Chapter
10
Disassembly and Reassembly
~3-:,.;D:;:;:;;is:::a::::SS::;e.:.:m.:.:b;;.lY,:..::3.:.:n.::.d..:R.:.;e;;;a:::;SS::;,;e;;;m;;,;b;;,;l,:.Y
_____________________
3,4]H3(B)(C)E
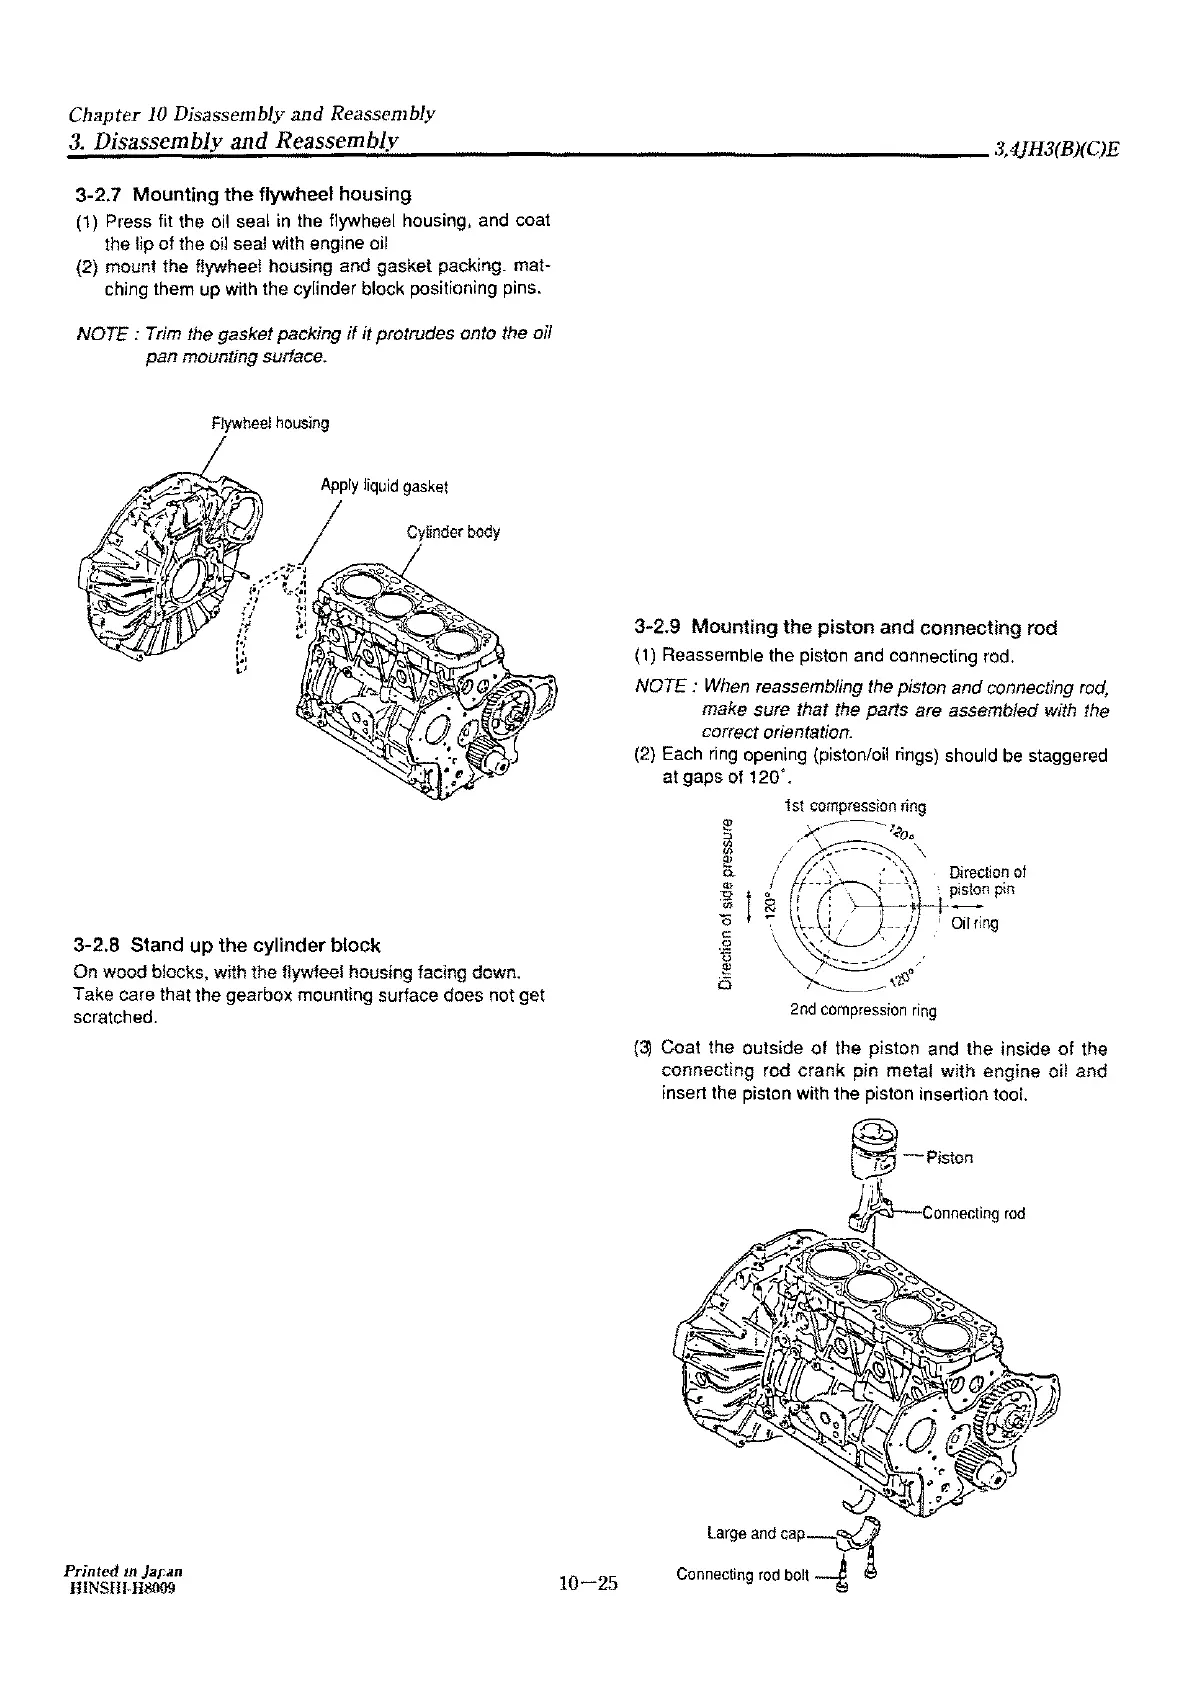
3-2.7
Mounting
the
flywheel
housing
(1)
Press fit the oil seal
in
the flywheel housing, and coat
the lip of the oil seal with engine oil
(2) mount the flywheel housing and gasket packing. mat-
ching them up with the cylinder block positioning pins.
NOTE : Trim the gasket packing ii it protrudes onto the oil
pan
mounting surface.
Flywheel
housing
.,,,,.;;-
ti,~-:~r.,.
.,
,.,
',
:1
.,
...
,,
t;
Apply
liquid
gasket
Cylinder
body
3-2.8 Stand
up
the
cylinder
block
On
wood blocks, with the flywfeel housing lacing down.
Take care that the gearbox mounting surface does not get
scratched.
Printed
rn
Jar,tm
HINSH!-H8009
10-25
3-2.9
Mounting
the
piston
and
connecting
rod
(1)
Reassemble the piston and connecting rod.
NOTE :
When
reassembling the piston and connecting
rod,
make sure that the parts are assembled with the
correct
orientation.
(2) Each
ring
opening (piston/oil
rings)
should
be
staggered
at gaps of 120·.
C
0
1
6
1st
compression
ring
/x
..
-~---
'<o,,
'
,.
.....
--------,
'\
/ /
-\
! \
Direction
of
I
f·-0;'
c··', •
piston
pin
2 ; :
•,
L f .
....
1
' · '
1
'
Oil
ring
~:~
____
::~,
.
I
------------
'{.."
2nd
compression
ring
(3)
Coat the outside
of
the piston and the inside of the
connecting rod crank pin metal
wi1h
engine oil and
insert the piston with the piston insertion tool.
~-Piston
ii
/::£.
Connecting
rod
~~.;,;::_1
 Loading...