■ Connection procedure, frames R5…R8
WARNING! WARNING!
If the drive will be connected on an IT (ungrounded) system, make sure you have
disconnected the EMC Filter and Varistor (VAR). See EMC filter (page 66).
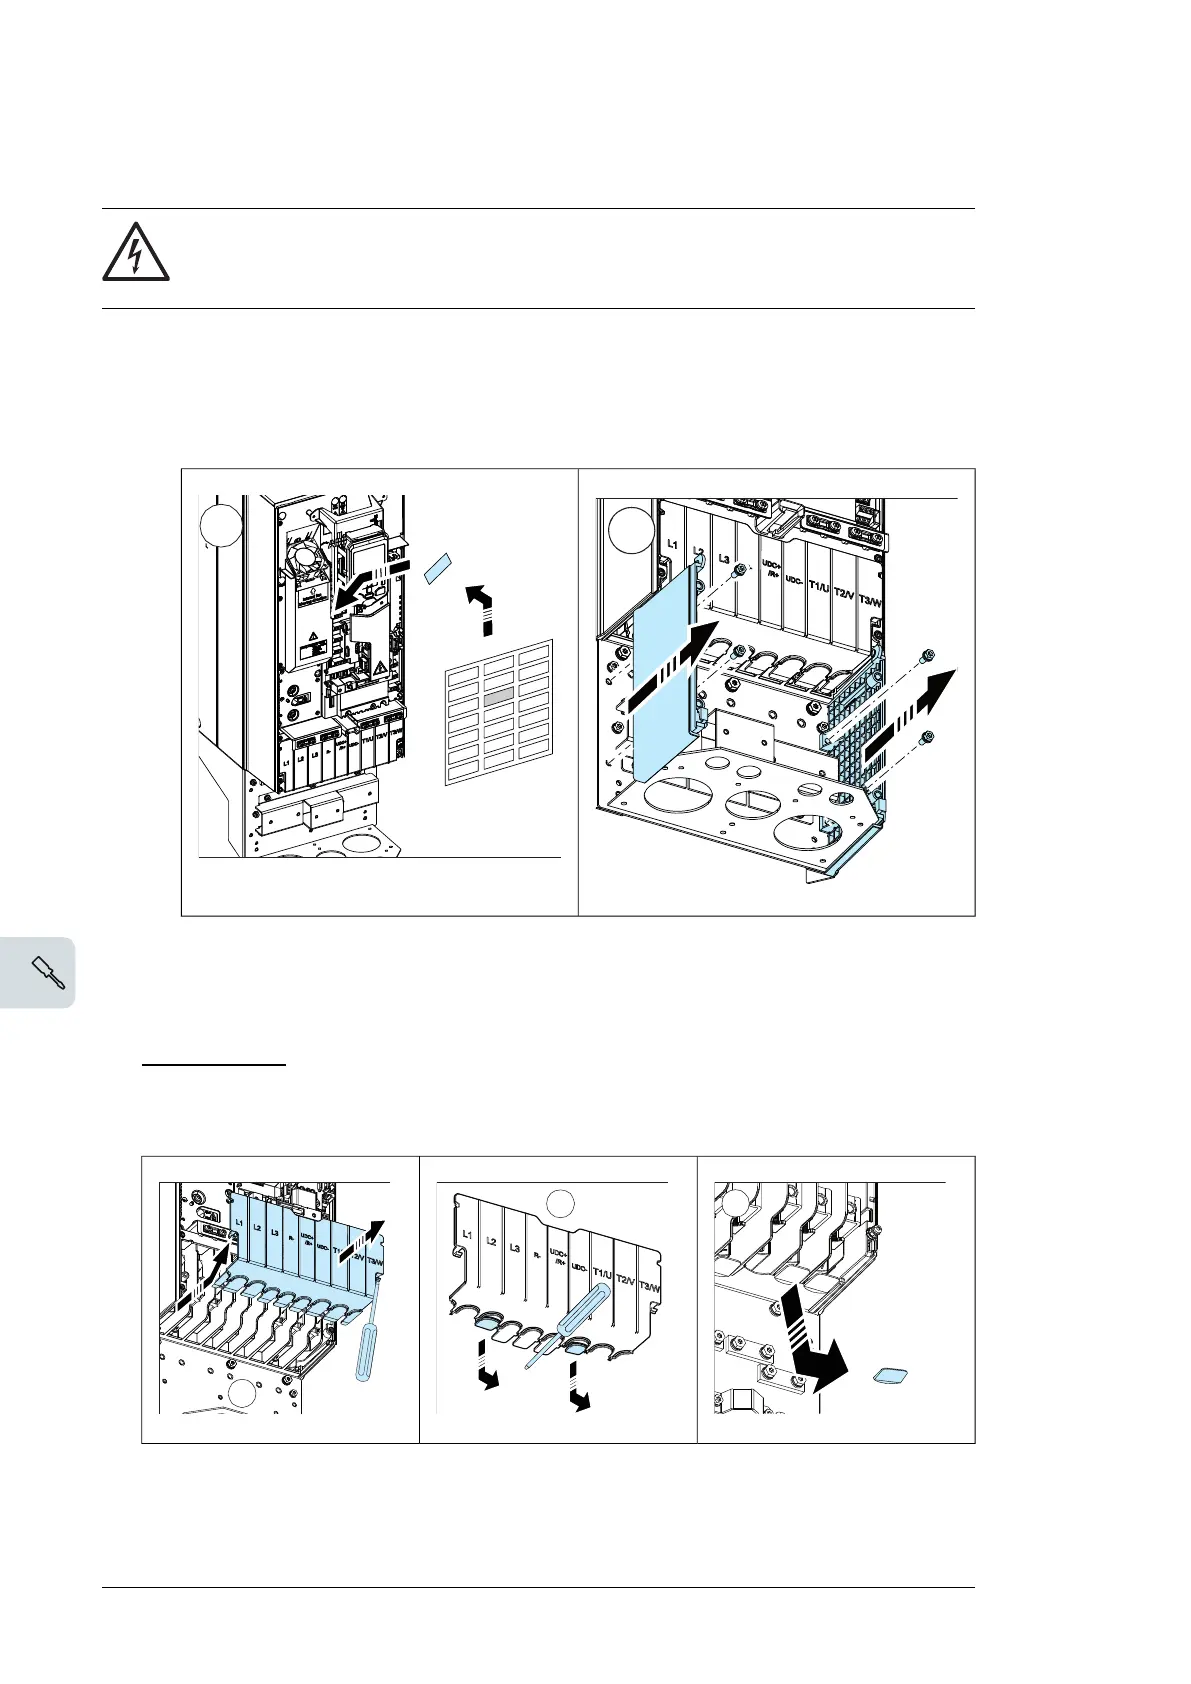
1. Attach the residual voltage warning sticker next to the control board.
2. Remove the side plates of the cable box as follows:
• Remove the retaining screws.
• Slide the walls out.
86 Electrical installation
Connection procedure, frames R6…R8
WARNING! If the drive will be connected on an IT (ungrounded) system,
make sure you have disconnected the EMC filter and ground-to-phase varistor.
See page 71. If the drive will be connected on a corner-grounded TN system, make
sure you have disconnected the EMC filter. See page 71.
1. Attach the residual voltage warning sticker next to the control board.
2. Remove the side plates of the cable box as follows:
• Remove the retaining screws.
• Slide the walls out.
3. Remove the shroud on the power cable terminals by releasing the clips with a
screwdriver and pulling the shroud out.
4. Knock out holes in the shroud for the cables to be installed.
5. Frames R8
: If you install parallel cables, also knock out holes in the lower shroud
for the cables to be installed.
1 2
3. Remove the shroud on the power cable terminals by releasing the clips with a screwdriver
and pulling the shroud out.
4. Knock out holes in the shroud for the cables to be installed.
5. Frame R8 only: If you install parallel cables, also knock out holes in the lower shroud
for the cables to be installed.
Frame R8
86 Electrical installation
Connection procedure, frames R6…R8
WARNING! If the drive will be connected on an IT (ungrounded) system,
make sure you have disconnected the EMC filter and ground-to-phase varistor.
See page 71. If the drive will be connected on a corner-grounded TN system, make
sure you have disconnected the EMC filter. See page 71.
1. Attach the residual voltage warning sticker next to the control board.
2. Remove the side plates of the cable box as follows:
• Remove the retaining screws.
• Slide the walls out.
3. Remove the shroud on the power cable terminals by releasing the clips with a
screwdriver and pulling the shroud out.
4. Knock out holes in the shroud for the cables to be installed.
5. Frames R8
: If you install parallel cables, also knock out holes in the lower shroud
for the cables to be installed.
Motor cable
6. Cut an adequate hole into the rubber grommet. Slide the grommet onto the cable.
80 Electrical installation

 Loading...