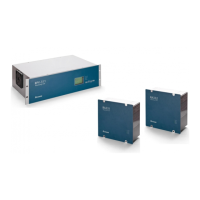
4.1 RPV311 Mechanical Installation 265
4.2 RA331, RA332 and RA333 Mechanical Installation 265
5 Cables and Connectors 268
5.1 Power Supply Connections 268
5.2 RPV311 AC and DC Power Connection 269
5.3 RA331, RA332 and RA333 AC and DC Power Connection 269
5.4 Powering Up 270
5.5 Earth Connnection 270
5.6 Connection Between RPV311 and RA331, RA332 or RA333 271
5.7 Analog Voltage Inputs (50/60 Hz) 274
5.8 High-speed Analog Voltage Inputs (TW) 279
5.9 Analog Current Inputs 280
5.10 Analog DC Transducer Inputs ± 10 V 284
5.11 Analog DC Transducer Inputs ± 20 mA 286
5.12 Current Clamps 288
5.13 Digital Inputs 289
5.14 Time Synchronization Inputs 289
5.15 Dry Contact Relays 291
6 Case Dimensions 293
6.1 RPV311 293
6.2 RPV311 Accessories 293
6.3 RA33x 294
6.4 RA33x Accessories 297
6.5 Panel for Installation of Two Remote Acquisition Modules (Q61) 298
Chapter 16 Maintenance and Troubleshooting 299
1 Chapter Overview 300
2 Maintenance 301
2.1 Maintenance Checks 301
2.2 Replacing the Unit 301
2.3 Cleaning 302
2.4 Watchdog 302
3 RPV311 Troubleshooting 303
3.1 Ready in processing module does not light up 303
3.2 Alarm in processing module lights up 303
3.3 SYNC does not lights up 303
3.4 Date or time incorrect 303
3.5 Time drift throughout operation week 303
4 RPV311 Firmware Update 305
5 Product Support Tools - PST 306
6 RA331, RA332, and RA333 Troubleshooting 307
6.1 MAINS indicator does not light up 307
6.2 READY indicator does not light up 307
6.3 PPS indicator does not light up (Only RA333) 307
6.4 Link with the processing module is not active 307
7 Equipment Return 308
8 Instructions for Equipment Repair/Service for Service Personnel 309

 Loading...