SmartROC D65 T4F 9 Angle instruments
126 No: 713944459.6 en
n Hole spacing: Distance between holes. (Selected in ROC Manager)
n Burden: Distance between rows in the drill plan. (Selected in ROC Manager)
n Hole angle: Angle of hole. (Selected in ROC Manager)
n Side angle: Side angle of hole. (Selected in ROC Manager)
n Level: The level selected in ROC Manager.
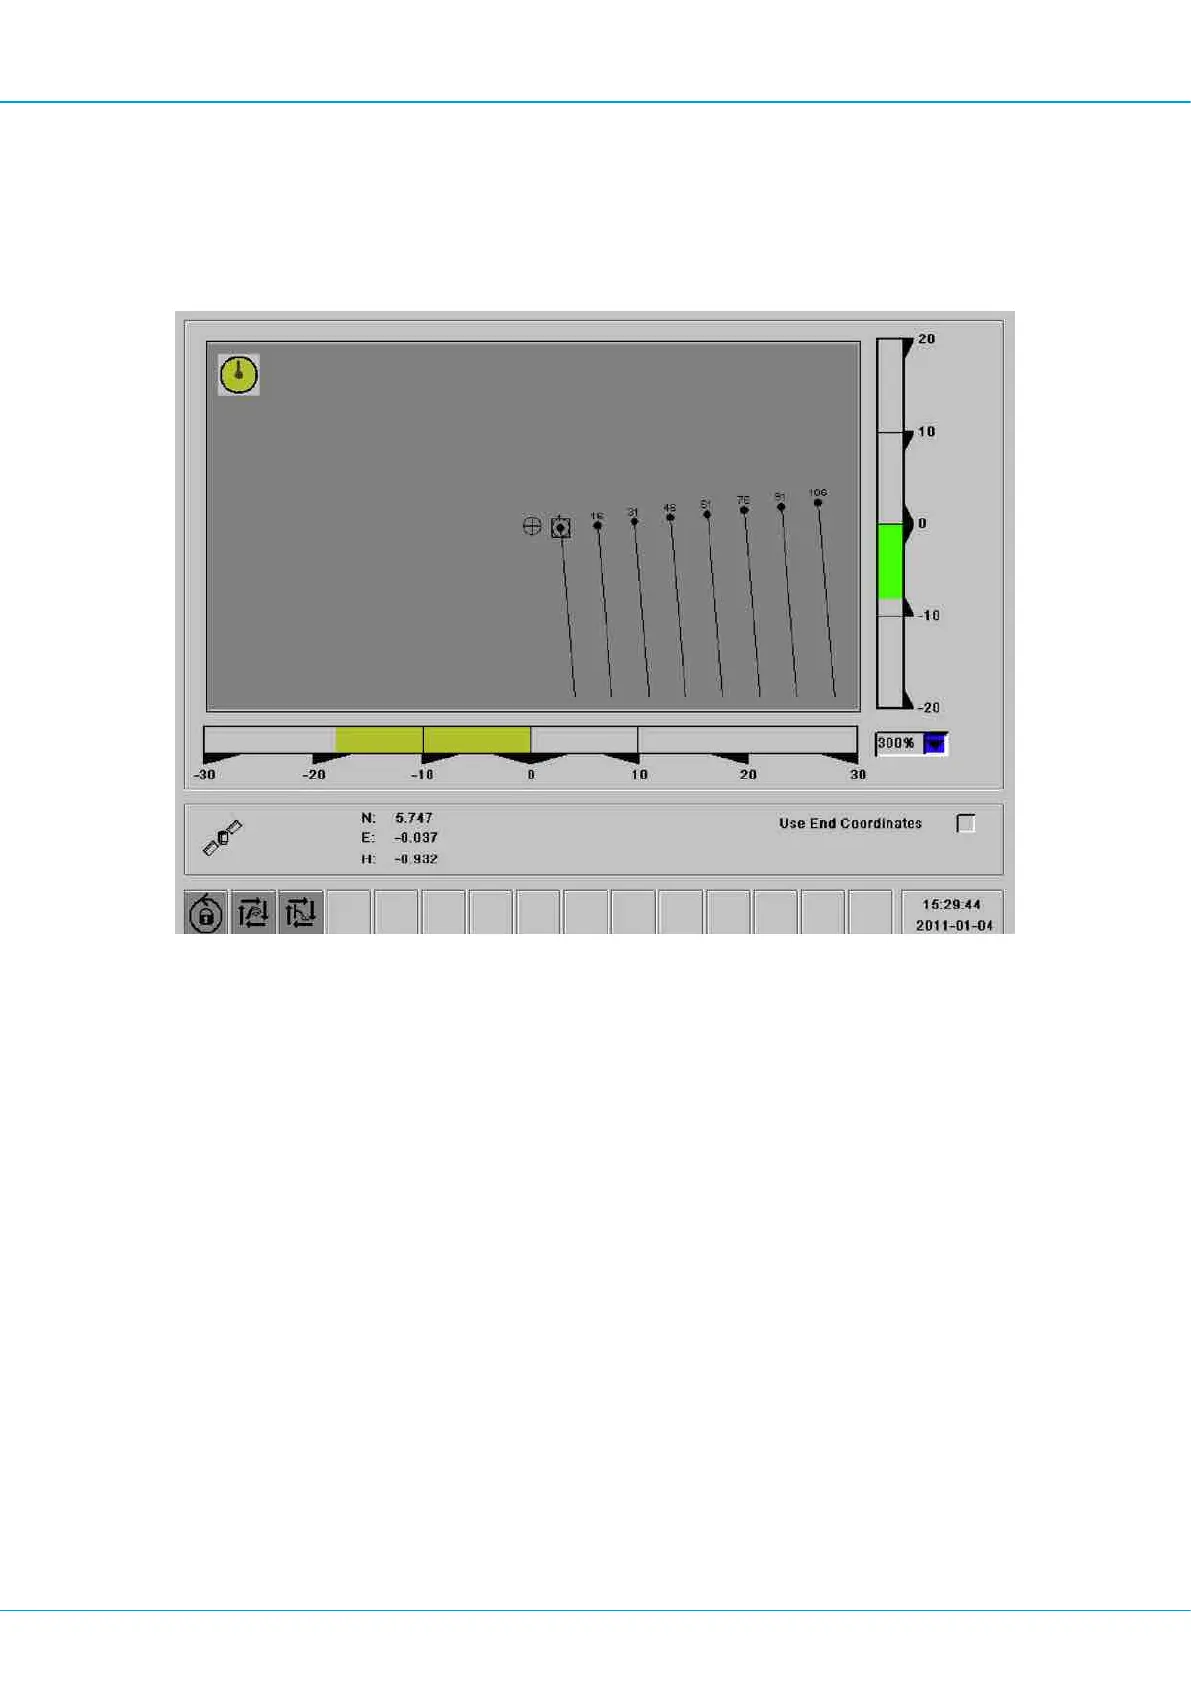
Menu for fine navigation
1.
The aim device shows the drill bit's current position.
2.
The system suggests the next hole by marking it with a circle.
3.
Press enter to confirm the selection. The selected hole is now marked by a square.
4.
The bars under and to the right now function as navigation help. When the drill bit is in
the correct position they should be at 0.
5.
When the drill bit has the correct position, go to the F1 menu and reset the depth
meter.
6.
Everything is now ready to start drilling.
7.
Repeat the procedure for the next hole.
Select hole
When holes are selected a rough navigation menu appears automatically and this shows
the direction in which the rig should be repositioned. Green line marks tramming direction,
red line indicates north.
Set up the rig in accordance with the rules described in "Preparations for drilling".
Set the feeder angles and make sure that the bars are green with the semi-autopositioning
button in combination with the boom levers. The drill bit then has the correct coordinates.
 Loading...