SmartROC D65 T4F 8 Drilling
98 No: 713944459.6 en
The auto-sequence can be stopped by pressing any of the drill lever buttons or the OHA
button itself.
Restart of OHA
If OHA is stopped during drilling, it can be restarted with the OHA button. The OHA se-
quence will continue from the position it was in when stopped. If the auto-sequence is
stopped when a drilling rod is loaded or retracted, the operator must manually ensure that
both threaded elements are together, that the RHS arms are in the carousel and that the
break-out claws are open before OHA can be restarted.
If the function is stopped during the drilling phase, OHA can be restarted in two ways:
1.
Resume locked drilling manually and then press the OHA button.
2.
Restart drilling by pressing the OHA button. The auto-sequence process is restarted
by initiating a low air flow. The cradle then moves 5 cm back and the drill begins to ro-
tate. The rig begins a locked collaring for a certain time, depending on the time set
under Min collaring time. When the locked collaring is complete, full drilling will be
resumed.
Initial collaring
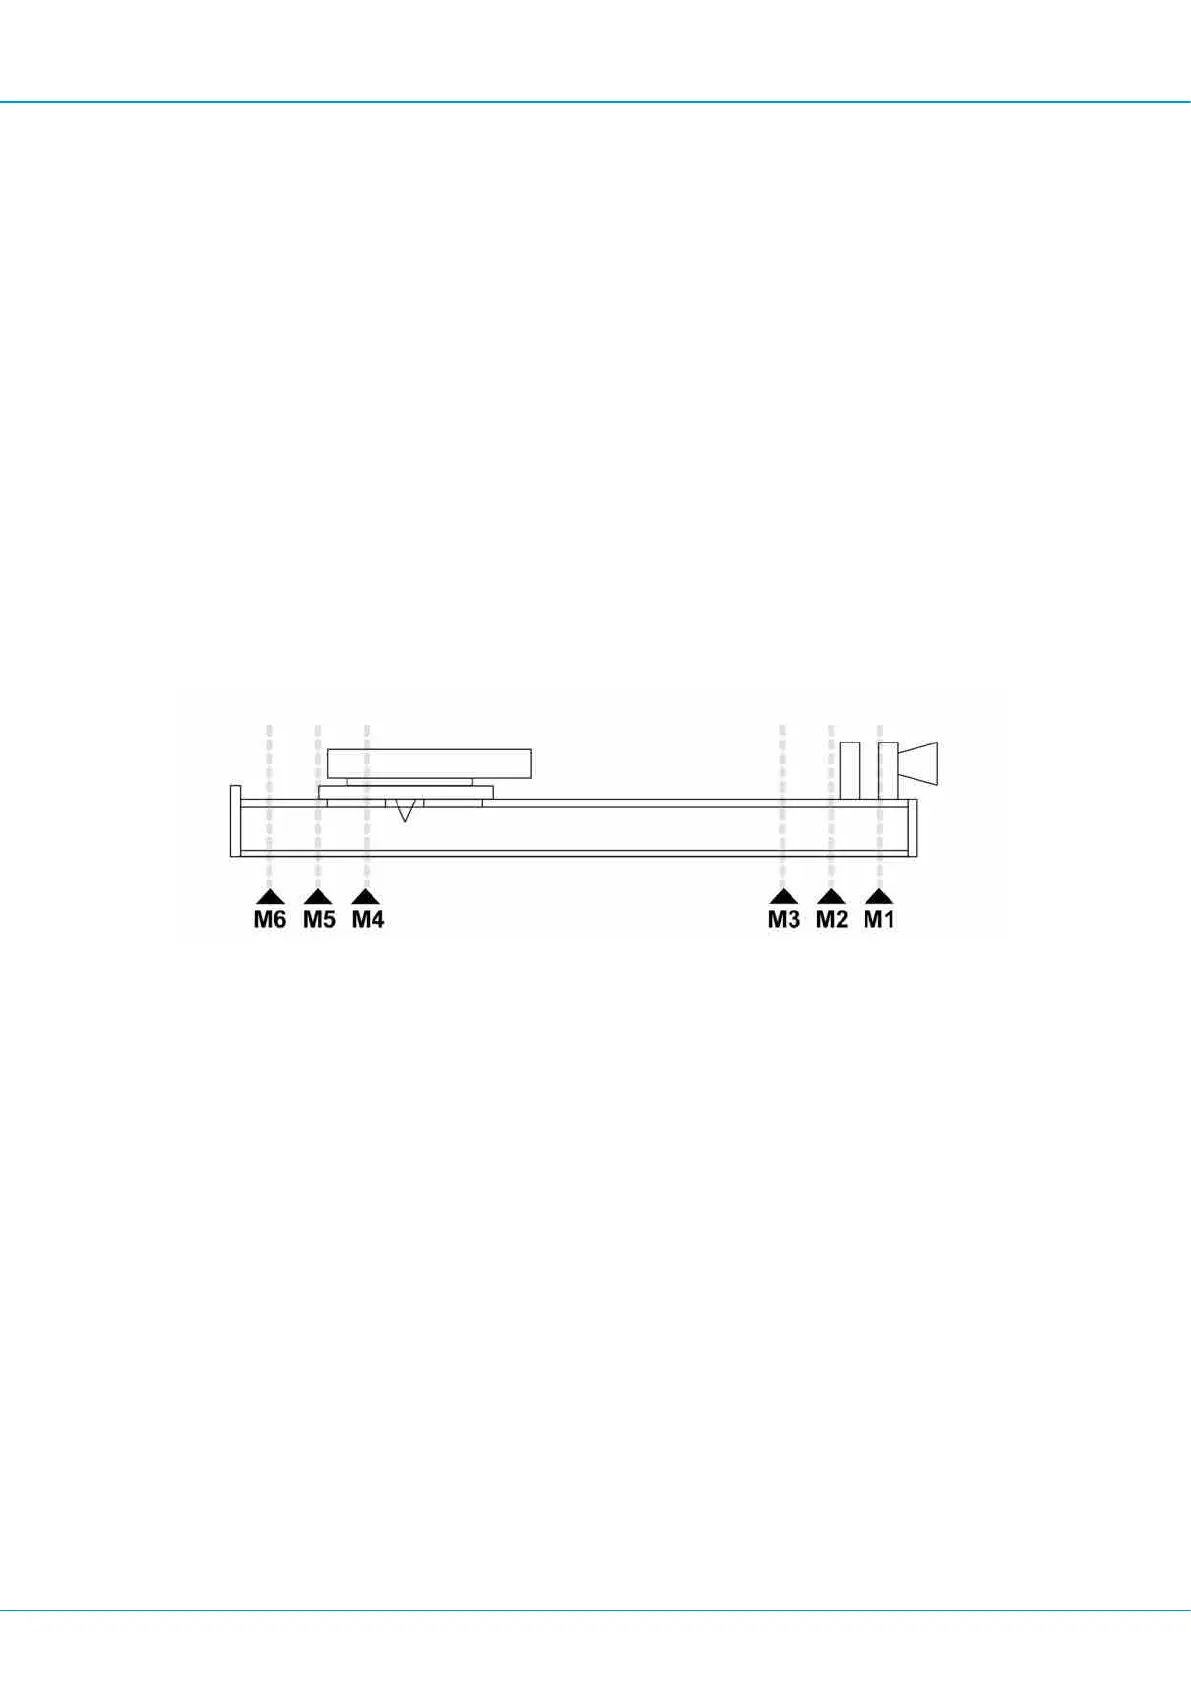
Cradle positions
Initial collaring is a stage within the OHA function and is performed with the first rod when a
new hole is started.
During initial collaring the rig will perform the following steps sequentially:
1.
If the cradle is currently at position M5, it will be retracted to this point. This guaran-
tees that the drill bit does not come into contact with the surface when calibrated at id-
ling feed speed.
2.
Forward feed of the cradle will start without rotation and air.
3.
The cradle will move down 5 cm and the idle feed pressure is then read-in by the sys-
tem.
4.
Once the cradle passes position M5 the lower drill steel support will close.
5.
Forward feed continues without rotation and air. When the drill makes contact with the
rock, the rig detects this as an increase in feed pressure over the idling feed speed
which was calibrated in step 3. The feed pressure can be set via the menu Drilling,
Parameters, Feed pressure, Pressure increase rock contact.
6.
When rock contact is detected the cradle is moved backward 5 cm in order to let out
air flow.
7.
Low air flow is started, rotation is switched off for a preset time. This period can be
modified with F2, Settings 1, Rotation delay time auto collaring.
 Loading...