Installing the MAPD
2-20 Issue 3 May 2002
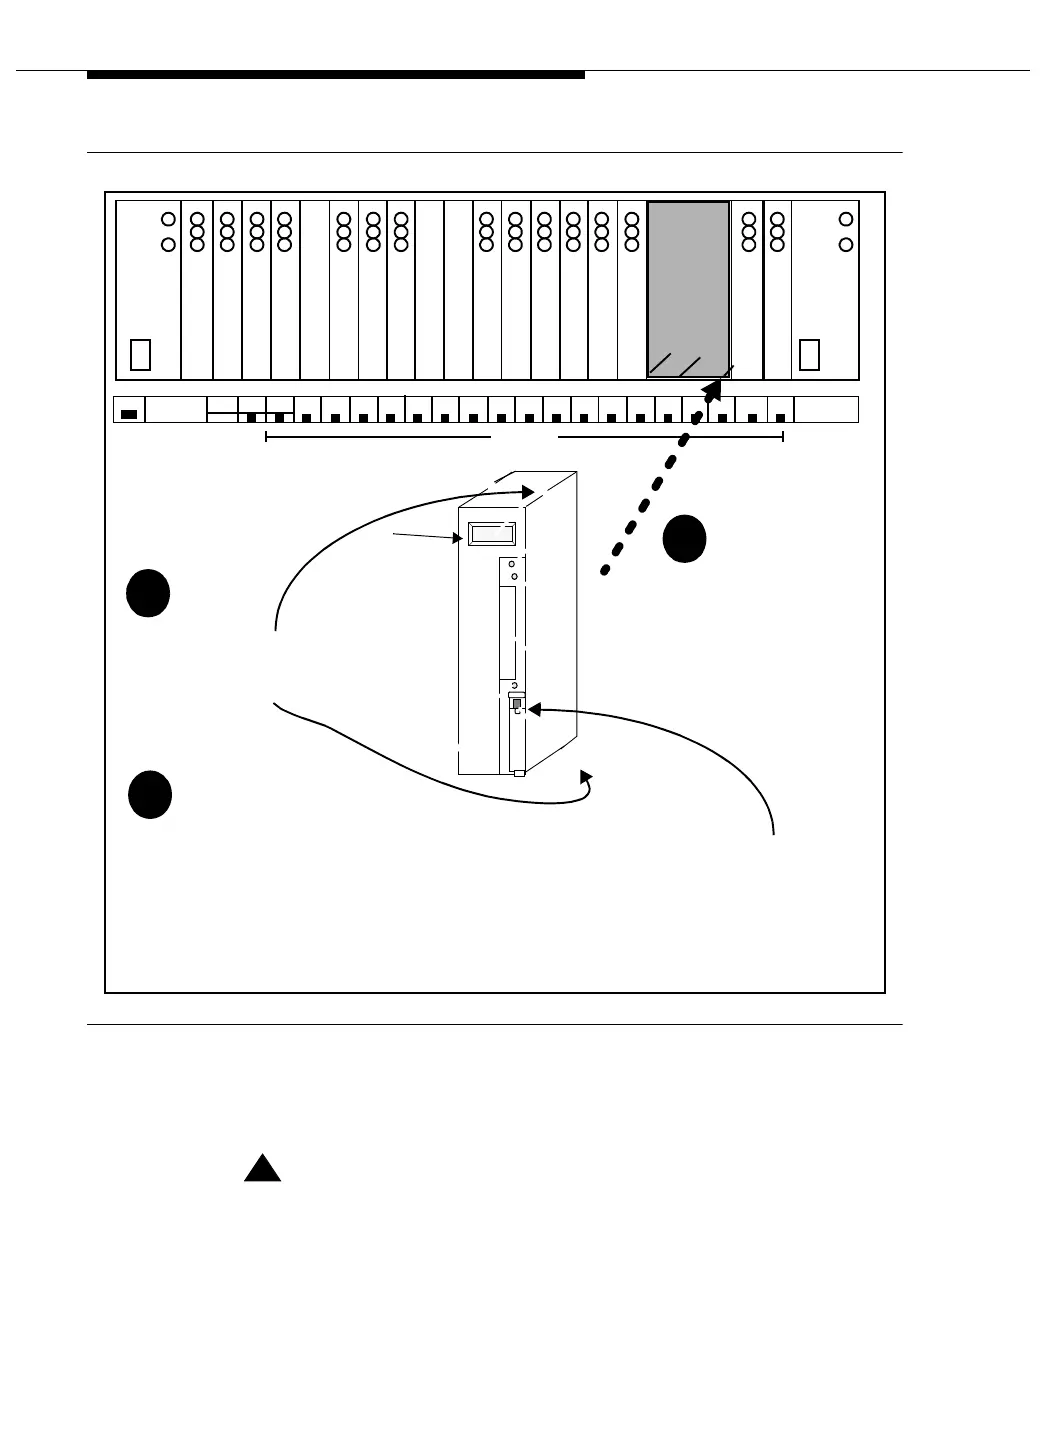
Figure 2-11. Installing the TN801B in a DEFINITY ECS (DC)
6. Insert the assembly and lock it in place by pushing up the securing latch. If
the switch is powered on, the MAPD system will boot automatically. If the
switch is not powered on, wait until it is, and then proceed to Step 6.
!
WARNING:
The MAPD system will automatically boot when seated in the slots of
a switch that is powered on. Damage to the disk could occur if the
assembly is removed while booting. Be sure that the assembly is
properly aligned in the slot, and then insert it with a single, firm push.
Do not adjust or attempt to reinsert the assembly once it has started
to boot.
Avaya
6
3
1
D
B
B
.
.
.
.
.
.
.
.
.
.
.
.
.
.
.
.
.
.
.
.
.
.
.
.
.
.
.
.
.
.
.
.
.
.
.
.
.
.
.
.
.
.
.
.
.
.
.
.
.
.
.
.
.
.
.
.
.
.
.
.
.
.
.
.
.
.
.
.
.
.
.
.
.
.
.
.
.
.
.
.
.
.
.
.
.
.
.
.
.
.
.
.
.
.
.
.
.
.
.
.
.
.
.
.
.
.
.
.
.
.
.
.
POWER UNIT
POWER
UNIT
SERVICE
TONE-
CLOCK
EXPN
INTFC
20
POWER UNIT
PURPLE SLOTS
(PORT SLOTS)
TOP WHITE
BOTTOM PURPLE
TWO SLOTS
.
.
.
.
.
.
.
.
6
3
1
D
A
19181716151413121110987654321
Z
1
0
0
C
Z
1
0
0
C
Z
1
0
0
C
A
P
P.
B
L
A
N
K
A
P
P.
B
L
A
N
K
A
P
P.
B
L
A
N
K
Avaya
.
.
.
.
.
.
.
.
Avaya
.
.
.
.
.
.
.
.
Avaya Avaya Avaya Avaya Avaya Avaya Avaya Avaya Avaya Avaya Avaya
TN801B
LCD
Hold the system assembly by the top
MAPD Board
and bottom edges of the TN801B
Line up the MAPD Board
reserved for the MAPD
with the bottom guide
system in the switch carrier
of the righmost of the 3 slots
Insert the assembly and lock it in place by pushing up the securing latch
1
2
3
The MAPD system will automatically boot when seated in the slots of
a switch that is powered on. Damage to the disk could occur if the
assembly is removed while booting. Be sure that the assembly is
properly aligned in the slot, and then insert it with a single, firm push.
Do not adjust or attempt to reinsert the assembly once it has started
to boot.