4. Lamp & Lamp House
If yes, insert the anode adaptation bushing (reference 12 im age 4-40 and im age 4-43) into the integrated anode support of the
UV blocker.
If no, make sure that there is no anod e adaptation bushing inserted into the anode support.
12
Image 4-40
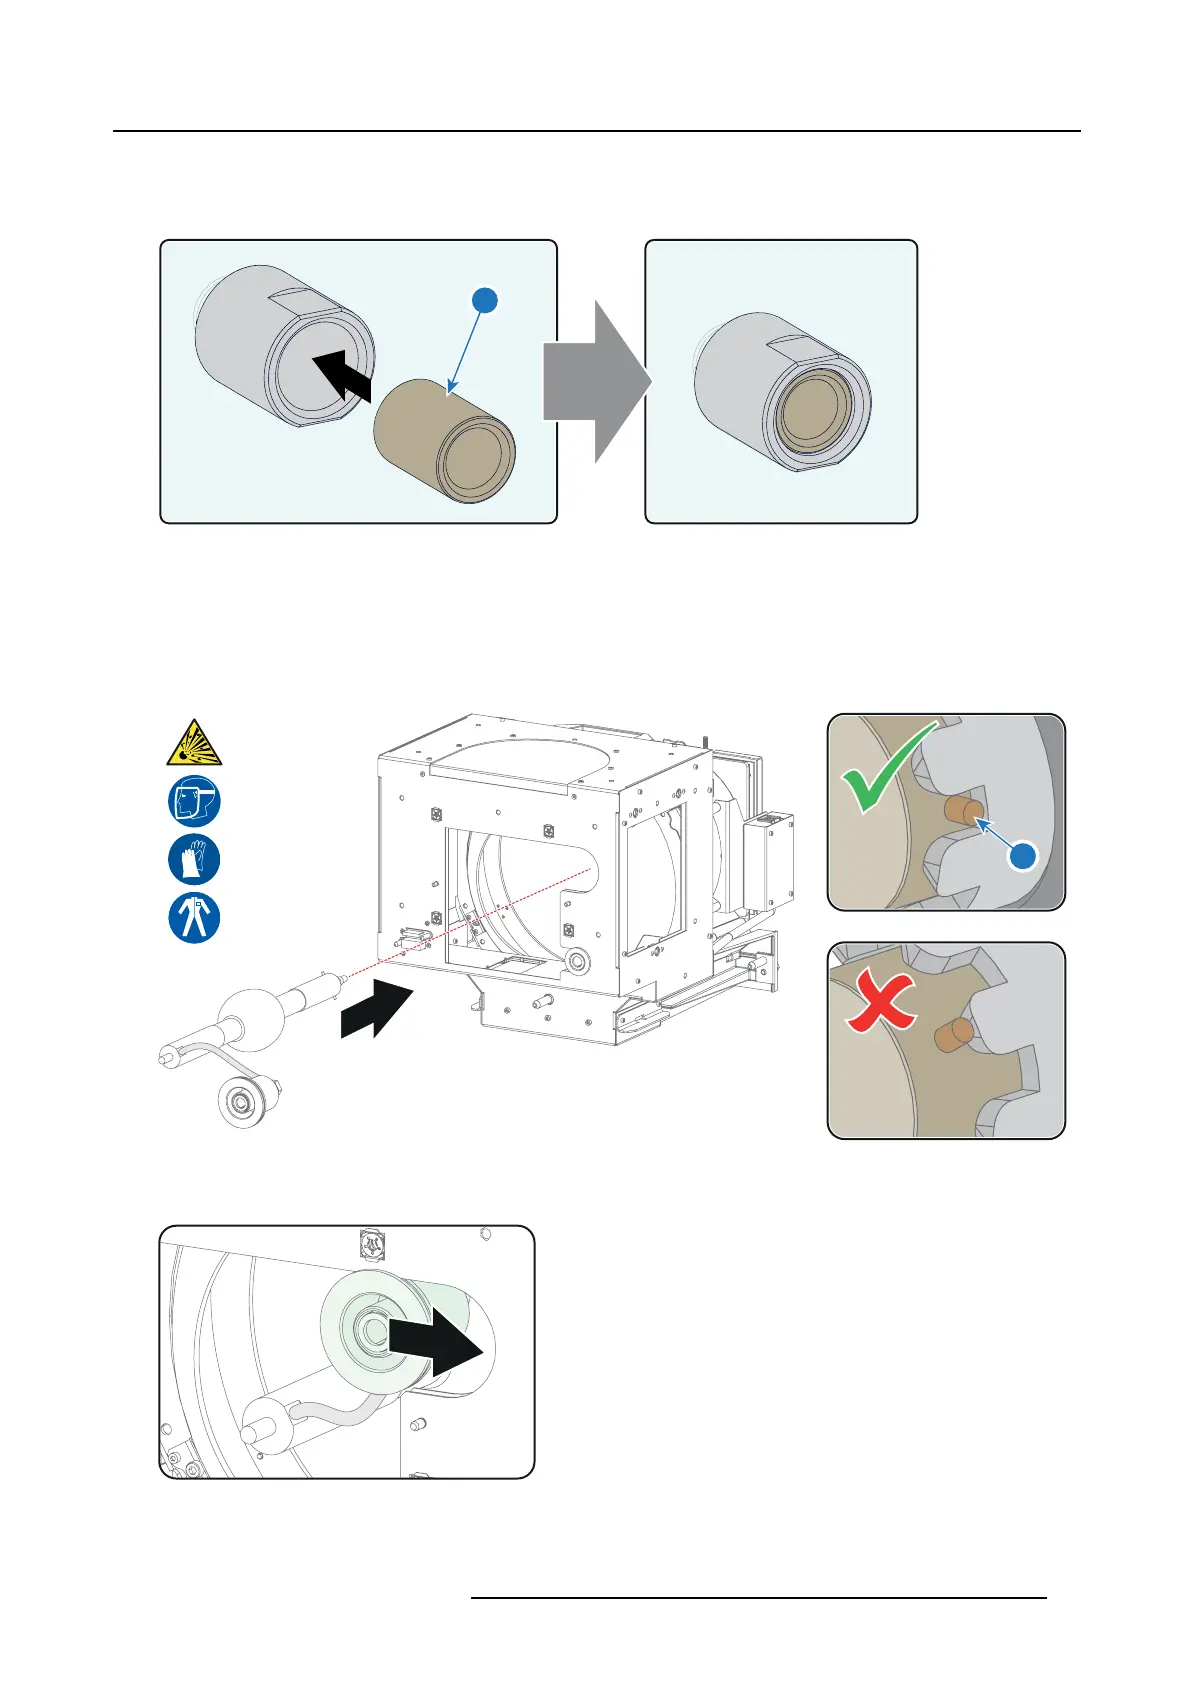
7. Remove the protective packing from the xenon lamp and gently insert the xenon lamp into the L amp House as illustrated. Lam p
cathode first, Make sure that the wire of the lam p anode is upward s oriented. While inserting the lamp, ro tate it slightly, engaging
the pins (reference 11 image 4-41) of the cathode adapter in the foreseen s lots. This is to ensure the lam p cathode is c ompletely
inserted. Kee p supporting the anode of the lamp with one hand once t he x enon lamp is in position.
Caution: Ensure that you wear protective clothing, a full face shield and protective gloves.
Tip: Write do wn the serial number of the xenon lamp. You will need this while updating the lam p parameters after installation
of the xenon lam p. T he serial number of the xen on lamp is engr aved in the neck of the xenon lamp.
11
Image 4-41
8. Slide the anode connector in its position on the Lamp H ouse as illustrated.
Caution: Avoid any tension on the anode wire, ensuring there is no mechan ical stress on the lamp.
Image 4-42
9. Install the UV blocker assembly as illustrated. Use the opening at the side of the Lamp House to guide the anode pin of the
xenon lamp into the anod e supporting m e chanism of the UV blocker.
R5905963 PROMETHEUS SERIES 09/03/2015
61
 Loading...