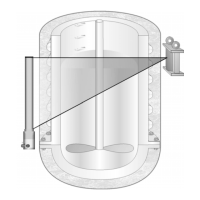
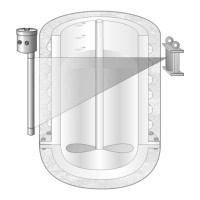
SENSseries LB 480 Level measurement
BERTHOLD TECHNOLOGIES GmbH & Co. KG
2 – 225
Volume 2 3 Electrical Installation
2
Install the connecting cables in the terminal compartment so
that
– dirt and moisture is avoided in the terminal compartment;
– the wires are not damaged when stripping;
– the conductor insulation extends into the terminals when
stripping;
– the minimum bending radii permitted for the respective
conductor cross-section are not fallen below.
Stranded leads have to be stripped 10 mm, and may be intro-
duced only when the spring-type terminal was opened by a
suitable tool (screwdriver with a blade width of about 3 mm).
Make sure that all wires of the stranded lead are completely
trapped and no small wires project from the terminal. The insu-
lation of the wire must extend into the terminal insertion open-
ing.
Connect the wires according to the wiring diagram in chapter
3.1 and chapter 3.2 to the terminal strip of the detector. Use at
least the following terminals:
– Signal output: Terminals 19 and 20
– Power supply: Terminals 2 and 3 and the PE terminal for the
grounding conductor connection.
Place the cable shields on the terminals marked with PE. Place
the cable shield directly inside the screw fitting, if you are using
EMC screw fittings.
Make sure that the wires sit securely in the terminals.
Connect the terminal for potential equalization to the outside of
the detector housing using the equipotential busbar.
With cable glands: Tighten the hexagon nuts of the cable
entries so much that the tightness of the terminal compartment
and the strain relief protection of the connection points are
secured. The tightening torques can be found on page 1-47.
Remove any loose metal particles, dirt and traces of moisture
from the terminal compartment.
Only with Ex-protection FM/CSA: When installing pipework in a
hazardous area, encapsulate the conduit seal using a suitable
filler.
Make sure that the cover seal is undamaged and the snap rings
or Nordlock discs are placed on all the cover screws.
Close the housing carefully with the cover seal and the housing
cover. To do this, put the housing cover with the sealing on the
housing and tighten the Allen screws using the specified
torque: depending on the version, M5 with 4 Nm or M8 with 17
Nm (standard values).