Using External ATEM Hardware Panels
Select remote heads to control by pressing their
respective camera number soft buttons.
Controlling a HyperDeck
In ATEM 6.8 or newer, you can control up to 4 Blackmagic HyperDeck Studio disk recorders
using your ATEM Broadcast Panel. This includes playback transport control and record features.
All the configuration settings that can be set using ATEM Software Control can also be set using
your hardware panel. For information on how to set up HyperDecks and control them using your
ATEM Broadcast Panel, refer to the ‘HyperDeck Control’ section in this manual.
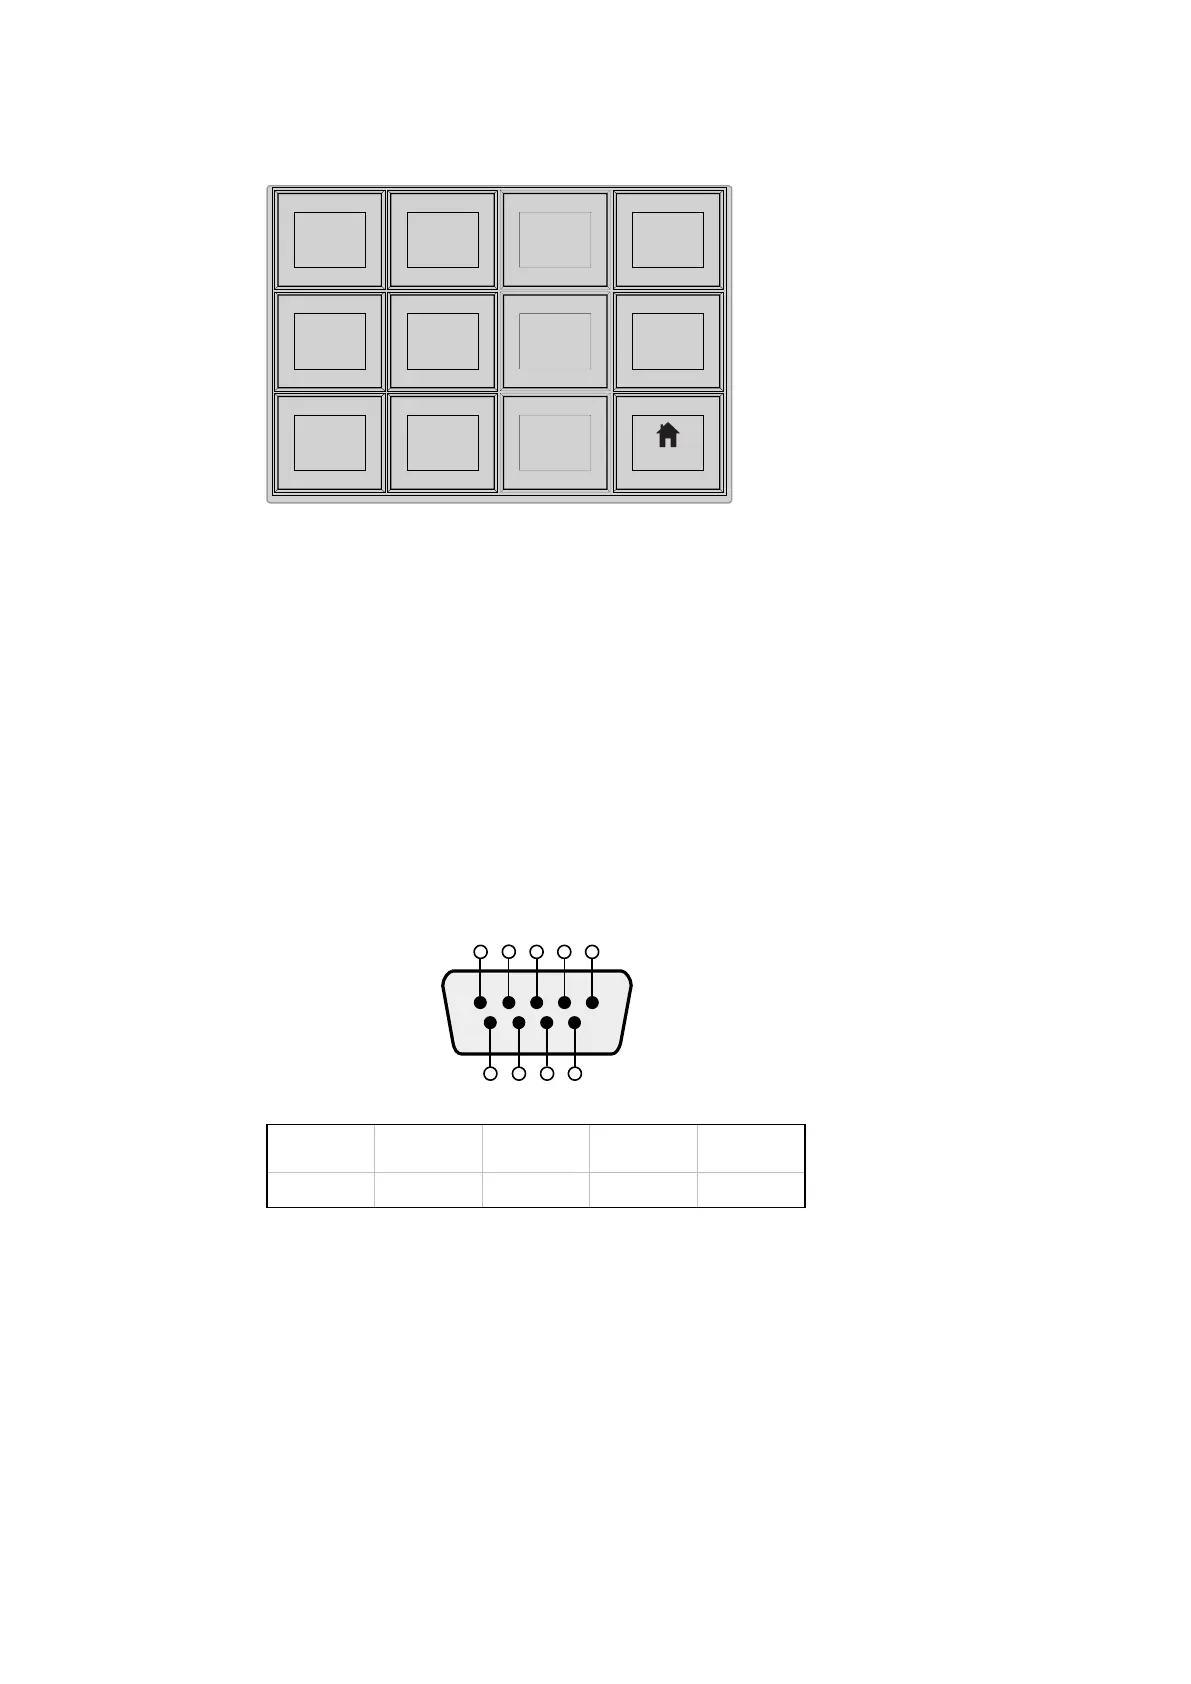
Serial Port Pin Connections for Control Cables
RS-422 is a broadcast standard using a common DB-9 connector. You can easily rewire this
type of connector in a custom built PTZ control unit if you want to design one yourself.
A pinout diagram of the RS-422 DB-9 connector is provided on this page.
RS-422 PTZ pin connections.
Button Mapping
ATEM software and hardware control panels support button mapping so you can assign your
most important sources, especially cameras, to the most accessible buttons in the program and
preview rows. Occasional sources can be assigned to less prominent buttons. Button mapping
is set independently for each control panel so button mapping set on a software control panel
will not affect the button mapping set on a hardware control panel.
CUT
SHIFT
ON
KEY 1
CAM
1
CAM
2
CAM
3
SETUP
HOME
BKGD
CUT AUTO
KEY 2 KEY 3 KEY 4
ON ON ON
1 2 3
4 5 6
7 8 9
CAM 0 CLR
PREV
TRANS
FILL
DIP
MIX
DSK 1
TIE
DSK 2
Control Panel
Switcher
Main
Backup
Main
Backup
TIE
DSK 1
CUT
DSK 2
CUT
DSK 1
AUTO
DSK 2
AUTO
FTB
Receive
(–)
Receive
(+)
Transmit
(–)
Transmit
(+)
Ground
Pins
8 3 2 7 1, 4, 6, 9
5 4 3 2 1
9 8 7 6
195
 Loading...