Using ATEM Television StudioProSwitchers
Audio Levels
Normally, the knob next the LCD is used to adjust the main audio mixer master output. Adjusting
the knob will lower or strengthen the whole program audio levels and you can see the effect on
the main audio meters in the LCD that are superimposed on the video preview.
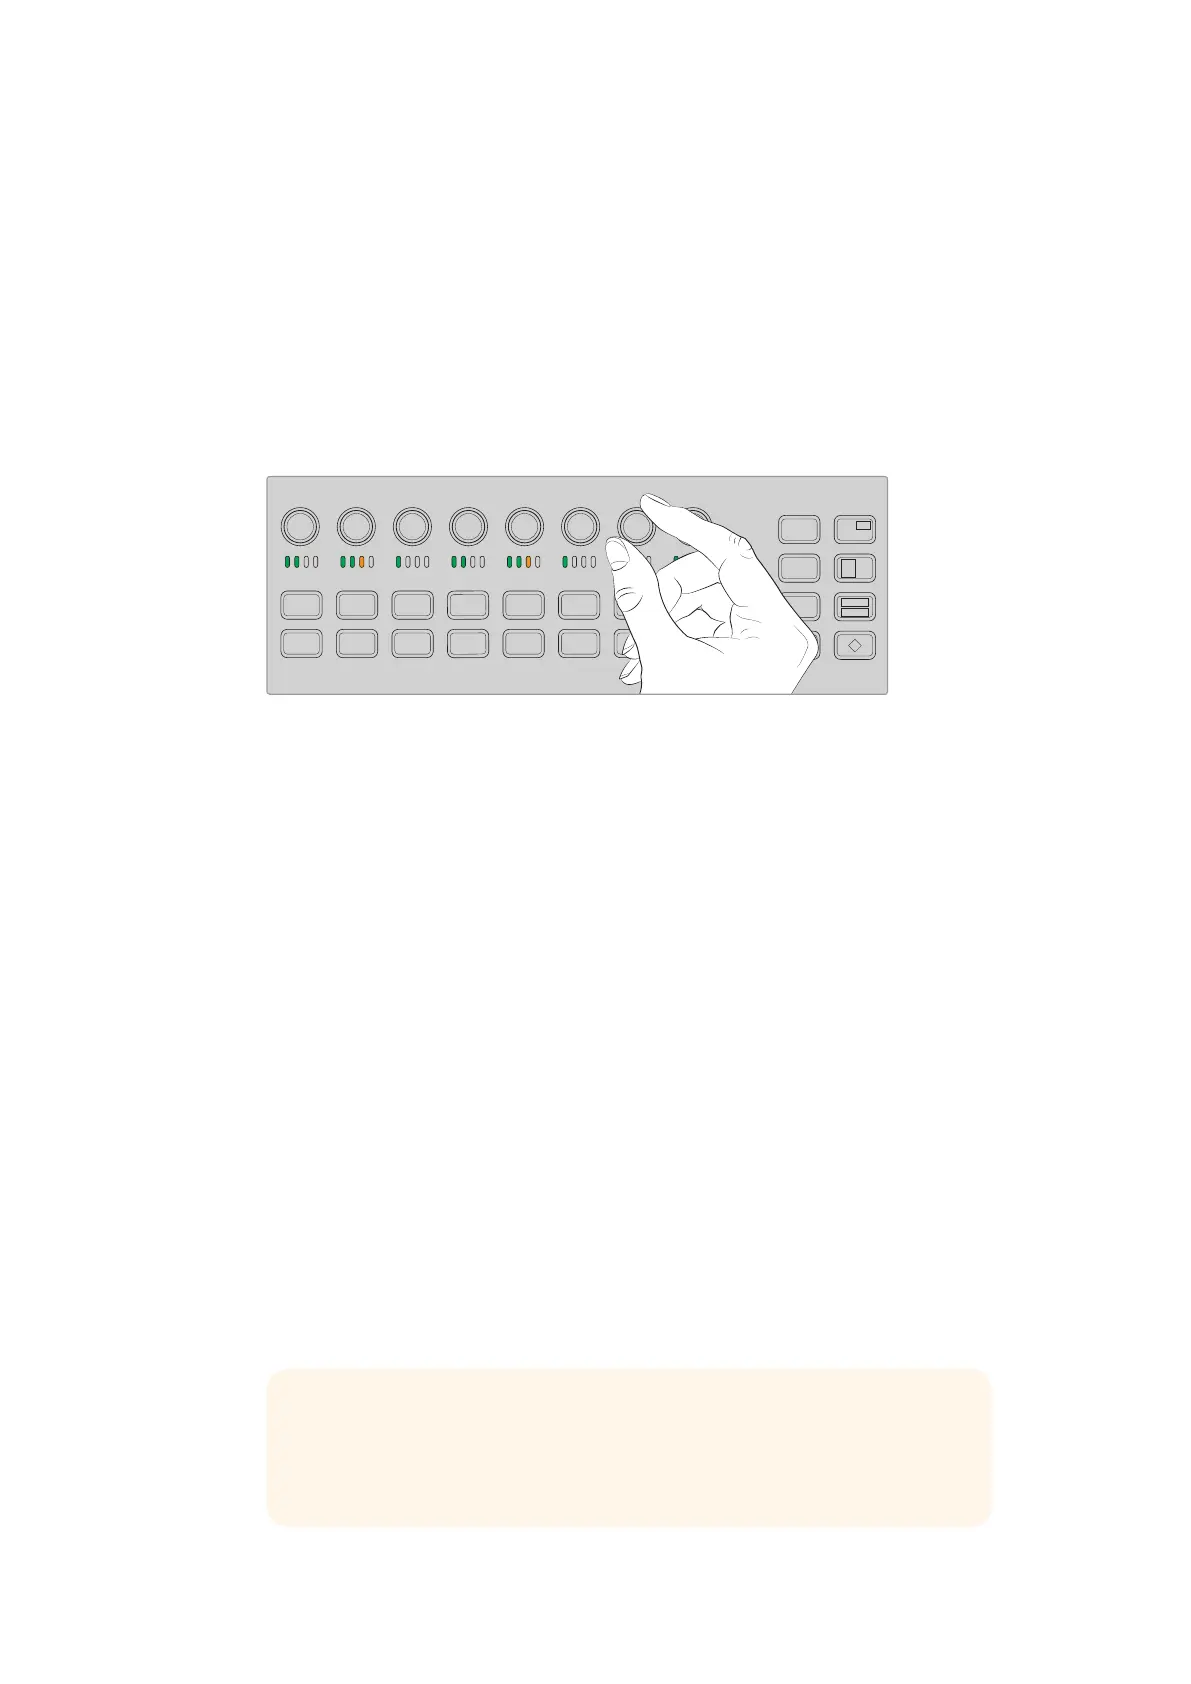
If you want to adjust the audio for one of the inputs, this is where the small 4 LED meter above
each input is used. This small meter lets you identify where a hot audio level could be coming
from. If the main audio level is too high and only one of the small meters on the control panel
has a red flashing LED then this means that only that single input is too high level. So in this
case you don’t want to adjust the master audio level knob because all the other inputs will now
become too low. You really want to identify the specific input that is too hot and adjust just that
single audio level.
Adjust the audio knobs to adjust the audio level for a specific source
You can also change audio settings in the LCD menus as there is a full menu just for audio
settings, proving an alternative way of adjusting audio. Of course, any adjustments you make on
the control panel and in the LCD menus is also reflected in the software control panel.
By connecting a computer and selecting the audio mixer in the software control panel, you can
watch the effect of each control panel setting on the audio mixer. This can be a good way of
better understanding what the control panel audio controls are doing.
Changing Levels for Split Audio Channels
If you have split a mono input using ATEM Software Control so they are two separate channels
for stereo output, then you will notice the control knob will change the level for the left channel
only. To change the level for the right audio channel, simply hold down the shift button and turn
the control knob.
Camera Control
The camera control knobs, buttons and trackball give you the ability to control Blackmagic
URSA Mini and Blackmagic Studio model cameras via the SDI program return signal. When
using compatible lenses, you can adjust settings such as iris, focus, zoom and camera features
such as the camera color correctors using the respective controls on your switcher’s panel.
Having the ability to make fast adjustments to your cameras directly from ATEM Television
Studio Pro HD’s control panel is like having a built in CCU.
VISCA PTZ cameras and remote heads can also be controlled using the camera control trackball.
321
765
DIRECT
TALK 7
4
8
DIRECT
TALK 8
DIRECT
TALK 6
DIRECT
TALK 5
DIP
9
BORD
10 11
MACRO
12
AFV
ON
KEY 1
CUT
1
AFV
ON
KEY 1
FILL
2
AFV
ON
DSK 1
CUT
3
AFV
ON
DSK 1
FILL
4
AFV
ON
DSK 2
CUT
5
AFV
ON
DSK 2
FILL
6
AFV
ON
DVE
CUT
7
AFV
ON
DVE
FILL
8
MIX
DIP
DVE
PUSH
LOGO
INVERT
DVE
SQZ
DVE
PIP 1
1 2 3
4 5 6
7 8 9
ENTER 0 CLEAR
DVE
PIP 3
DVE
PIP 2
DVE
PIP 4
AUTO
IRIS
db
GAIN
GAIN
AUTO
FOCUS
SHUTGAMMA
CALL
RESET
RGB
RESET
ALL
RESET
ALL
AUX
MENU
SET
W/BALLIFT
PRIM
COLOR
OFFSET
COLOR
PTZ
MP 1
1
MP 1K
2
MP 2
3
MP 2K
4
BG 1
5
BG 2
6
BLACK
7
BARS
8
MP 1
1
MP 1K
2
MP 2
3
MP 2K
4
BG 1
5
BG 2
6
BLACK
7
BARS
8
DSK 1
AUTO
DSK 2
AUTO
FTB
DSK 1
CUT
DSK 2
CUT
SHIFT
SHIFT CUT AUTO
KEY 1
CUT
BKGD
KEY 1
TIE
BKGD
KEY 1
TIE
TIP Camera control is possible via camera control packets of information
embedded in the SDI outputs from the ATEM switcher to your Blackmagic
Design cameras. For more details, refer to the ‘using camera control’
information located in the ‘using ATEM Software Control’ section of this manual.
96