Using the Auxiliary Output
Using the Auxiliary Output
The auxiliary output is an extra SDI output that can have various inputs and internal sources
routed to it. The aux output is very similar to a router output, and all video inputs, color
generators, media players, program, preview and even color bars can be routed.
If you need an extra program output, then the aux output is ideal, or if you need a clean feed
before one or both of the downstream keyers, then you can even select these to the aux
output. This will give you a program feed without a logo or bug, so you can capture this as a
broadcast master for later post production or transmission.
The aux output is extremely powerful, and can be routed using your switcher’s control panel
aux button, as well as the LCD menu and ATEM Software Control. The aux output menu is
available in the menu bar at the top of the software control panel regardless of the window
currently selected so it is always available.
The switcher will always perform a clean switch when the auxiliary output changes sources so
this means you can use the switcher to cut between sources on the auxiliary output cleanly and
without glitches.
Routing Auxiliary Output Sources
There are three different ways you can route sources to the auxiliary output. You can use your
switcher’s built in control panel, ATEM Software Control, or an additional ATEM hardware panel
such as an ATEM broadcast panel or ATEM 1 M/E Advanced Panel.
Routing the Aux Output using the Built in Control Panel
To select a source for the auxiliary output:
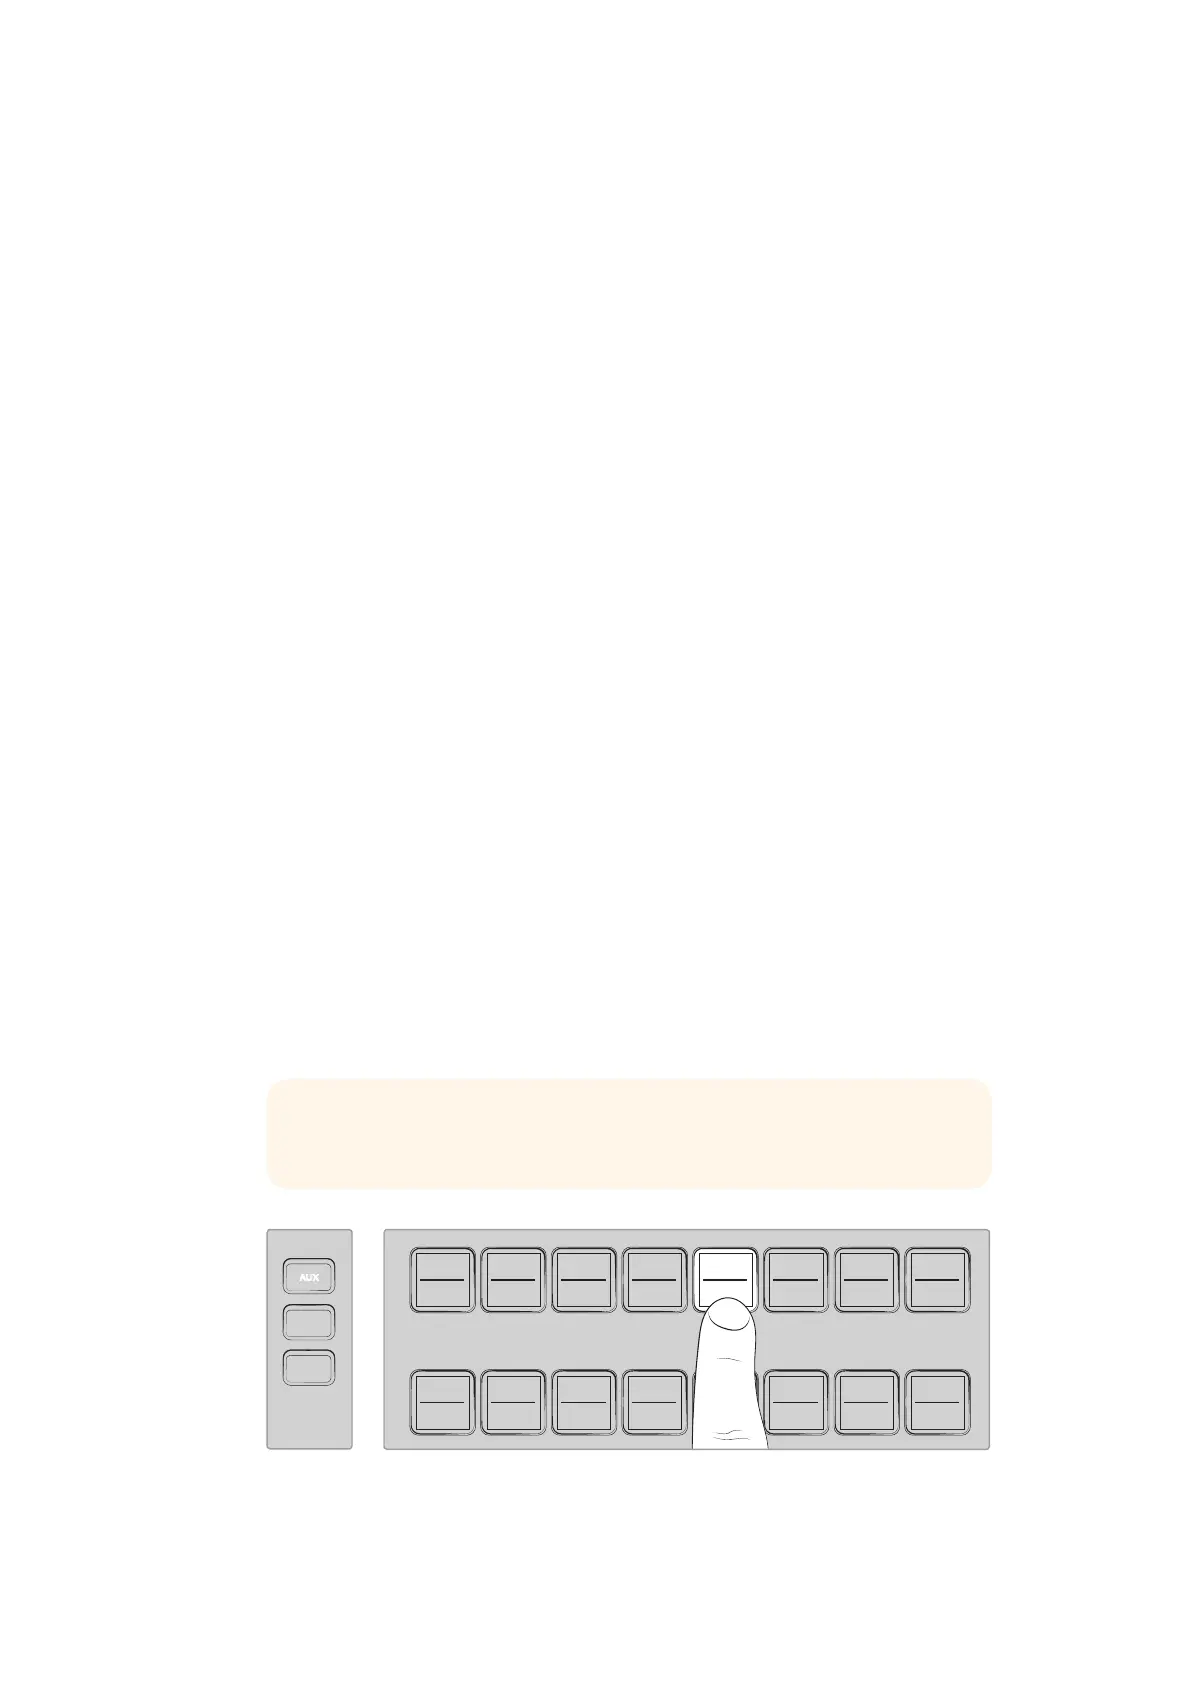
1 Press the button labeled AUX on the control panel.
The buttons will illuminate white to let you know you are in the auxiliary output
selection mode.
2 Press a source button to route that source to the auxiliary output. This is a clean switch
so you can even use this mode as a second 'cut only' switcher if you want to.
3 Once you have selected the auxiliary output source, press the aux button again to exit
the auxiliary output selection mode and return to normal switching.
Press the AUX button and select a source for the auxiliary output using
the control panel buttons or via the auxiliary source LCD menu)
TIP Sources that aren't available on the control panel, for example clean feed,
can be selected in the auxiliary source LCD menu.
321
765
DIRECT
TALK 7
4
8
DIRECT
TALK 8
DIRECT
TALK 6
DIRECT
TALK 5
DIP
9
BORD
10 11
MACRO
12
AFV
ON
KEY 1
CUT
1
AFV
ON
KEY 1
FILL
2
AFV
ON
DSK 1
CUT
3
AFV
ON
DSK 1
FILL
4
AFV
ON
DSK 2
CUT
5
AFV
ON
DSK 2
FILL
6
AFV
ON
DVE
CUT
7
AFV
ON
DVE
FILL
8
MIX
DIP
DVE
PUSH
LOGO
INVERT
DVE
SQZ
DVE
PIP 1
1 2 3
4 5 6
7 8 9
ENTER 0 CLEAR
DVE
PIP 3
DVE
PIP 2
DVE
PIP 4
AUTO
IRIS
db
GAIN
IRIS FOCUS ZOOM
LEVEL Y ADJ SAT
GAIN
AUTO
FOCUS
SHUTGAMMA
CALL
RESET
RGB
RESET
ALL
RESET
ALL
AUX
MENU
SET
W/BALLIFT
PRIM
COLOR
OFFSET
COLOR
PTZ
MP 1
1
MP 1K
2
MP 2
3
MP 2K
4
BG 1
5
BG 2
6
BLACK
7
BARS
8
MP 1
1
MP 1K
2
MP 2
3
MP 2K
4
BG 1
5
BG 2
6
BLACK
7
BARS
8
DSK 1
AUTO
DSK 2
AUTO
FTB
DSK 1
CUT
DSK 2
CUT
SHIFT
SHIFT CUT AUTO
KEY 1
CUT
BKGD
KEY 1
TIE
BKGD
KEY 1
TIE
AUX
150