11.36
When installing:
•
While installation basically consists of performing
the dismantling operations in reverse sequence,
special attention should be directed toward the
following additional points:
•
Remove traces of thread-locking compound
from threads of camshafts and chain rail
•
The inlet camshaft bears a punch mark (arrow) as
identification
•
Make sure that the camshafts turn easily and
smoothly
L
Note:
Always replace the threaded plug's seal ring!
•
Install chain tensioner
e
Attention:
Remove TDC set bolt,
BMW No. 11 7 651!
•
Turn the engine over several times by hand
– Check valve clearance and adjust as necessary
•
Install the cylinder head cover before installing
the powertrain cradle
e
Attention:
When installing, note the correct positions of the
spring struts!
L
Note:
Make sure the detent for the long lever of the easy-
lift mechanism engages. If necessary, move the le-
ver to the drive position first, and then move it to the
park position!
Fluids and lubricants:
Loctite 243
X
Torque specifications:
Guide rail ..................................................... 10 Nm
Camshaft sprockets .................................... 30 Nm
TDC set bolt threaded plug .......................... 15 Nm
Threaded plug for chain tensioner................ 35 Nm
Lower strut mount ........................................ 21 Nm
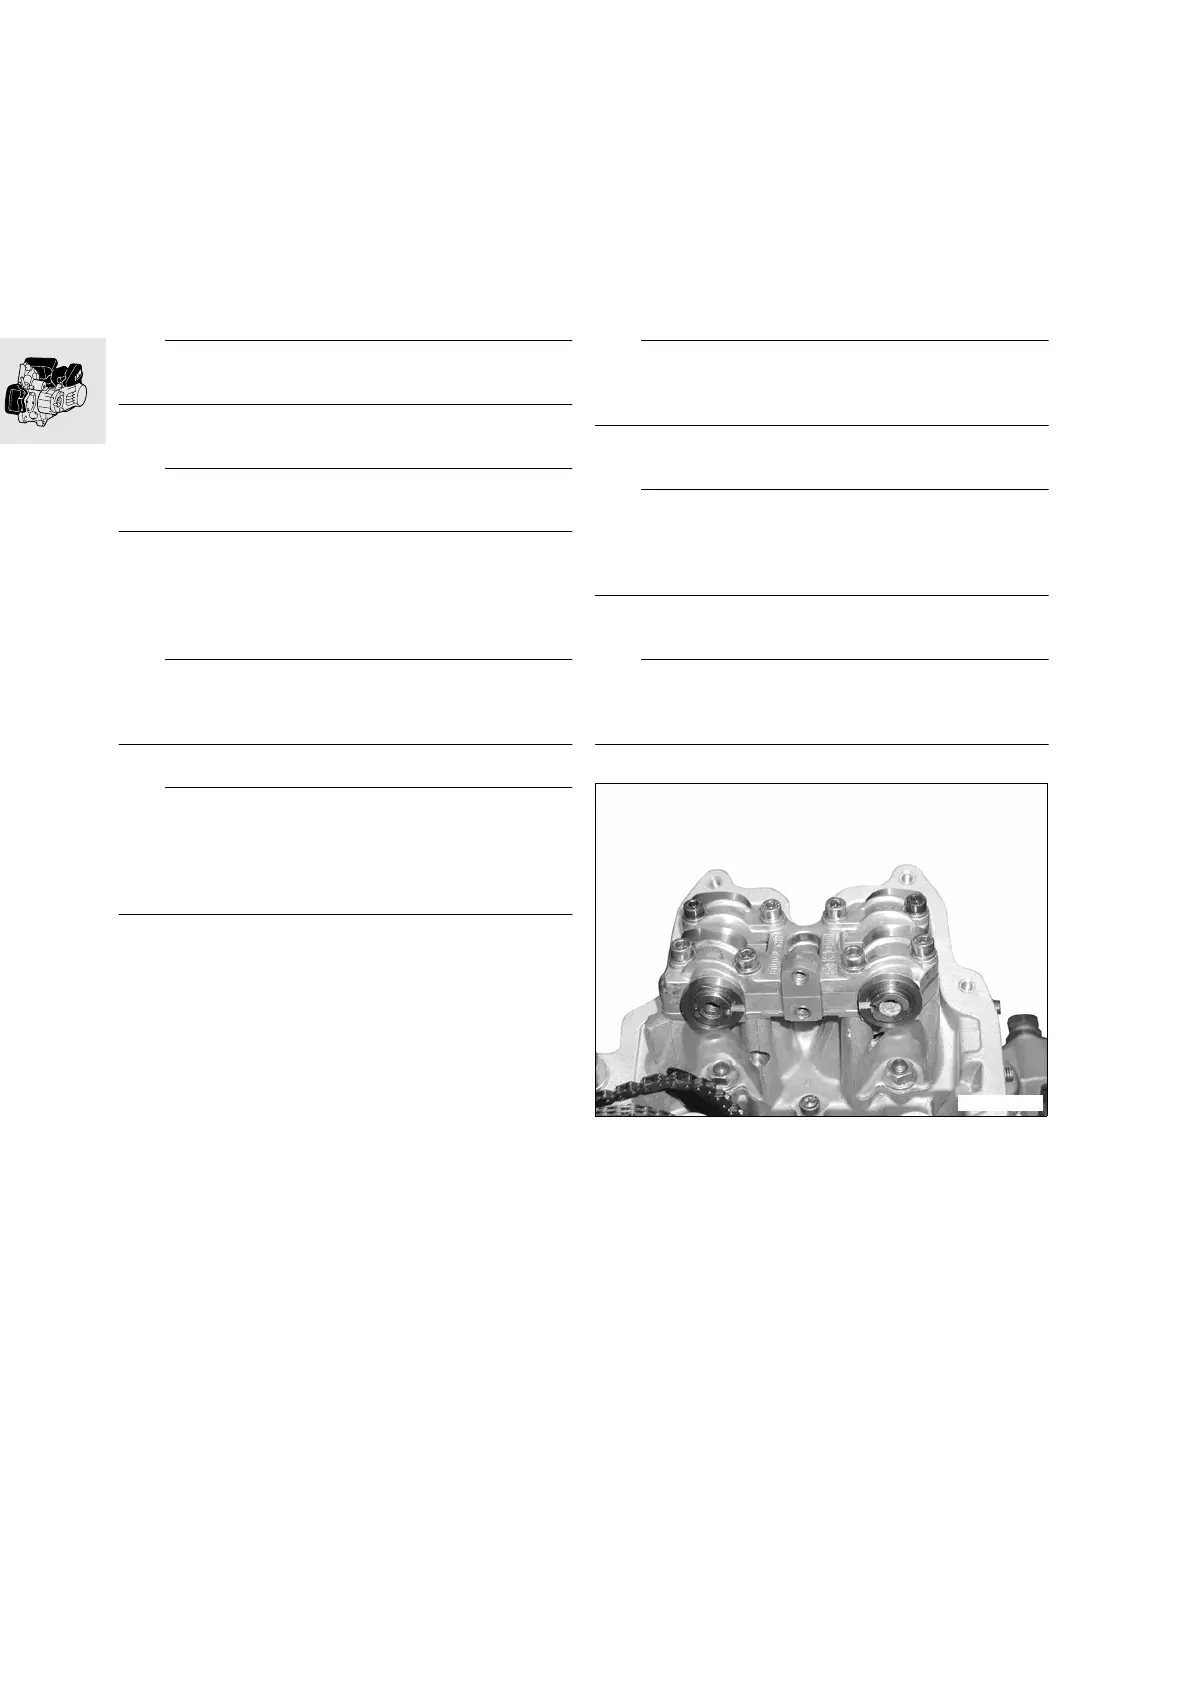
11 31 035 Camshaft bearing cap/camshaft
removal, installation, replacement
For enhanced clarity some of the illustrations show
the components with the powertrain cradle re-
moved.
– Swivel out powertrain cradle (
a
11.12)
– Remove cylinder head cover (
a
11.34)
– Lock engine at TDC (
a
11.14)
– Remove guide rail (
a
11.38)
L
Note:
Camshafts can also be removed and installed with
the camshaft sprockets attached.
– Removing camshaft sprockets (
a
11.35)
L
Note:
Make sure that the timing chain does not drop into
the housing. Use a retainer to keep timing chain ten-
sioned at all times!
•
Secure timing chain to prevent it from falling
L
Note:
Note lengths of bolts used to mount camshaft bear-
ing caps!
•
Remove 8 securing bolts
•
Remove camshaft bearing cap
•
Removing camshafts
•
Remove camshaft bearing seat
C1000232