24.15
Dismantling driven variator
d
Warning:
Assembly is spring-loaded - injury hazard!
– Removing/replacing clutch (
a
21.5)
L
Note:
Further disassembly is necessary only the two
plates do not move easily in opposite directions.
•
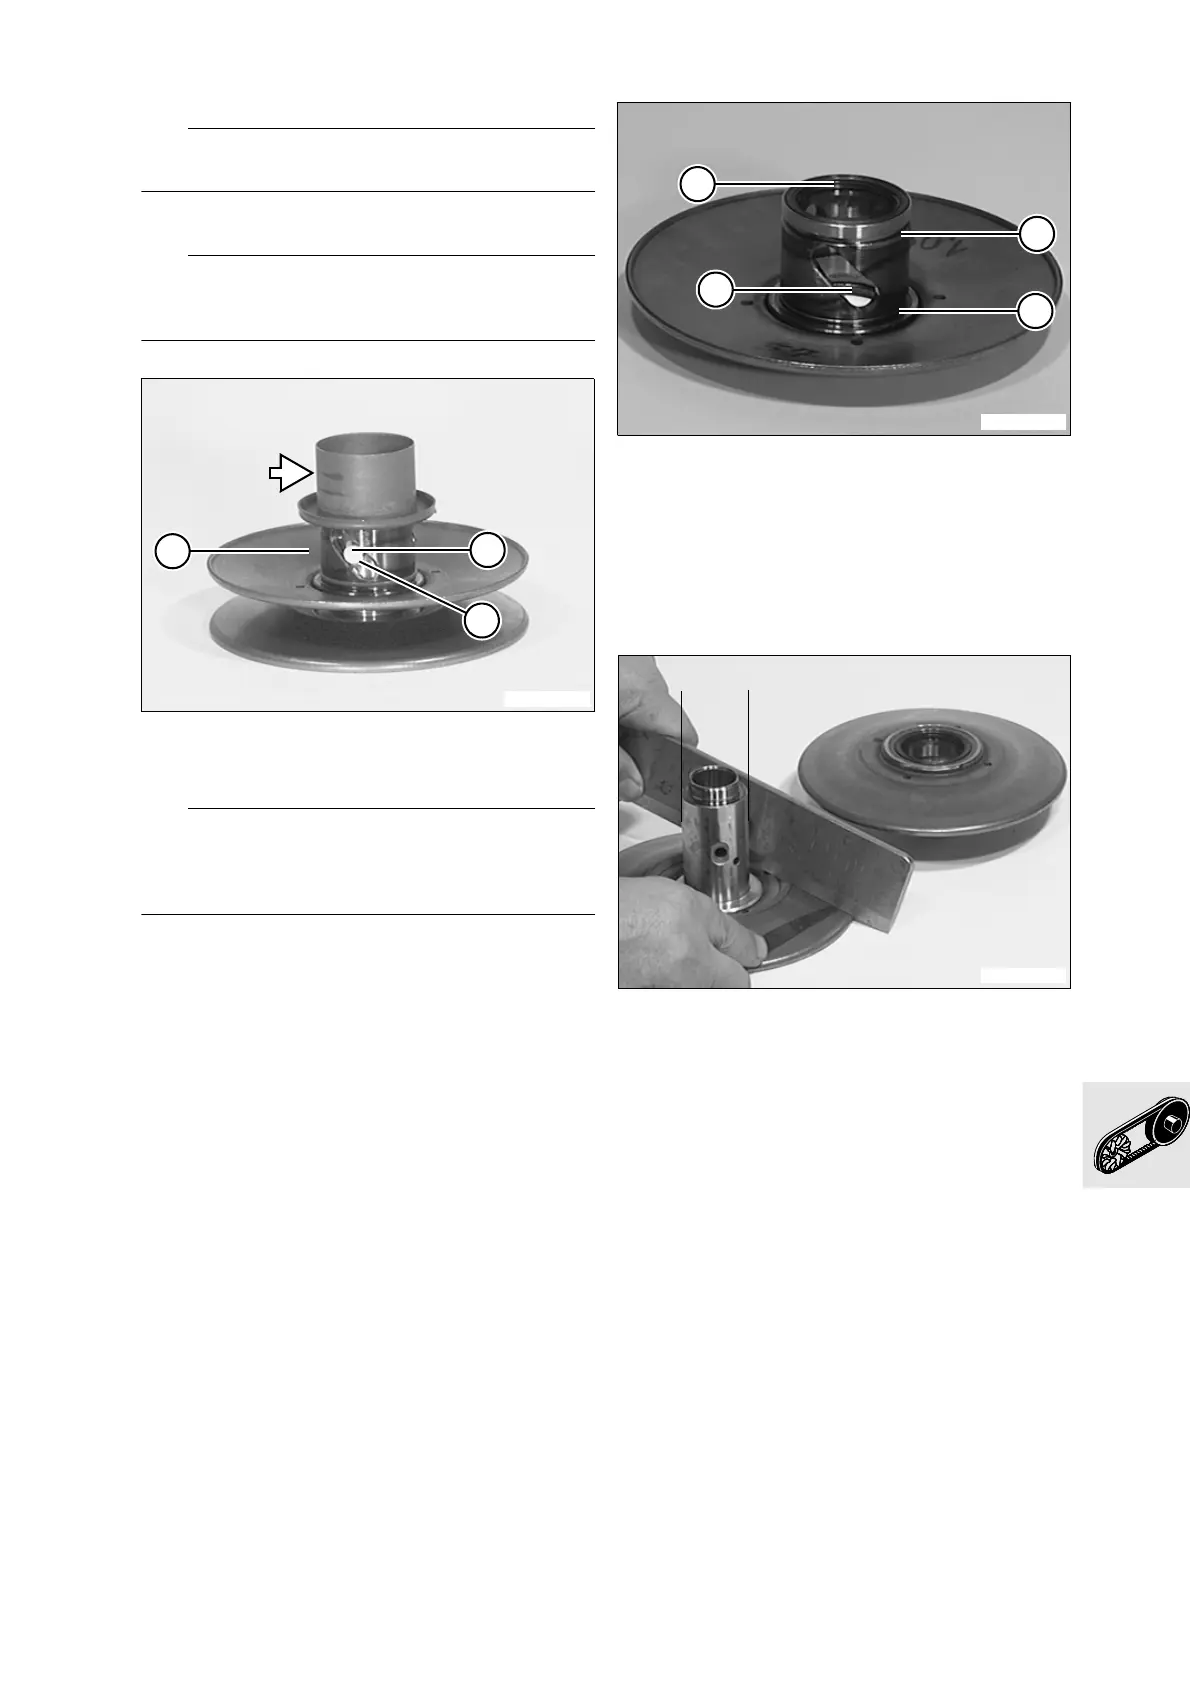
Turn guide cover (arrow) to remove and check for
wear
L
Note:
The new version of the driven variator has 4 guide
studs but no guide sleeves! Note when dismantling,
testing and assembling!
•
Press guide studs (1) and guide sleeves (2) from
inside to outside to remove
•
Remove outer plate (3)
•
Remove O-rings (1) and check for damage
•
Check both shaft oil seals (2) for damage and
correct fit
Checking individual components
– Check spring (
a
21.6)
•
Outside Ø "D" of sleeve in the inside plate
•
Check friction faces of both side plates for wear
and damage with precision straightedge and
feeler gauge
Wear data:
Outside Ø "D".................................. min. 33.90 mm
.......................................................(min. 1.3346 in)
Max. planar deviation of running
surface ........................................................ 0.5 mm
.............................................................. (0.0197 in)
c1110580
1
2
3
C1110590
1
1
2
2
C110600
D


 To Next Page