Confidential
5-8
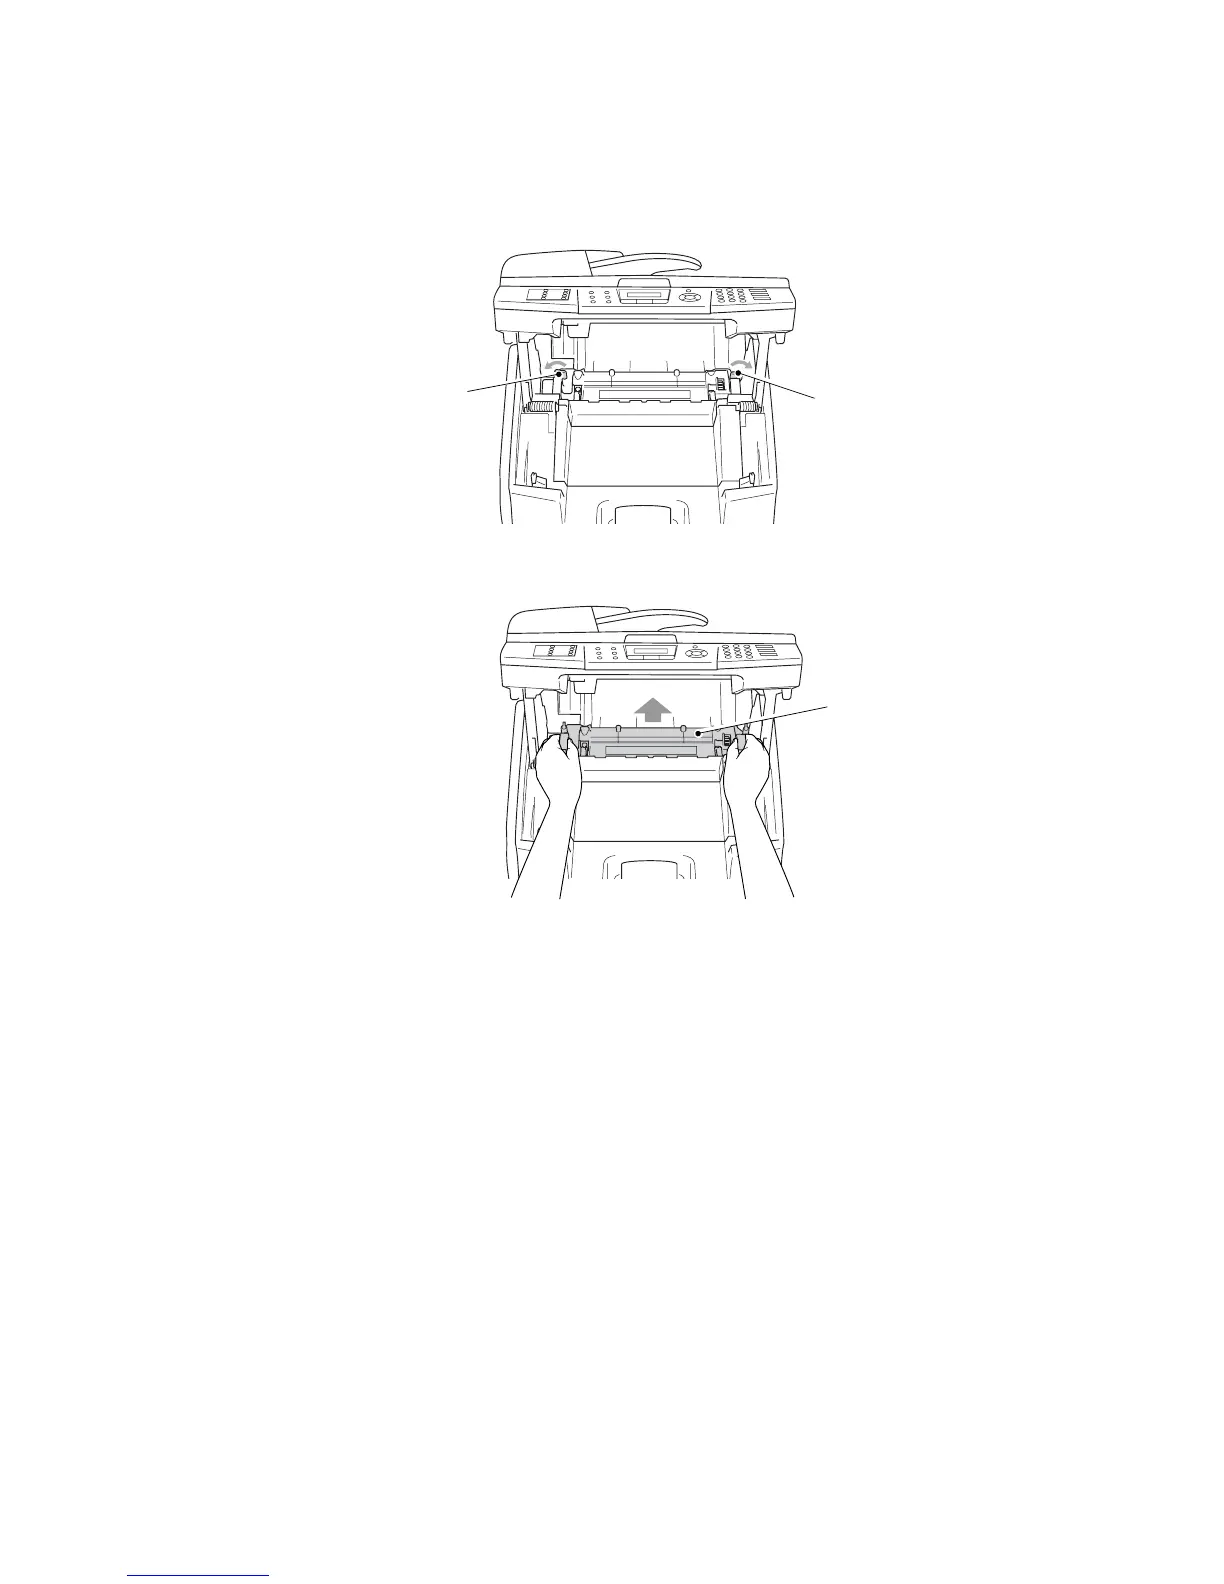
(1) Open the back cover and scanner unit.
(2) Release the two lock knobs to remove the fusing unit from the machine.
Fig. 5-3
Fig. 5-4
(3) Remove the setscrew (A) (BT3x6, 1 piece), the shoulder screw (A’) and pull up the two
release levers to remove the top fuser cover FU.
(4) Remove the screw (B) to remove the lock knob KIT FU. (2 places)
(5) Remove the setscrew (C) (BT3x8, 2 pieces) of the front fuser cover FU.
(6) Remove the front fuser cover FU.
(7) Remove the setscrew (D) (ST3x6, 1 piece and FU shoulder screw, 2 pieces) of the bottom
fuser cover FU.
(8) Remove the setscrew (E) (SM3x6 with washer, 1 piece) from the bottom fuser cover FU.
(9) Remove the setscrew (F) (ST3x6, 1 piece) to remove the ground wire.
(10) Remove the setscrew (G) (SM3x6 with washer, 1 piece) of the fuser lamp from the terminal;
Pull out the tube from the harness.
(11) Remove the bottom fuser cover FU from the fuser roller ASSY FU.
(12) Remove the setscrew (H) (SM3x6 with washer, 1 piece) of the fuser lamp terminal from the
terminal.
(13) Remove the setscrew (I) (SM3x6 with washer, 2 pieces) of the lamp holder, and then
remove the lamp holder.
Fusing unit
Lock leve
r
Lock lever
 Loading...