Confidential
5-9
(14) Pull out the fuser lamp from the fuser roller (HT).
NOTE: Since the voltage of heater lamp is subject to the destination, confirm the specified
rated voltage. (US : 120V 940W, EC : 240V 940W, JP : 100V 940W)
(15) Remove the setscrew (J) (ST3x6 with washer, 2 pieces) to remove the two terminals of the
fuser connector harness.
(16) Disconnect the connector connecting to the fuser connector FU.
(17) Remove the FU shoulder screws (K) (2 pieces) to remove the fuser connector FU from the
bottom fuser cover FU.
(18) Remove the setscrew (L) (BT3x6, 1 piece and BT3x12, 1 piece) to remove the thermistor
ASSY FU from the bottom fuser cover FU.
CAUTION
• This is the replacement work of important part in terms of the product safety. Therefore,
this work should be performed by the skillful personnel having the sound knowledge and
at the location where the safety is ensured. (Measurement of the insulation resistance
needs to be done.)
• The fusing unit and its peripheral parts are very hot (approximately 100°C). Prior to
starting the replacement work, confirm that the fusing unit and its peripheral parts are
well cooled down.
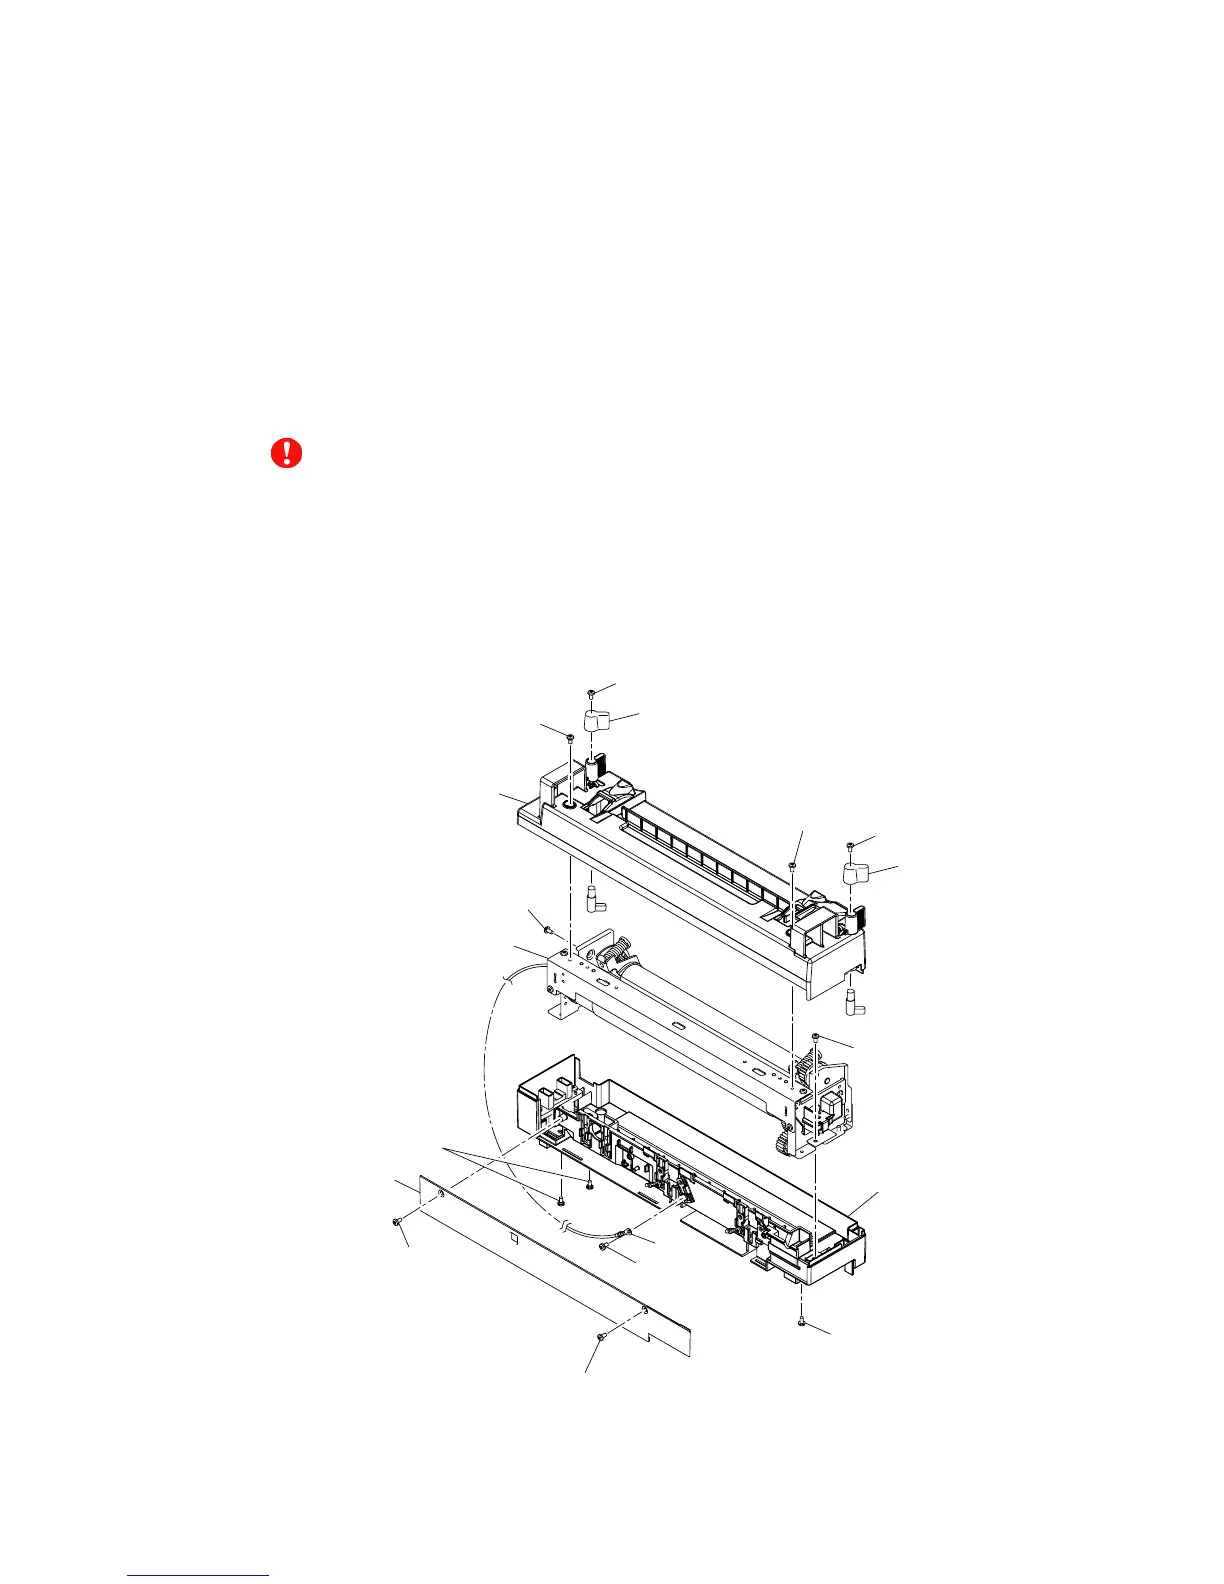
Fig. 5-5
(A): BT3x6
(A’):
Shoulder screw
Lock knob KIT FU
Top fuser cover FU
(B): Screw
Lock knob KIT FU
(C): BT3x8
(C): BT3x8
(D): Fuser shoulder screw
(G): SM3x6 with
washer
(D): ST3x6
Front fuser cover FU Bottom fuser cover FU
Fuser roller (HT)
(E): SM3x6 with washer
(F): ST3x6
Tube
(B): Screw
 Loading...