6-34 2002 Buell P3: Drive/Transmission
HOME
DISASSEMBLY
Drive out needle bearings from inside bore of main drive
gear. Do not reuse bearings after removal.
ASSEMBLY
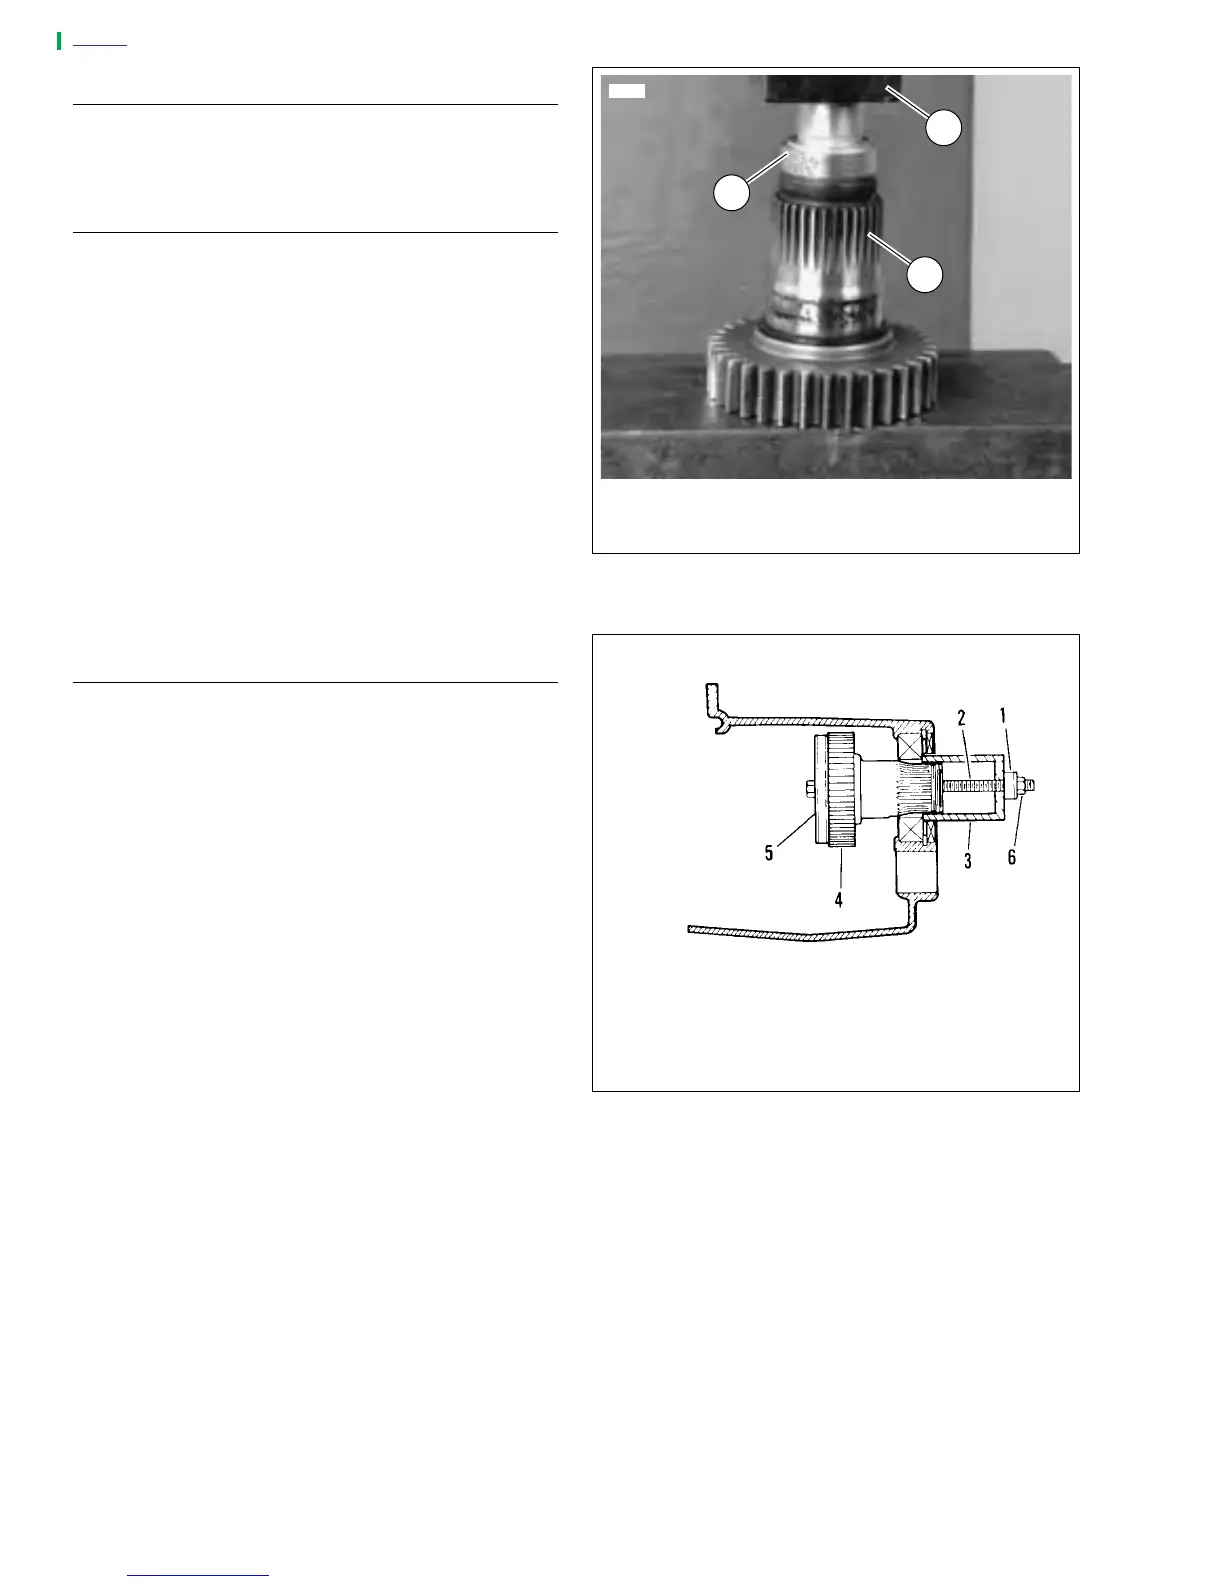
1. See Figure 6-48. Use INNER/OUTER MAIN DRIVE
GEAR NEEDLE BEARING INSTALLATION TOOL (Part
No. HD-37842-A) for assembly. Select which end of tool
to use.
a. The end stamped 0.080 in. (2.032 mm) is for driving
the bearing into the inner end.
b. The end stamped 0.315 in. (8.001 mm) is for the
outer end bearing.
2. Assemble parts. The installation tool will automatically
bottom on the gear when the correct depth is reached.
a. Place main drive gear on a press.
b. Press in the outer bearing to a depth of 0.315-0.285
in. (8.001-7.239 mm).
c. Press in the inner bearing to a depth of 0.080 in.
(2.032 mm).
INSTALLATION
1. Replace main drive gear bearing.
2. See Figure 6-49. Use MAIN DRIVE GEAR REMOVER
AND INSTALLER (Part No. HD-35316-A) for assembly.
a. Take bolt (2) and place washer (5) followed by main
drive gear (4) over end of bolt.
b. From inside of case insert bolt and main drive gear
through inner race of ball bearing.
c. Insert threaded end of bolt (2) through installer cup
(3) and thrust washer (1).
d. Thread nut (6) onto end of bolt (2). Tighten nut (6)
until shoulder on gear (4) bottoms against inner race
of bearing.
3. See Figure 6-45. Tap in
new
seal (3) at threaded end of
5th gear.
Figure 6-48. Needle Bearing Installation Tool
Figure 6-49. Main Drive Gear Installation
3554
1
1. Ram on End of Press
2. Needle Bearing Installation Tool
3. Main Drive Gear
3
2
1. Thrust Washer
2. Bolt
3. Installer Cup
4. 5th Gear
5. Washer
6. Nut
a0122xSx