2-14 2002 Buell P3: Chassis
HOME
SEALED WHEEL BEARINGS 2.7
INSPECTION
1. Block motorcycle underneath frame so wheel is raised
off the ground.
2. See Figure 2-12. Mount a magnetic base dial indicator to
the brake disc with the dial’s contact point on the end of
the axle.
3. Turn the wheel through several rotations, then move the
wheel side to side to check for lateral end play.
a. If the end play is less than the service wear limit of
0.002 in. (0.051 mm), bearing passes inspection.
b. If the end play exceeds service wear limit or feels
rough, remove wheel and replace both wheel bear-
ings.
REMOVAL
1. Remove wheel from motorcycle.
2. See Figure 2-13. Obtain WHEEL BEARING INSTALLER/
REMOVER (Part No. HD-44060) and assemble.
a. Sparingly apply graphite lubricant to threads of forc-
ing screw (1) to prolong service life and ensure
smooth operation.
b. Install nut (2), washer (3) and Nice bearing (4) on
screw. Insert assembly through hole in bridge (5).
c. Drop ball bearing inside collet (6). Fasten collet and
ball bearing to forcing screw (1).
3. Hold end of forcing screw (1) and turn collet (6) to
expand edges of collet.
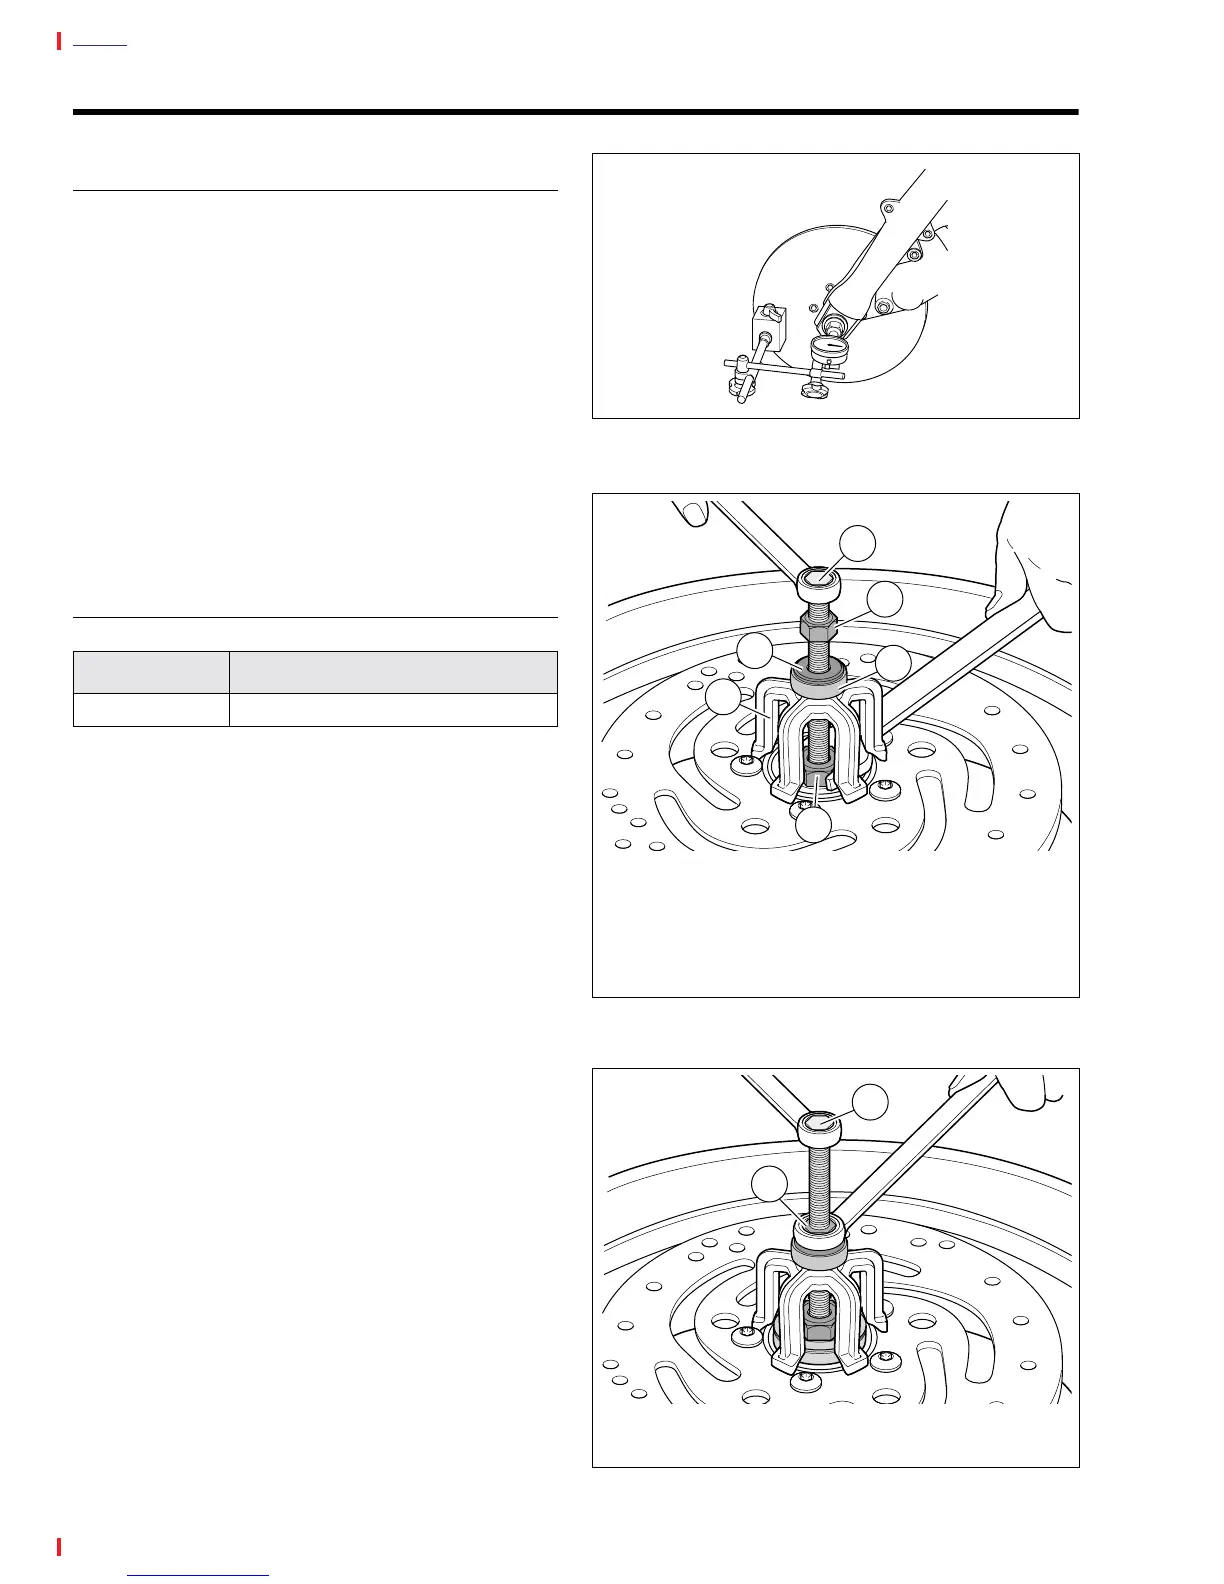
4. See Figure 2-14. When expanded collet has gripped
bearing edges, hold end of forcing screw (1) and turn the
nut (2) to remove bearing from wheel.
5. Remove spacer from inside wheel hub.
6. Repeat procedure for opposite side bearing. Discard all
bearings upon removal.
PART NO. SPECIALTY TOOL
B-43933 Wheel bearing installer/remover
Figure 2-12. Wheel Bearing Inspection
(Front Wheel Shown)
Figure 2-13. Removal Tool
Figure 2-14. Remove Bearing
a0199x2x
1. Forcing Screw
2. Nut
3. Washer
4. Nice Bearing
5. Bridge
6. Collet with Ball Bearing inside
a0200x2x
1
2
4
6
5
3
a020x2x
2
1. Forcing Screw
2. Nut
1