4-12 2002 Buell P3: Fuel System
HOME
AIR CLEANER 4.3
GENERAL
The air cleaner prevents foreign material from entering the
carburetor and engine, trapping airborne dust and dirt in the
filter element. Service the air cleaner filter element every
10,000 miles (16,000 km), or more often if the motorcycle is
run in a dusty environment. Replace the element every
30,000 miles (48,000 km).
REMOVAL
1. Release five latches around perimeter of air box cover.
See Figure 4-10.
2. Remove single Phillips screw at bottom of air box cover
(7 o’clock position).
3. Pull cover from air box.
4. Pull conical shaped filter from air box.
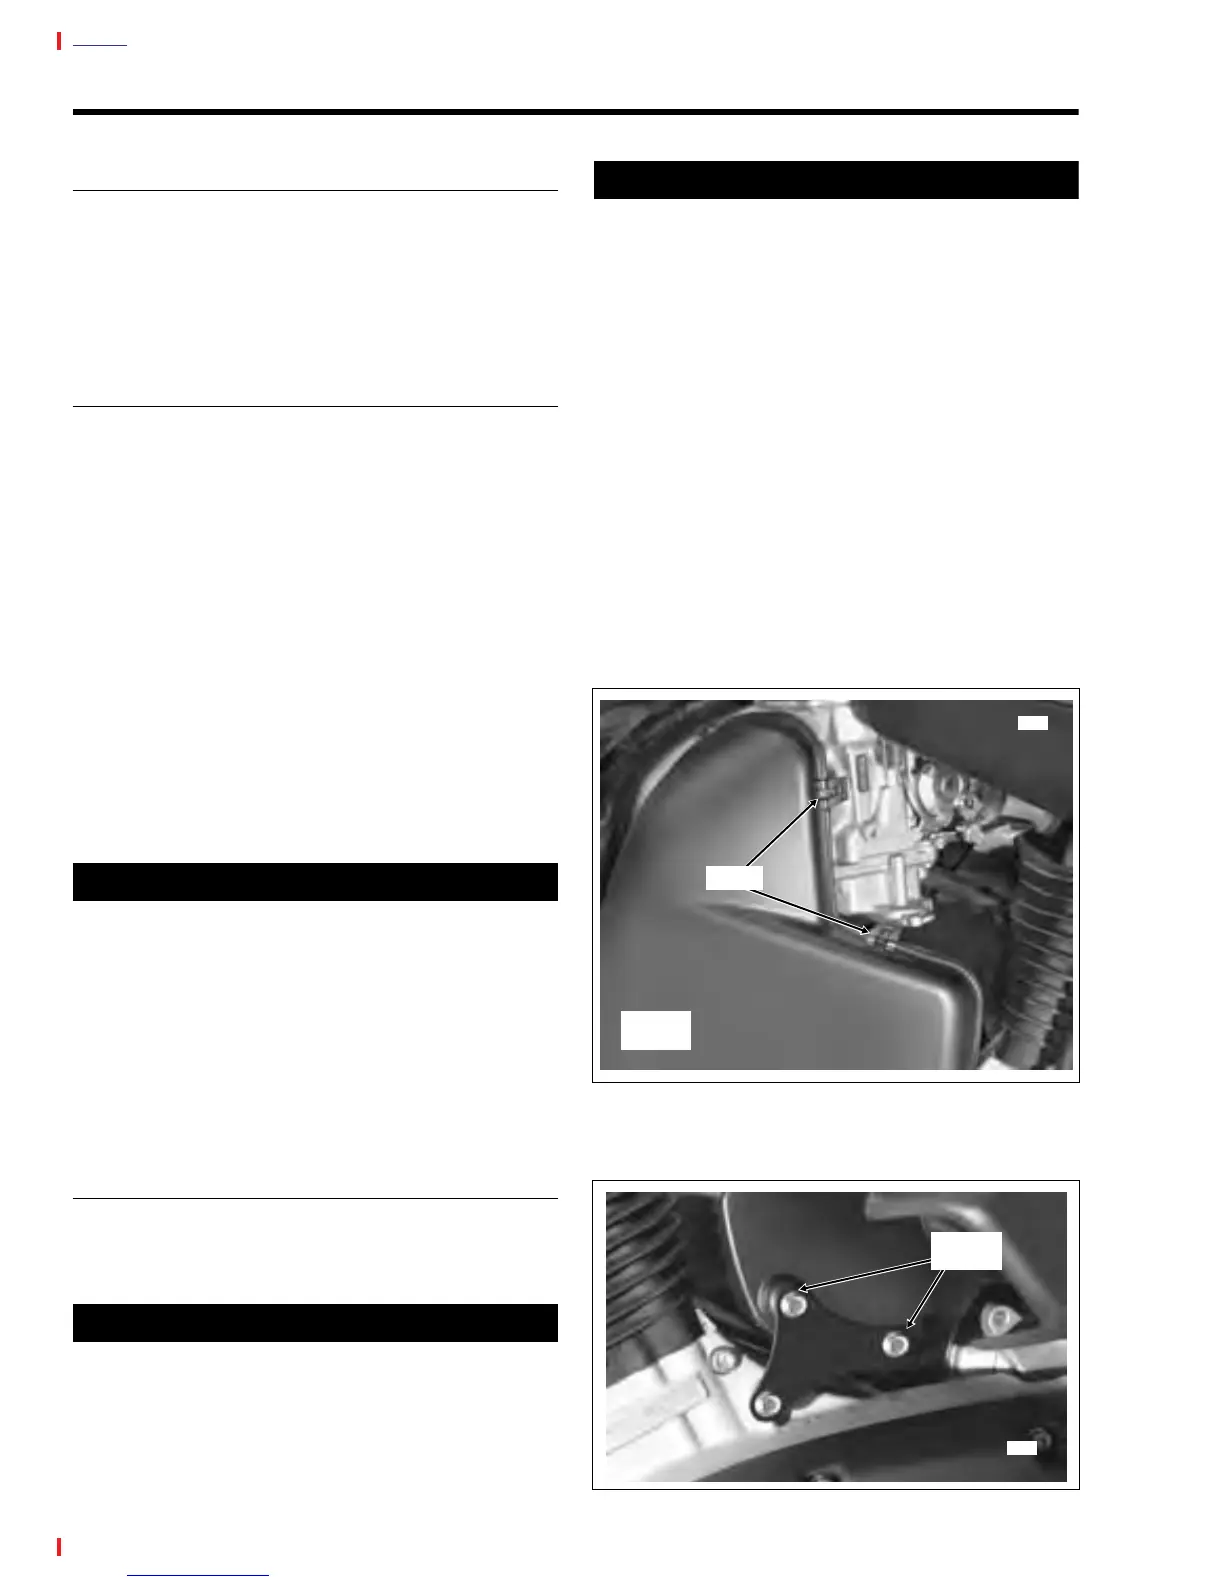
5. Squeeze wings on spring clamp with pliers and pull PCV
outlet hose from fixed position on allen head screw (gold)
at top of venturi ring. Remove screw with spacer.
6. Remove remaining two allen head screws to free venturi
ring from carburetor flange.
7. Remove hex screw at bottom of air box (6 o’clock posi-
tion) to release bracket from crankcase hole.
8. Moving to left side of vehicle, remove two flange bolts to
release side of air box from triangular shaped bracket.
Do not remove bottom bolt to crankcase. See Figure 4-
12.
CAUTION
Do not take bolt in and out of the crankcase unless nec-
essary. Since the potential for stripping always exists
during removal and installation, leave the bolt intact to
avoid possible damage to the crankcase.
9. Returning to the right side of the vehicle, carefully pull
out air box. When partially removed, detach PCV outlet
hose from middle fitting on 3-way connector.
10. Remove gasket from inboard side of air box. Discard
gasket.
CLEANING AND INSPECTION
1. Thoroughly clean air cleaner cover and backplate.
2. Replace the filter element if damaged or if filter media
cannot be adequately cleaned.
11WARNING1WARNING
Do not use gasoline or solvents to clean the filter ele-
ment. Volatile or flammable cleaning agents may cause
an intake system fire, which could result in death or seri-
ous injury.
3. Wash the filter element (and hose connections) in warm,
soapy water. To remove soot and carbon, soak element
for 30 minutes in warm water with mild detergent.
11WARNING1WARNING
Compressed air can pierce the skin and cause injury.
Never use your hand to check for leaks or to determine
air flow rates. Wear safety glasses to shield your eyes
from flying dirt and debris. Failure to comply could result
in death or serious injury.
4. Dry the filter element using low pressure compressed air
(32 psi/221 kPa maximum). Rotate the element while
moving air nozzle up and down the element exterior. Do
not rap the element on a hard surface.
5. Hold the filter element up to a strong light source. The
element can be considered sufficiently clean if light is
uniformly visible through the media.
6. Inspect all hose connections for cuts, tears, holes or
signs of deterioration. Replace as necessary. Direct
compressed air through hoses to verify that they are not
plugged.
Figure 4-10. Release Air Box Cover Latches
Figure 4-11. Remove Air Box From Bracket
7760
Air Box
Cover
Latch
Flange
Bolt
7757