2002 Buell P3: Fuel System 4-5
HOME
FUEL TANK COVER/FUEL TANK 4.2
REMOVAL
Fuel Tank Cover
11WARNING1WARNING
Gasoline is extremely flammable and highly explosive.
When servicing the fuel system, do not smoke or allow
open flame or sparks in the vicinity. Inadequate safety
precautions could result in death or serious injury.
1. Remove seat. Depress latch at bottom and pull seat up
and back to remove. See Figure 4-1.
11WARNING1WARNING
To protect against shock and accidental start-up of vehi-
cle, disconnect the negative battery cable before pro-
ceeding. Inadequate safety precautions could result in
death or serious injury.
2. Unthread bolt and remove battery negative cable (black)
from battery negative (-) terminal.
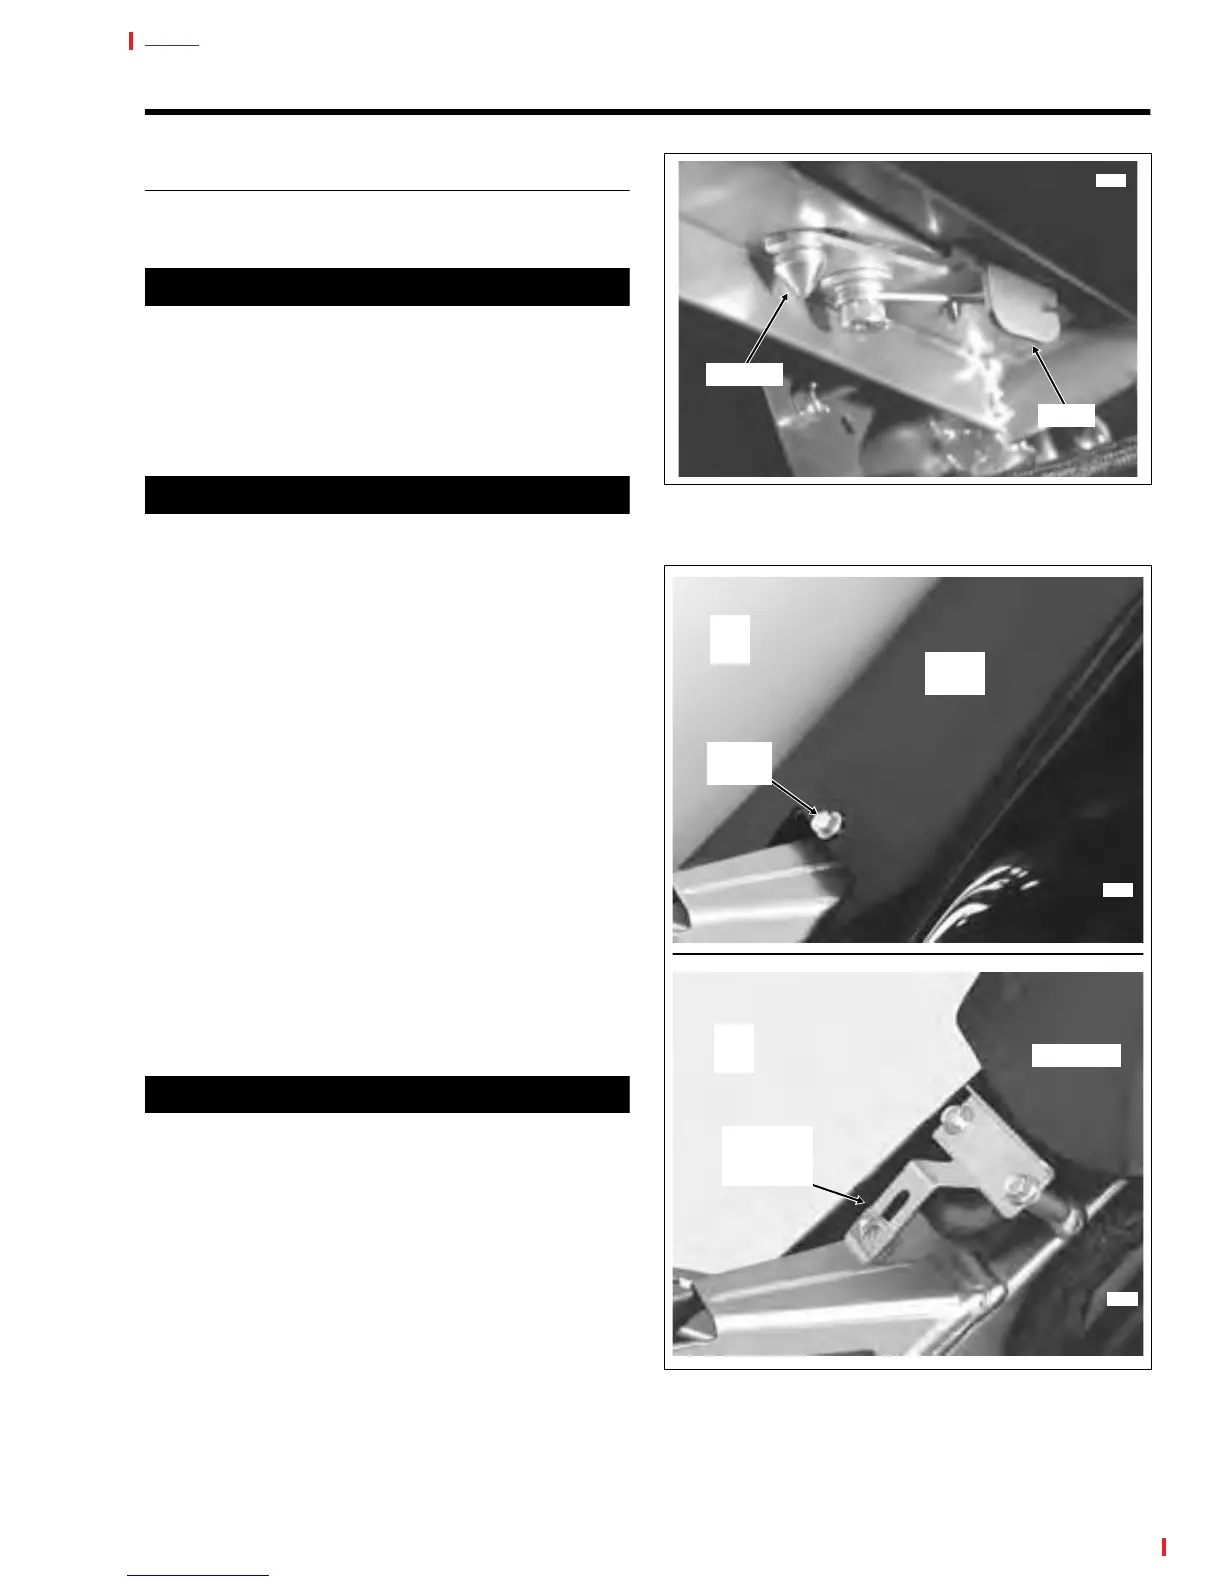
3. At rear of fuel tank, remove flange bolt (with nylon
washer) to release tank cover from clip nut on T-shaped
mounting bracket. See A of Figure 4-2.
4. Carefully cut small cable strap and pull vent tube from fit-
ting at front of fuel cap flange.
5. Remove oil dipstick from threaded hole in frame back-
bone (just rear of steering head). Remove mounting ring
from around threaded hole.
6. Remove tank cover and set aside.
7. Install oil dipstick back into threaded hole in frame back-
bone.
Fuel Tank
8. Rotate the 3-position valve handle on the fuel valve to
the fully vertical position to shut the gasoline supply to
the carburetor OFF. See A of Figure 4-5.
11WARNING1WARNING
Some gasoline will drain from the outlet hose when dis-
connected from the fuel valve. Thoroughly wipe up any
spilt fuel immediately. Dispose of rags in a suitable man-
ner. Gasoline is extremely flammable and highly explo-
sive. Inadequate safety precautions could result in death
or serious injury.
9. Turn slotted screw to loosen band clamp on outlet fitting
at side of fuel valve. Pull hose from fitting.
10. At rear of fuel tank, remove remaining two flange bolts to
release T-shaped mounting bracket from frame back-
bone. See B of Figure 4-2.
11. Remove left side airbox cover. See 4.3 AIR CLEANER.
12. Moving to front of vehicle, pry rubber stops from weld studs
on each side of frame backbone. See A and B of Figure 4-3.
13. Raise rear of fuel tank and slide assembly rearward to
remove from frame.
Figure 4-1. Remove Seat
Figure 4-2. Remove Tank Cover Fuel Tank
Seat Pin
Latch
7724
B
Fuel Tank
T-Shaped
Mounting
Bracket
7726
A
Tank
Cover
Flange
Bolt
7725