2-66 2002 Buell P3: Chassis
HOME
FRONT AND REAR ISOLATORS 2.31
FRONT ISOLATOR
Removal
1. Remove seat. See 2.28 SEAT.
2. Remove fuel tank. See 4.2 FUEL TANK COVER/FUEL
TANK.
3. Raise motorcycle until front suspension is unloaded.
4. Remove muffler, and support motor with jack. When iso-
lator is detached powertrain may move. See 2.20
EXHAUST SYSTEM.
5. Cut horn cable tie.
6. Remove clutch cable tie.
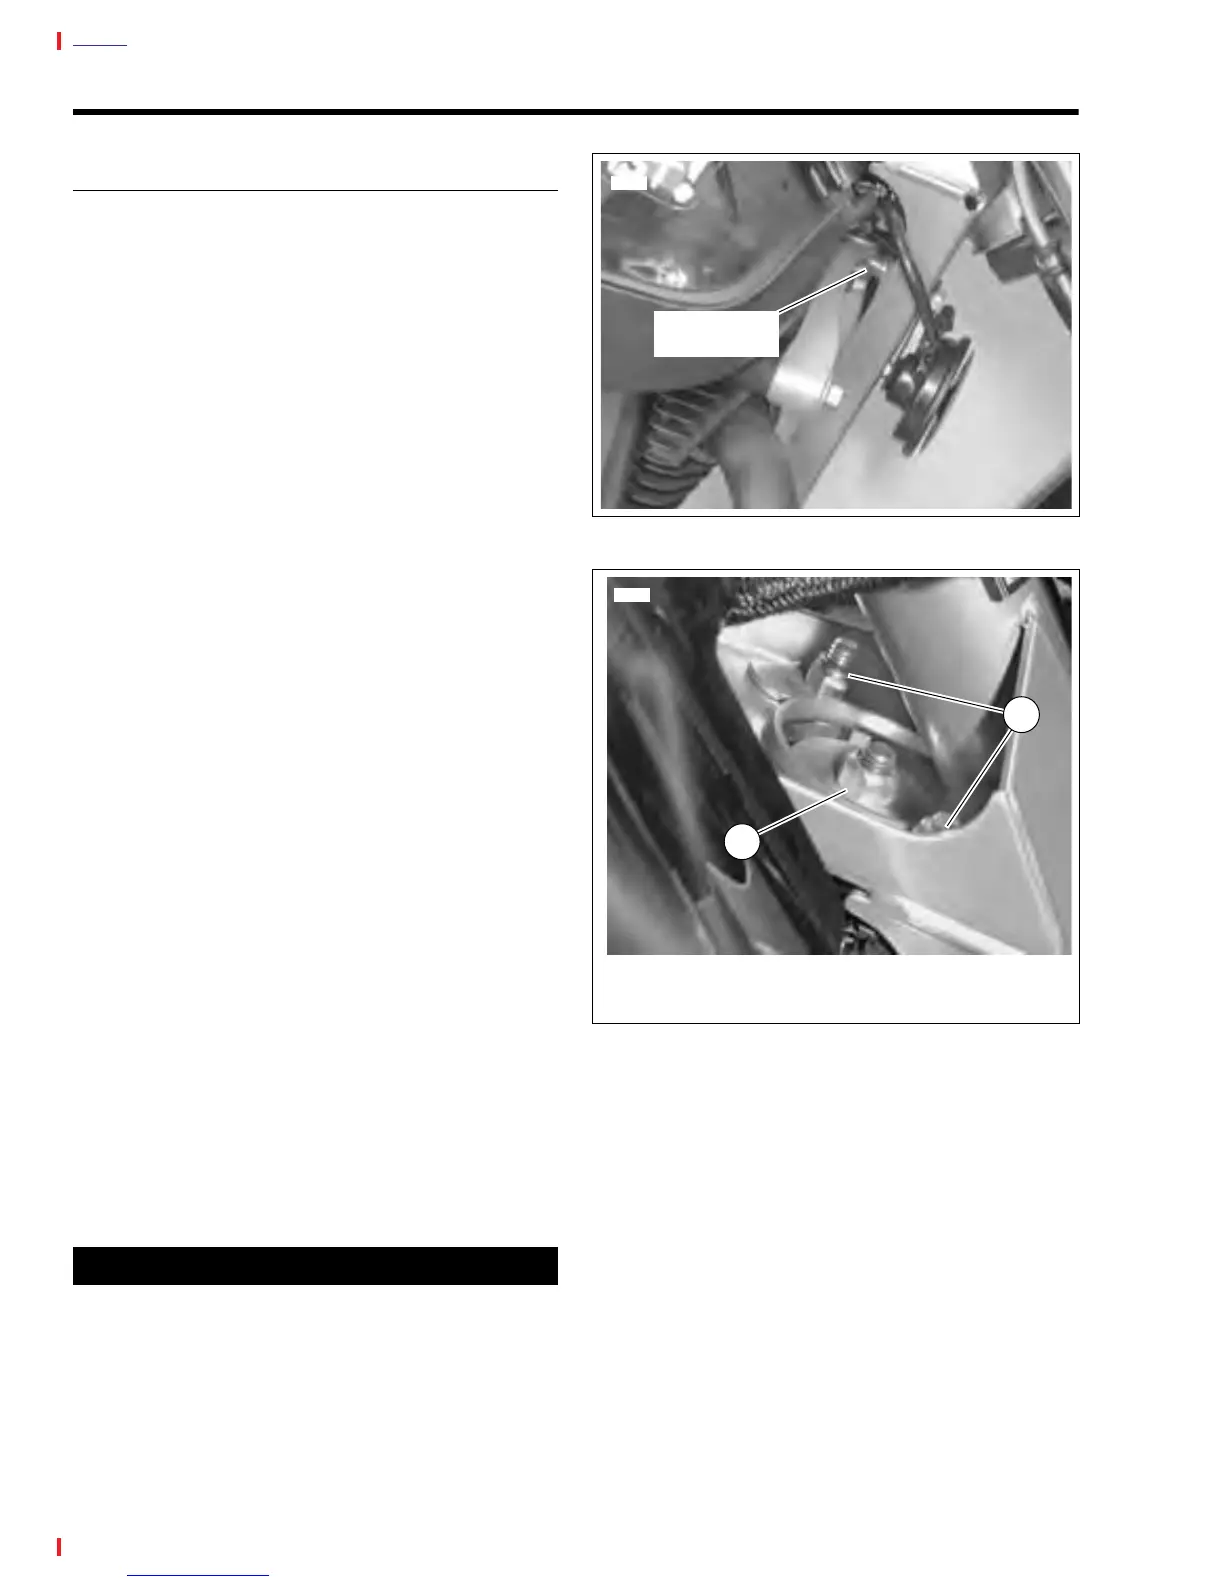
7. See Figure 2-112. Loosen front ground strap bolt for
clearance.
8. See Figure 2-113. Remove two outboard isolator bolts
(1).
9. Remove main isolator bolt (2) and nut. Discard nut.
10. Remove isolator.
Installation
1. See Figure 2-113. Position new isolator in frame.
2. Install two outboard isolator bolts (1). Torque 30-33 ft-lbs
(41-45 Nm).
3. Install main isolator bolt and new nut (2). Tighten main
isolator bolt to 63-70 ft-lbs (85-95 Nm).
4. Tighten front ground strap bolt to 30-33 ft-lbs (41-45 Nm)
5. Install clutch cable to clip.
6. Install horn tie wrap.
7. Install fuel tank. See 4.2 FUEL TANK COVER/FUEL
TANK.
11WARNING1WARNING
After installing seat, pull upward on front of seat to be
sure it is locked in position. If seat is loose, it could shift
during vehicle operation, causing loss of control of vehi-
cle and death or serious injury.
8. Install seat. See 2.28 SEAT.
Figure 2-112. Front Tiebar Bolt
Figure 2-113. Front Isolator Bolts
7746
Front Ground
Bolt Strap
7744
1. Outboard Isolator Bolts (2)
2. Main Isolator Nut
2
1