Removing the storage tray for NVIDIA GPU configurations
Prerequisites
1. Follow the safety guidelines listed in the Safety instructions.
2. Follow the procedure listed in the Before working inside your system.
3. Remove the cable cover.
4. Observe and disconnect the intrusion switch bridge cable from the connectors on the storage tray that is connected from
the system board. Observe and disconnect the drive backplane cables, BOSS power and signal cables, fan board cables from
the connector on the storage tray, signal cable from the connectors on the PDB2 and then keep the cables away from the
storage tray. Disconnect the VSB power cables (left and Right) from the connector on the system board and keep them on
the storage tray.
Steps
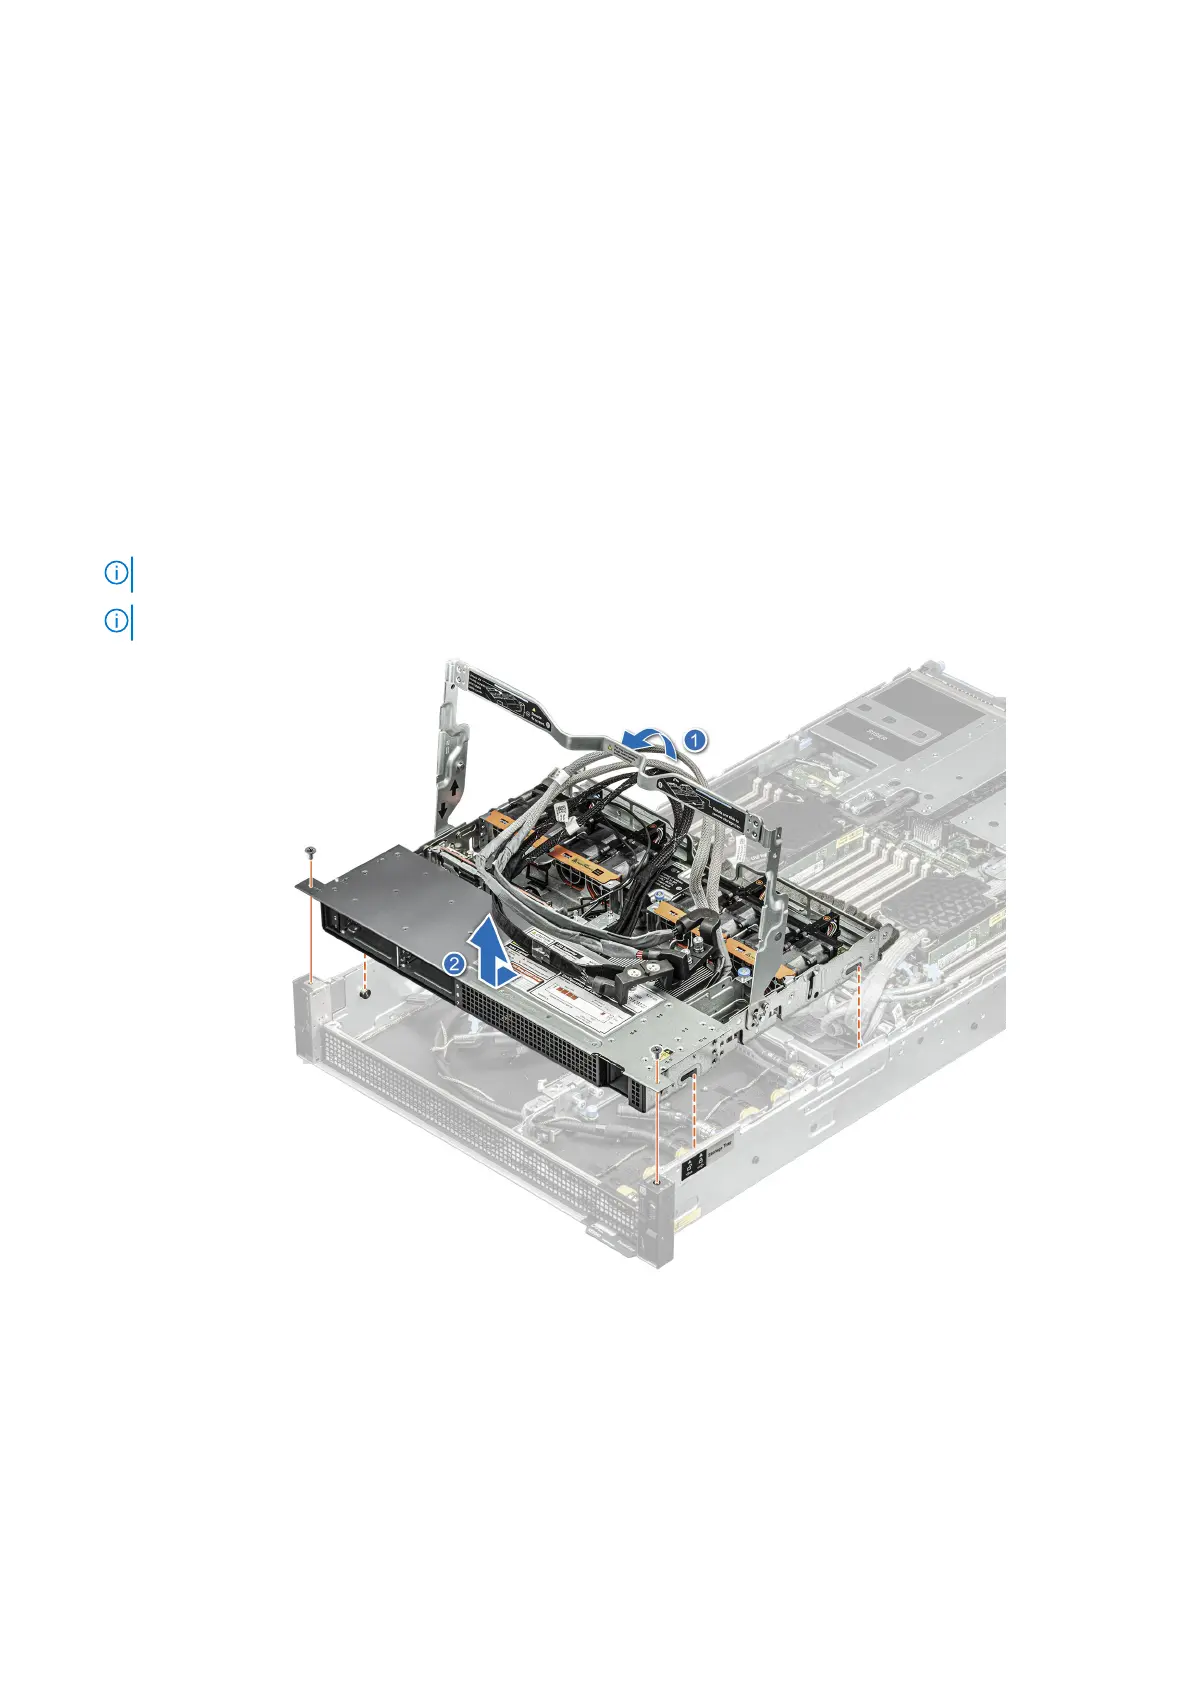
1. Using a Phillips 1 screwdriver, remove the screws on the drive cage.
2. Rotate the handle at an angle and slide the storage tray toward the front of the chassis.
3. Lift the storage tray out of the system.
NOTE: There is label to show the Storage tray lock and unlock on the left side of the chassis.
NOTE: The numbers on the image do not depict the exact steps. The numbers are for representation of sequence.
Figure 69. Removing the storage tray
Next steps
Replace the storage tray for NVIDIA GPU configurations.
Installing and removing system components
101