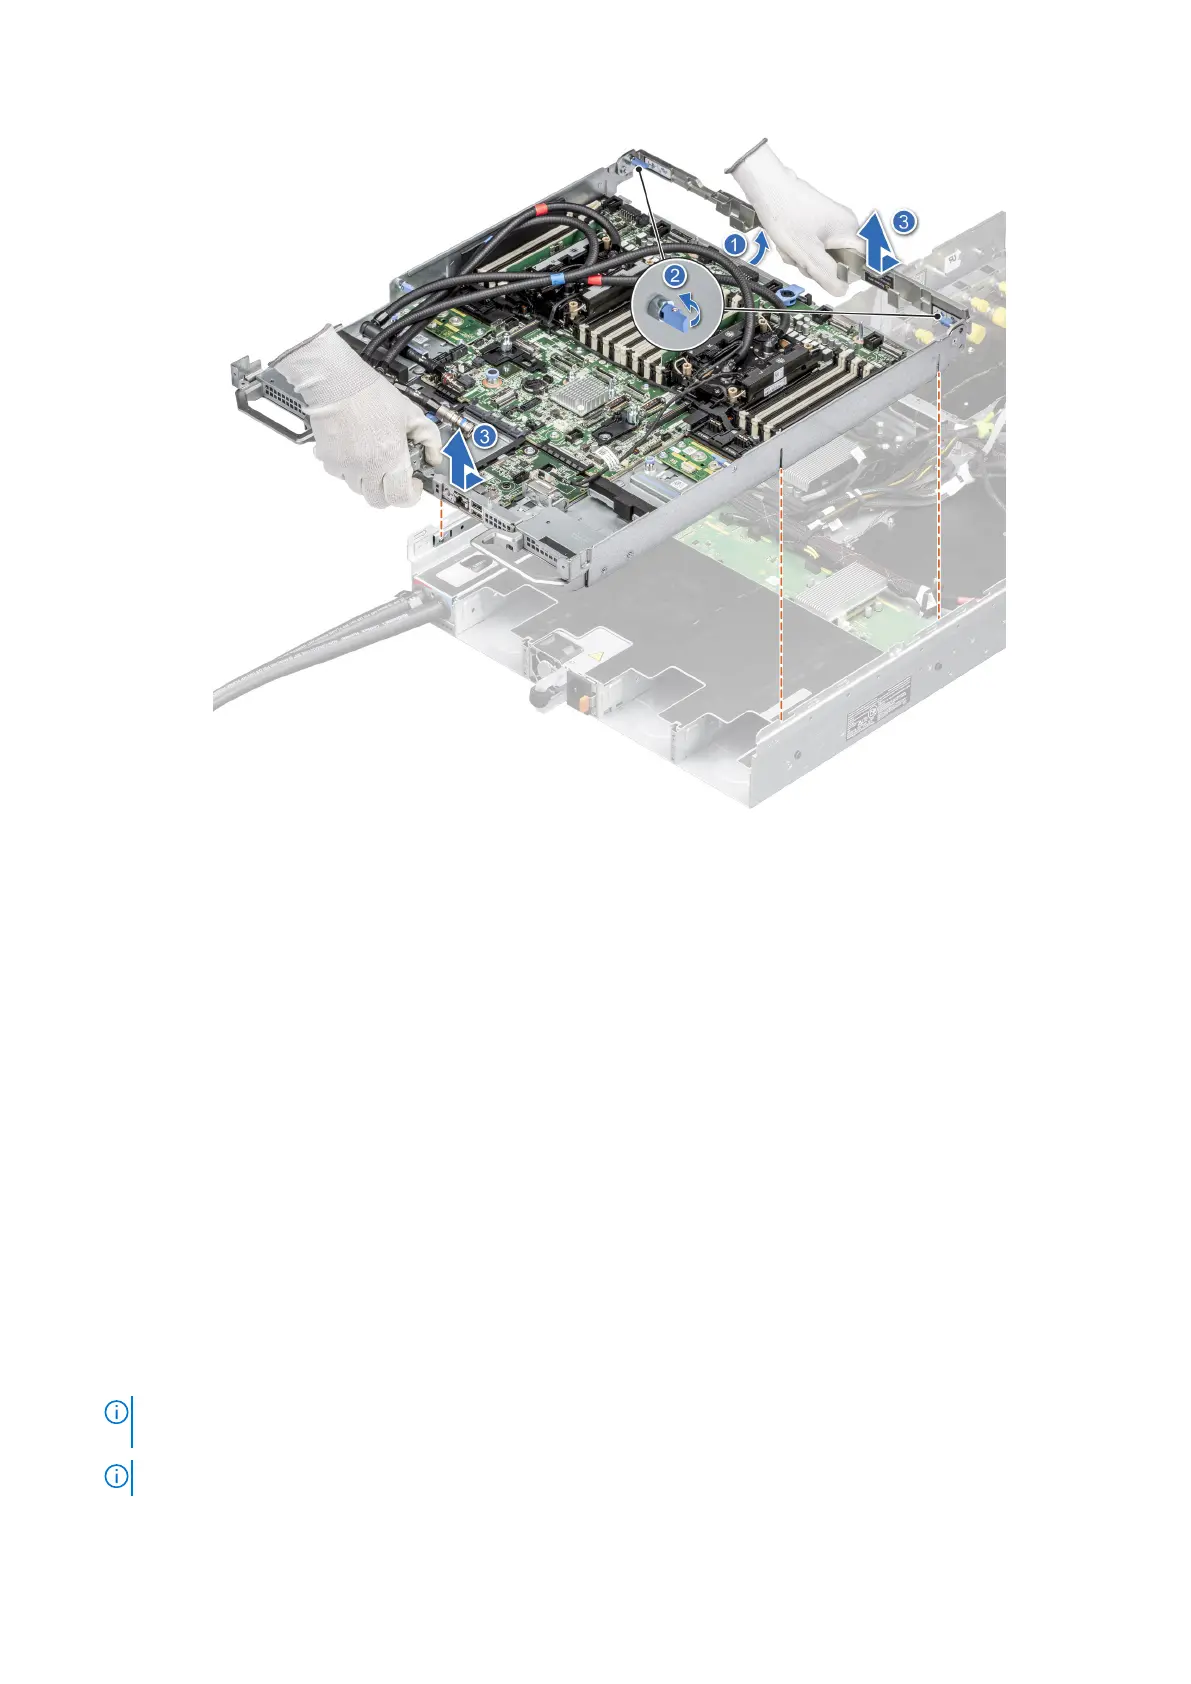
Figure 144. Removing the system board tray
Next steps
Install the system board tray for Intel GPU configurations.
Installing the system board tray for Intel GPU configurations
Prerequisites
1. Follow the safety guidelines listed in the Safety instructions.
2. Follow the procedure listed in Before working inside your system.
3. Remove the storage tray.
4. Remove the risers.
5. Remove the VSB cables from the system board.
6. Remove lower brace cover.
7. Disconnect all the cables from the system board and make note of all the cable connections. For more information, see
Cabling diagram.
8. Disconnect the liquid cooling tubes 11 and 12 from the Manifold for DLC module and keep in on the system board and make
sure do not damage any connectors on the system board.
Steps
1.
NOTE:
Make sure the two blue plungers at the rear of the chassis are unlocked and two blue plungers near to the
system board handle are in locked position with handle upward.
NOTE: Make sure chassis inner slide up_down triangle mark is fully aligned with chassis triangle mark.
Installing and removing system components 161