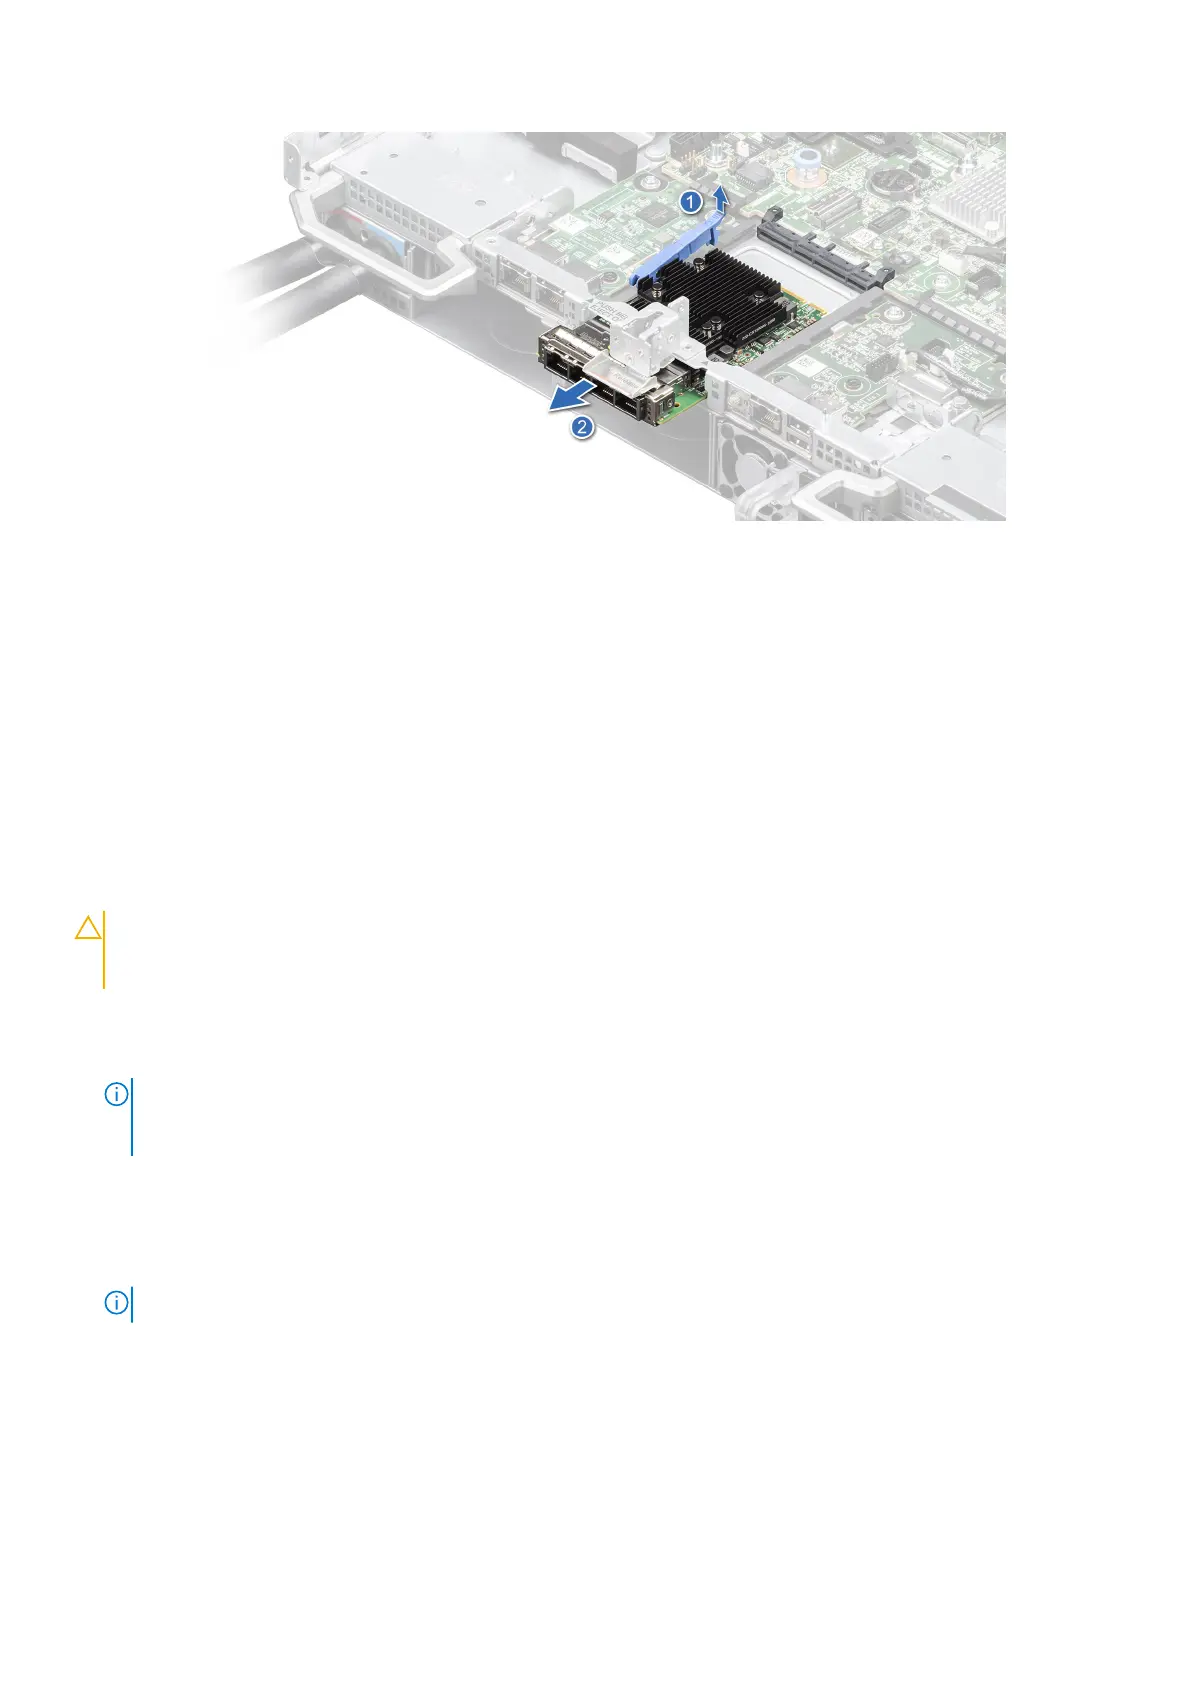
Figure 136. Removing the OCP card
4. If the OCP card is not going to be replaced, install a filler bracket .
Next steps
Replace the OCP card
Installing the OCP card
Prerequisites
1. Follow the safety guidelines listed in the Safety instructions.
2. Follow the procedure listed in the Before working inside your system.
3. Remove the risers 1A and 4A for Intel GPU configurations or Remove the riser 1B and 4B for NVIDIA GPU configurations.
CAUTION:
Do not install GPUs, network cards, or other PCIe devices on your system that are not validated
and tested by Dell. Damage caused by unauthorized and invalidated hardware installation will null and void the
system warranty.
Steps
1. If installed, remove the filler bracket.
NOTE:
Store the filler bracket for future use. Filler brackets must be installed in empty expansion card slots to maintain
Federal Communications Commission (FCC) certification of the system. The brackets also keep dust and dirt out of the
system and aid in proper cooling and airflow inside the system.
2. Open the blue latch on the system board.
3. Slide the OCP card into the slot in the system.
4. Push until the OCP card is connected to the connector on the system board.
5. Close the blue latch to lock the OCP card to the system.
NOTE: The numbers on the image do not depict the exact steps. The numbers are for representation of sequence.
Installing and removing system components 153