AssuredSAN 4004 Series Setup Guide 19
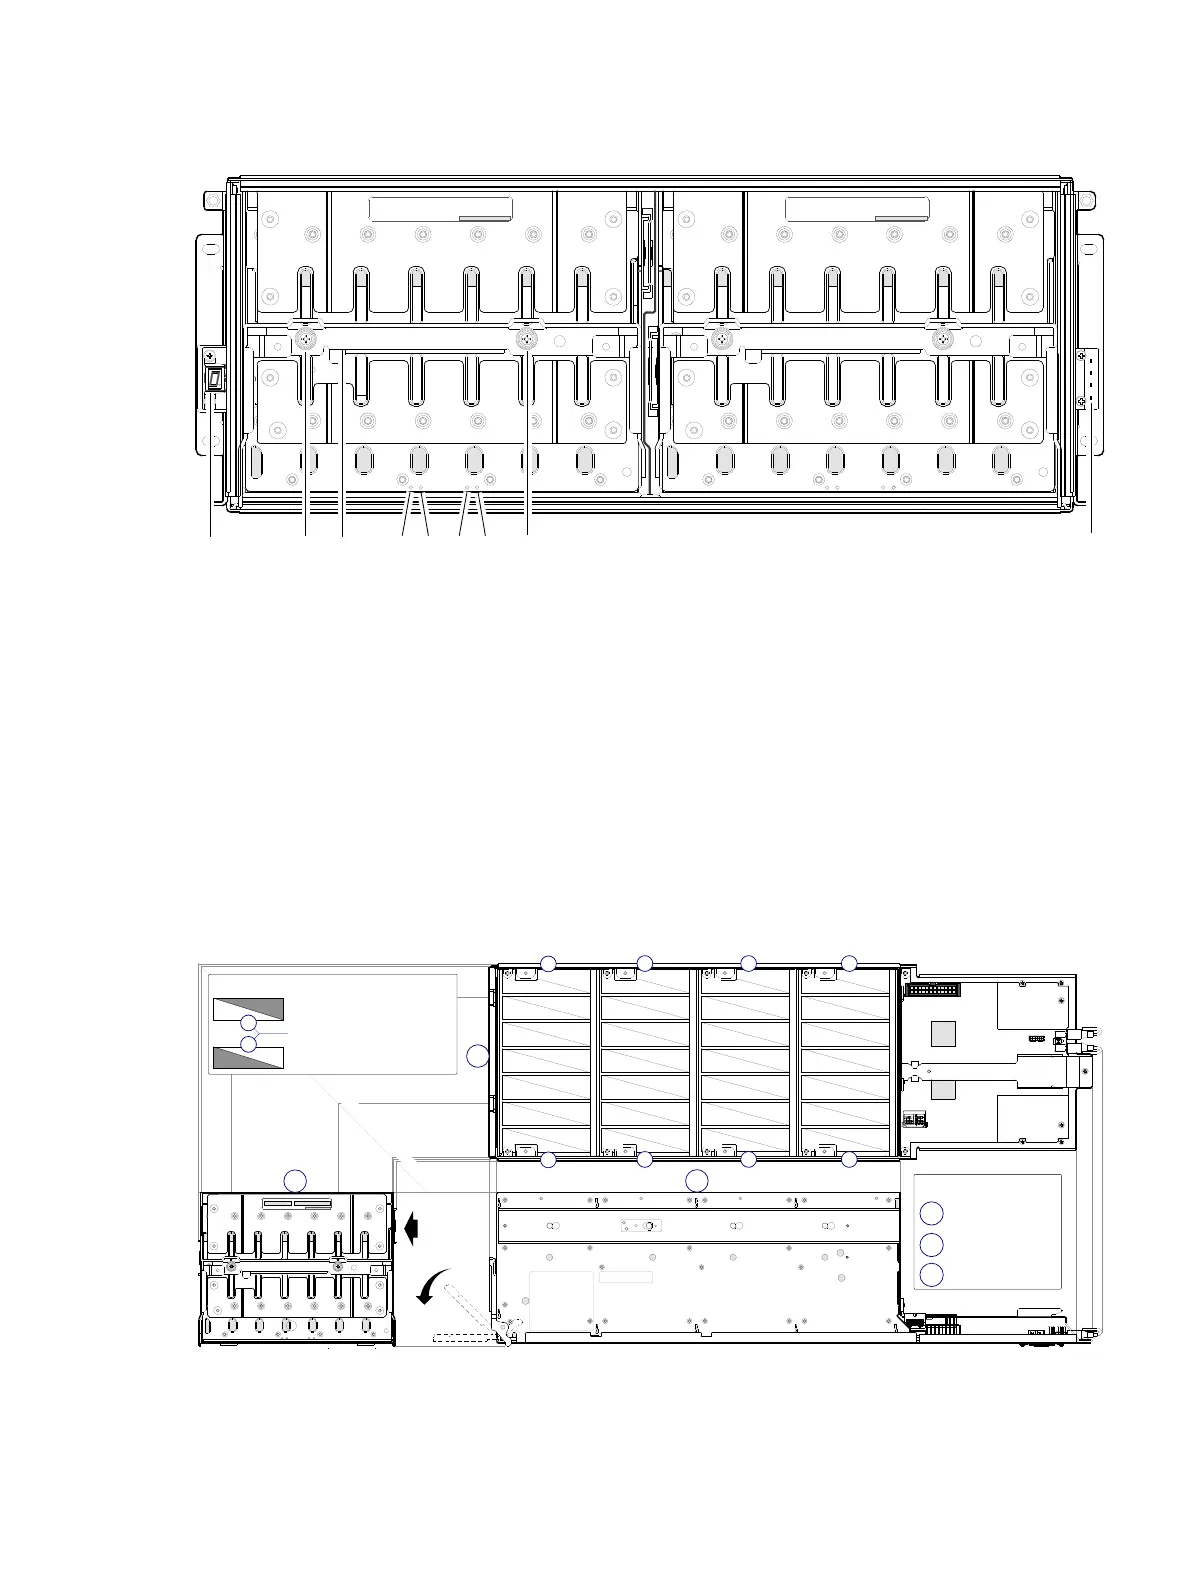
4U56 enclosure bezel removed
To access the drawers, you must remove the enclosure bezel (shown removed in Figure 7).
Figure 7 4U56 enclosure: front panel with bezel removed
Figure 7 shows the drawer handle in stow (closed and locked) position.
4U56 enclosure drawers
You can open the enclosure drawers to access the disks. Drawers 0 and 1 provide access to disks that are
oriented vertically—such that the back face of the disk faces down—and is inserted into the drawer disk
slots from above. A single drawer diagram is used to describe the numbering scheme.
Figure 8 4U56 enclosure: drawer front and side views with disk slot numbering
Your 4U56 enclosure is shipped with the drawers installed, but they are not populated with disks. Although
Air Management Solution (AMS) inserts are used with other AssuredSAN enclosures, they are not used by
the 4U56 enclosure. Locate the box containing your sledded disks.
1 Enclosure ear LEDs (see Figure 6 on page 18)
2 Thumbscrews for securing or accessing drawer
3 Drawer handle (shown in stowed position)
4 Drawer status LED: Unit Locator
5 Drawer status LED: OK to Remove
6 Drawer status LED: Fault/Service Required
7 Drawer status LED: FRU OK
DRAWER 0
DRIVES 0 − 27
PN: 21−00000590−00−01 rev A
DRAWER 1
DRIVES 28 − 55
PN: 21−00000590−00−02 rev A
Left ear
Right ear
123 4 5 6 7
1
Note: Bezel is removed and rails are not installed in this view.
2
PN: 21−00000590−00−02 rev A
0
28
1
29
2
30
3
31
4
32
5
33
34
7
35
8
36
9
37
10
38
11
39
12
40
41
42
15
43
16
44
17
45
18
46
19
47
48
49
22
50
23
51
23
52
25
53
26
54
55
14 21
2720
13
6
A
B
C
Front view
Top view
Right side view
Diagram legend:
A
Drawer multiviews
Disk rows with sequentially−numbered disk slots
B
C
0
3
1
2
0
3
1
2
D0
D1
Drawer 0 slot numbers
Drawer 1 slot numbers
Key: drawer/row/slot numbering
n
n
Disk row numbers
45° orthographic bisector
Revolve
handle