AssuredSAN 4004 Series Setup Guide 29
Populating drawers in 2U48 enclosures
Although the 2U48 chassis provides pre-assembled and pre-installed drawers, disk drive modules must be
installed into the drawers. In addition to locating your disk modules—and any Air Management Solution
(AMS) inserts, you should become familiar with the following concepts before populating the drawers:
• Full Disk Encryption (FDE) firmware feature (see FDE considerations on page 37).
• Preventing electrostatic discharge (see Electrostatic discharge appendix).
IMPORTANT: Please review the bullet topics above before populating the drawers.
Opening and closing a 2U16 drawer
You can open a drawer for visual inspection of disk bays. Before accessing the drawer via its handle, you
must first remove the enclosure bezel (see Enclosure bezel removal on page 104). Given that the enclosure
bezel is required to provide EMI protection, you should re-attach the bezel to the enclosure after examining
the drawer (see Enclosure bezel attachment on page 104).
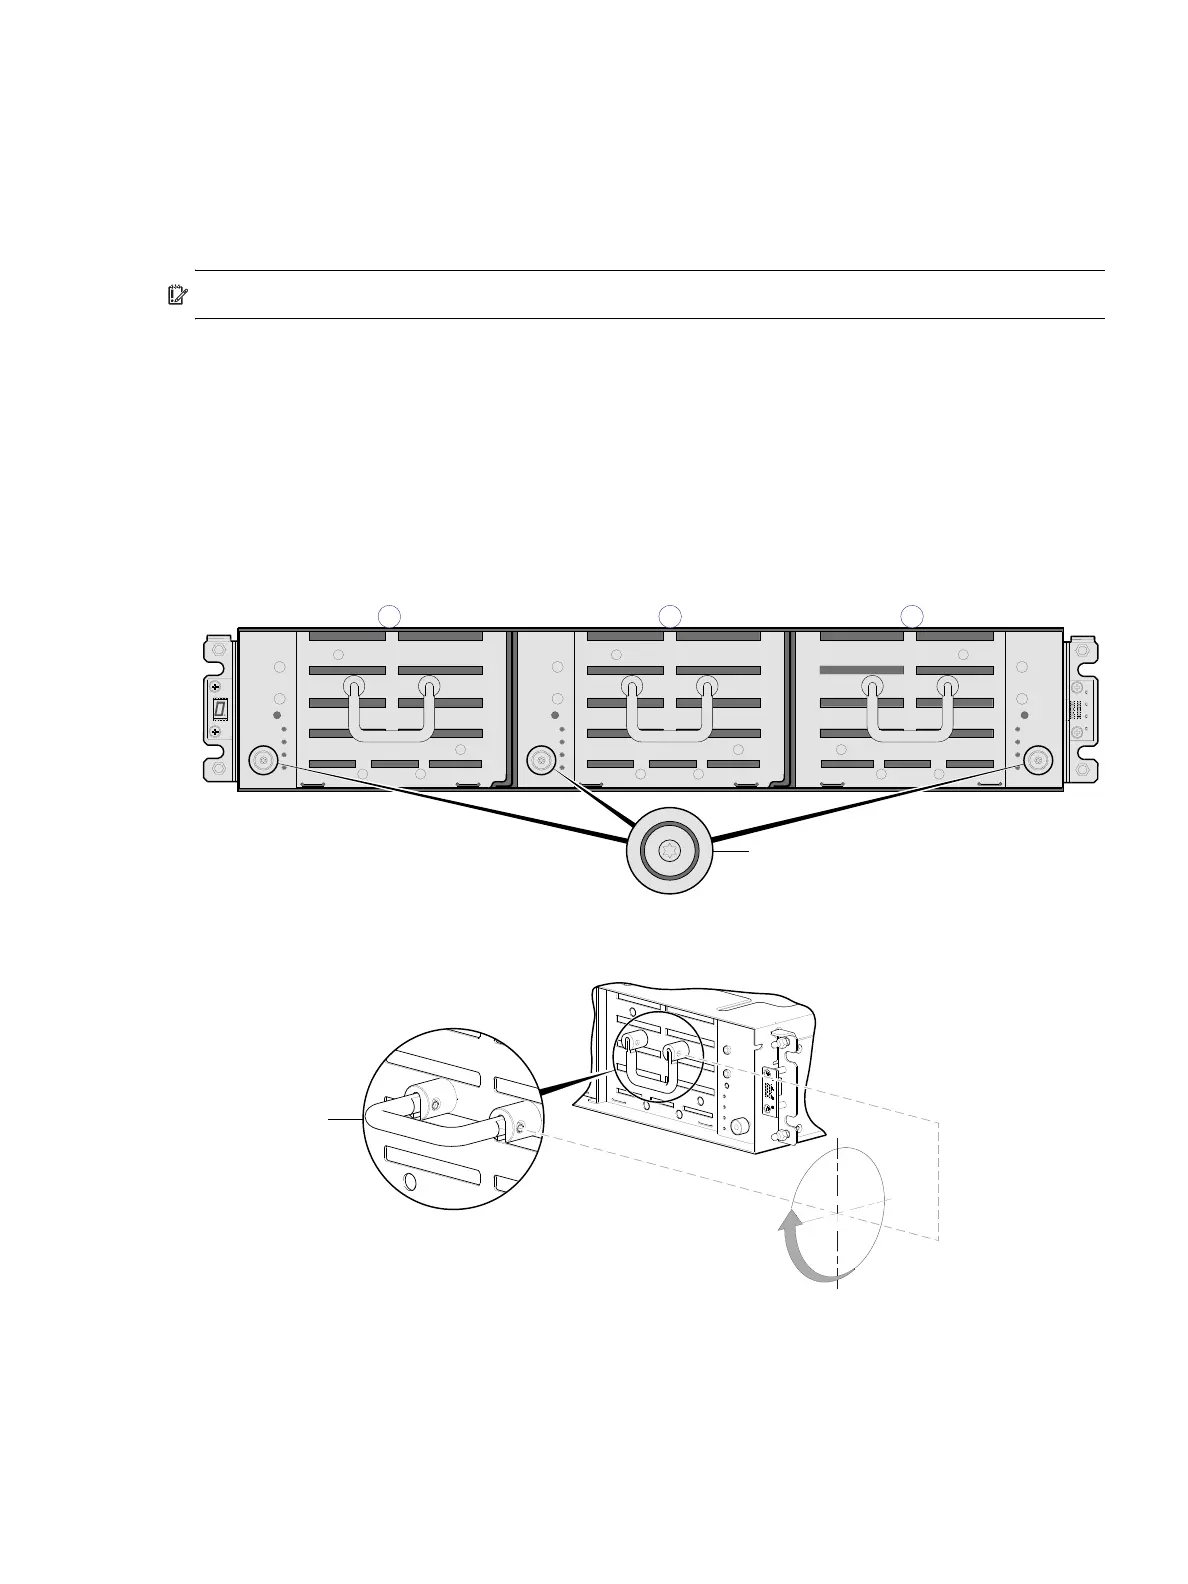
1. Using a Torx T15 or straight blade screwdriver, loosen the drawer stop screw on the front face of the drawer.
Once the screw is loosened, turn the outer thumbwheel counter-clockwise to unlock the drawer. Take
care not to remove the screw.
Figure 18 Opening a 2U16 drawer: loosen the drawer stop screw
2. Revolve the drawer handle upwards by 90to enable pulling the drawer outward for viewing disks.
Figure 19 Opening a 2U16 drawer: revolve the handle
3. Face the front of the drawer—and using the handle—pull the drawer outward along the drawer slide
until it meets the drawer stop.
Enclosure front panel with bezel removed showing left (0), middle, (1) and right (2) drawers
Loosen screw on target drawer
The drawer handle functions identically on all drawers.
Pull position