34 Installing the enclosures
Figure 28 Opening a 4U28 drawer: revolve the handle
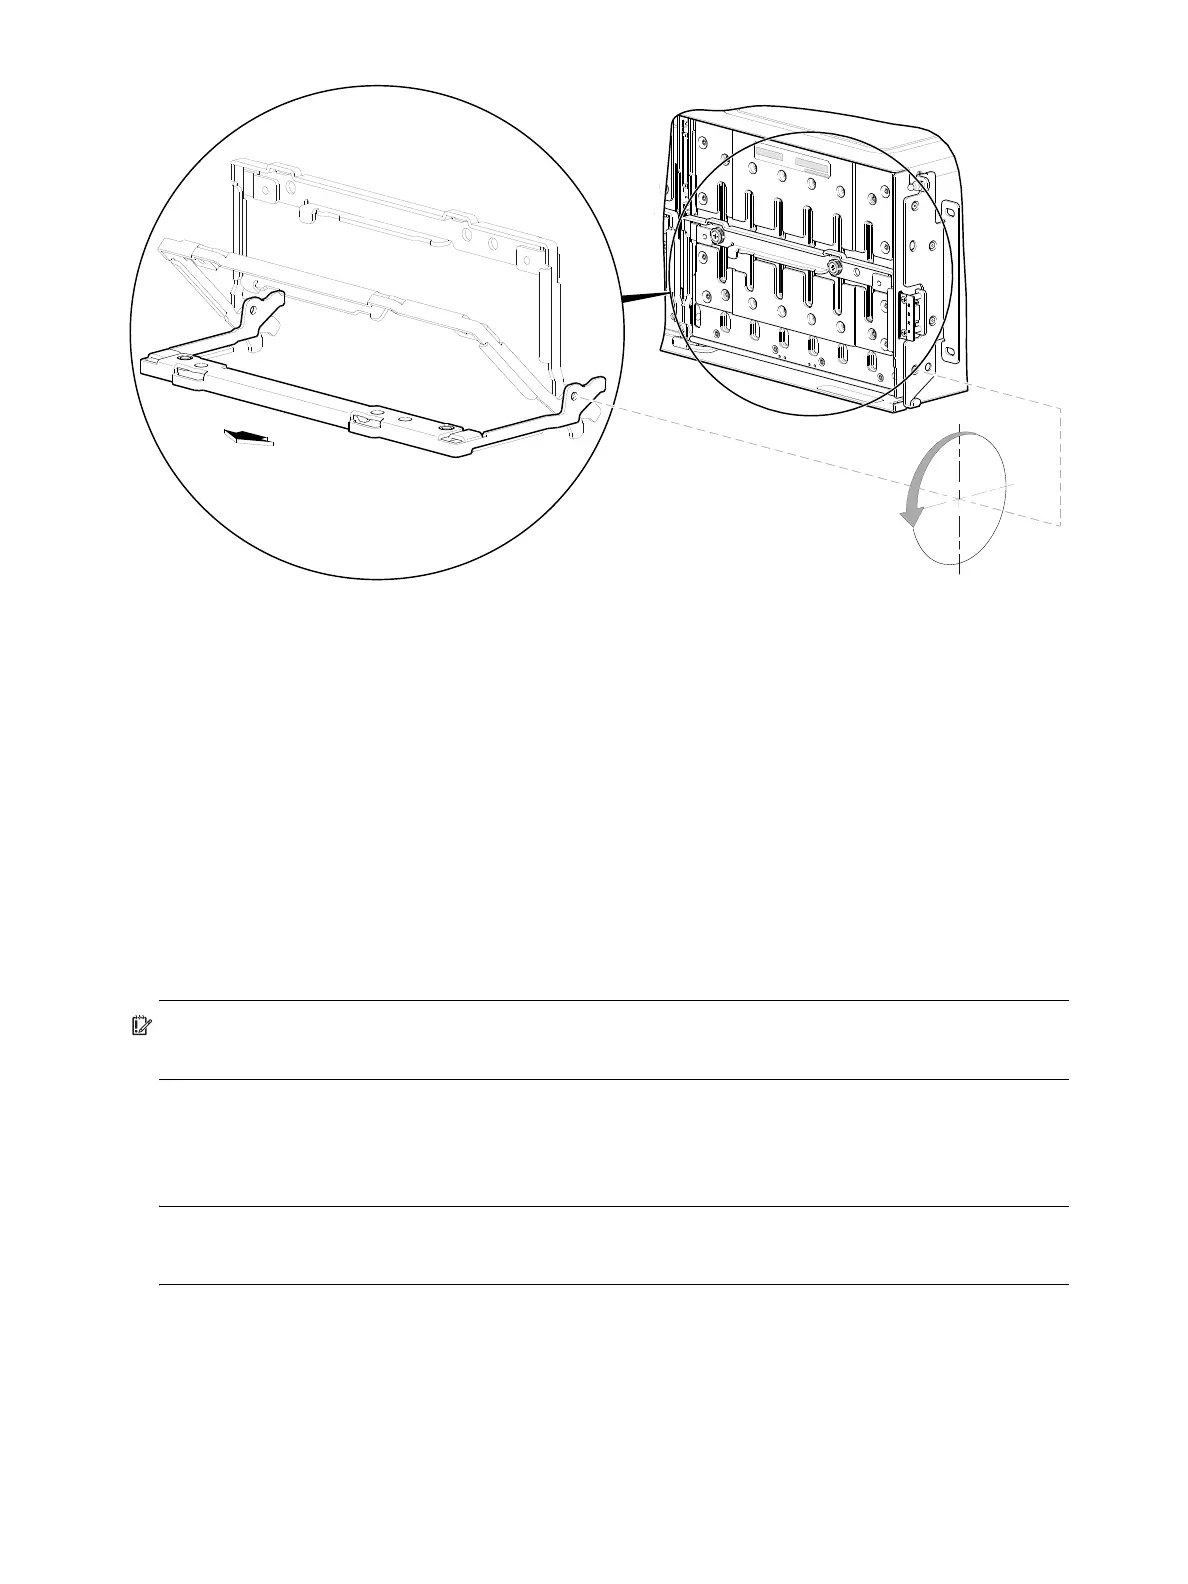
The detail at left in Figure 28 shows the drawer handle in pull and stow (closed and locked) position.
4. Face the front of the drawer—and using the handle—pull the drawer outward along the drawer slide
until it meets the drawer stop (see Figure 29 on page 35).
To close the drawer, simply slide the drawer into the enclosure along the drawer slide until it properly seats
in the drawer bay. Take care to ensure that no loose cable wires protrude beyond the limits of the igus
chainflex cable. After closing the drawer, rotate the handle upwards such that it is flush with the drawer
front panel. Tighten the two thumbwheel screws on each drawer handle. Re-attach the enclosure bezel to
the front of the enclosure (see Enclosure bezel attachment on page 104).
Aligning a disk module for installation into a 4U28 drawer
Once you have opened the drawer, you can access the disk bays. The enclosure uses a sledded disk positioned
to stand on end, for insertion into the drawer. Each sledded disk or SSD is mated to its connector on the drawer
PCBA.
IMPORTANT: Please refer to the disk slot numbering diagram on the center exterior wall of the target
drawer.
For Drawer 0 (left drawer), the pictorial is on the right exterior drawer wall. For Drawer 1 (right drawer) the
pictorial is on the left exterior drawer wall. Disk row and slot numbering is also provided in Figure 8 on
page 19.
NOTE: Blank disk drive slots are allowed. Unlike other Dot Hill Systems enclosures, the AssuredSAN
4004 Series does not employ an Air Management Solution (AMS) for use in empty disk drive slots.
During setup of your storage system, you will need to install disk modules into the drawers. You may also
need to remove a disk module, or move it to a different slot. Both procedures are provided herein.
90°
Drawer handle
S tow position
Pull position
Revolve handle to suit open
and close drawer actions.
Enclosure front panel (partial)