Acclarix LX9 Series Diagnostic Ultrasound System User Manual
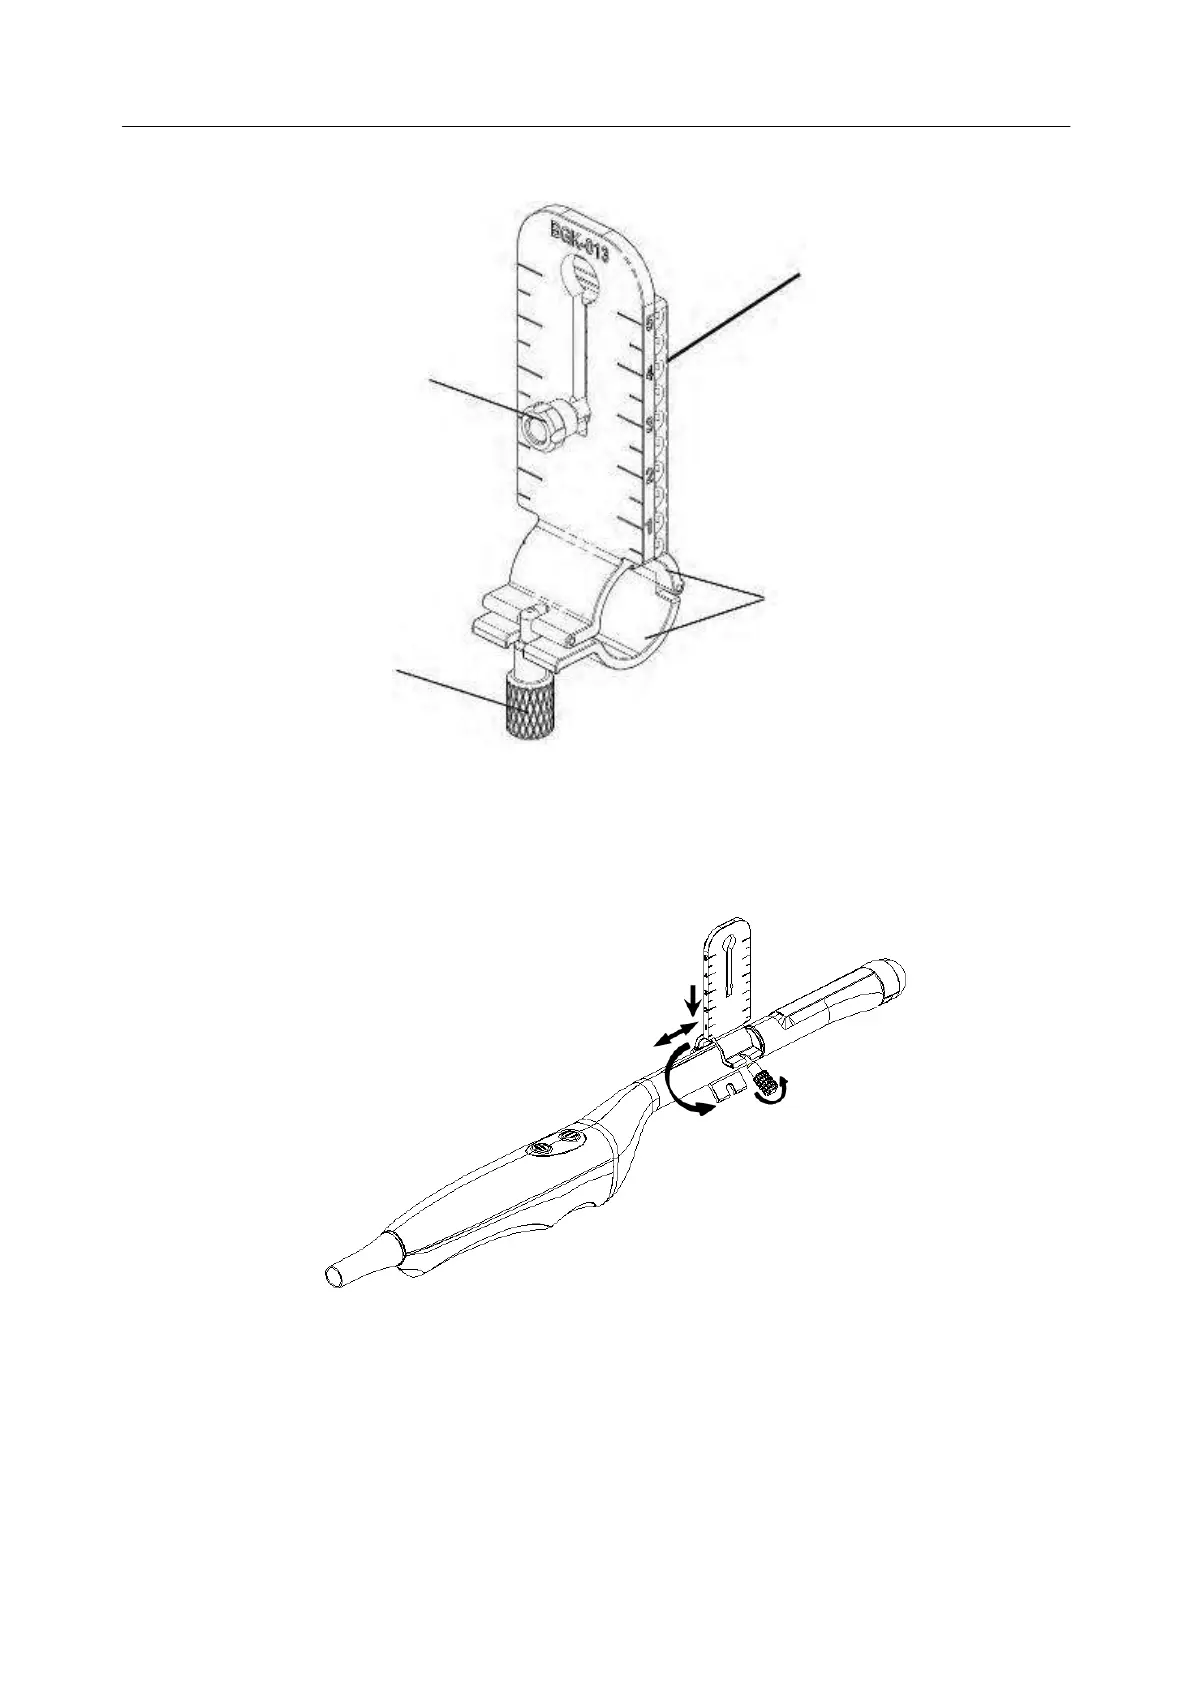
BGK-013
Structures:
Needle guide
Structure
Adjusting knob
Clamp
Locking Knob
Installation and Use Steps
1. Place an appropriate amount of gel on transducer surface, and insert transducer into the sheath.
2. Loosen the locking knob to open the clamp of bracket. Attach the bracket to the transducer by
aligning the locating markers on the bracket and the transducer. Properly secure the clamp with
the locking knob. Ensure the bracket is firmly attached.
3. Release the adjusting knob and move it up and down to adjusting the height of the needle guide
structure. Secure the adjusting knob when the desired height is reached.
4. Insert the biopsy needle into the needle guide path and do the biopsy.
5. After biopsy, remove the needle, and loosen the locking knob to remove the bracket from the
transducer.
 Loading...