Acclarix LX9 Series Diagnostic Ultrasound System User Manual
General Settings:
Auto-erase comments when the image is unfrozen: If this option is enabled, the comments will
be erased when the image is unfrozen, otherwise the comments will only be erased on demand
or at the start of a new exam.
Single arrow in comment: If this option is enabled only one single arrow will be added at a time
when adding comments on an image.
English Comment Library: If this option is enabled the system will use the comments library in
English even if the system language is not English.
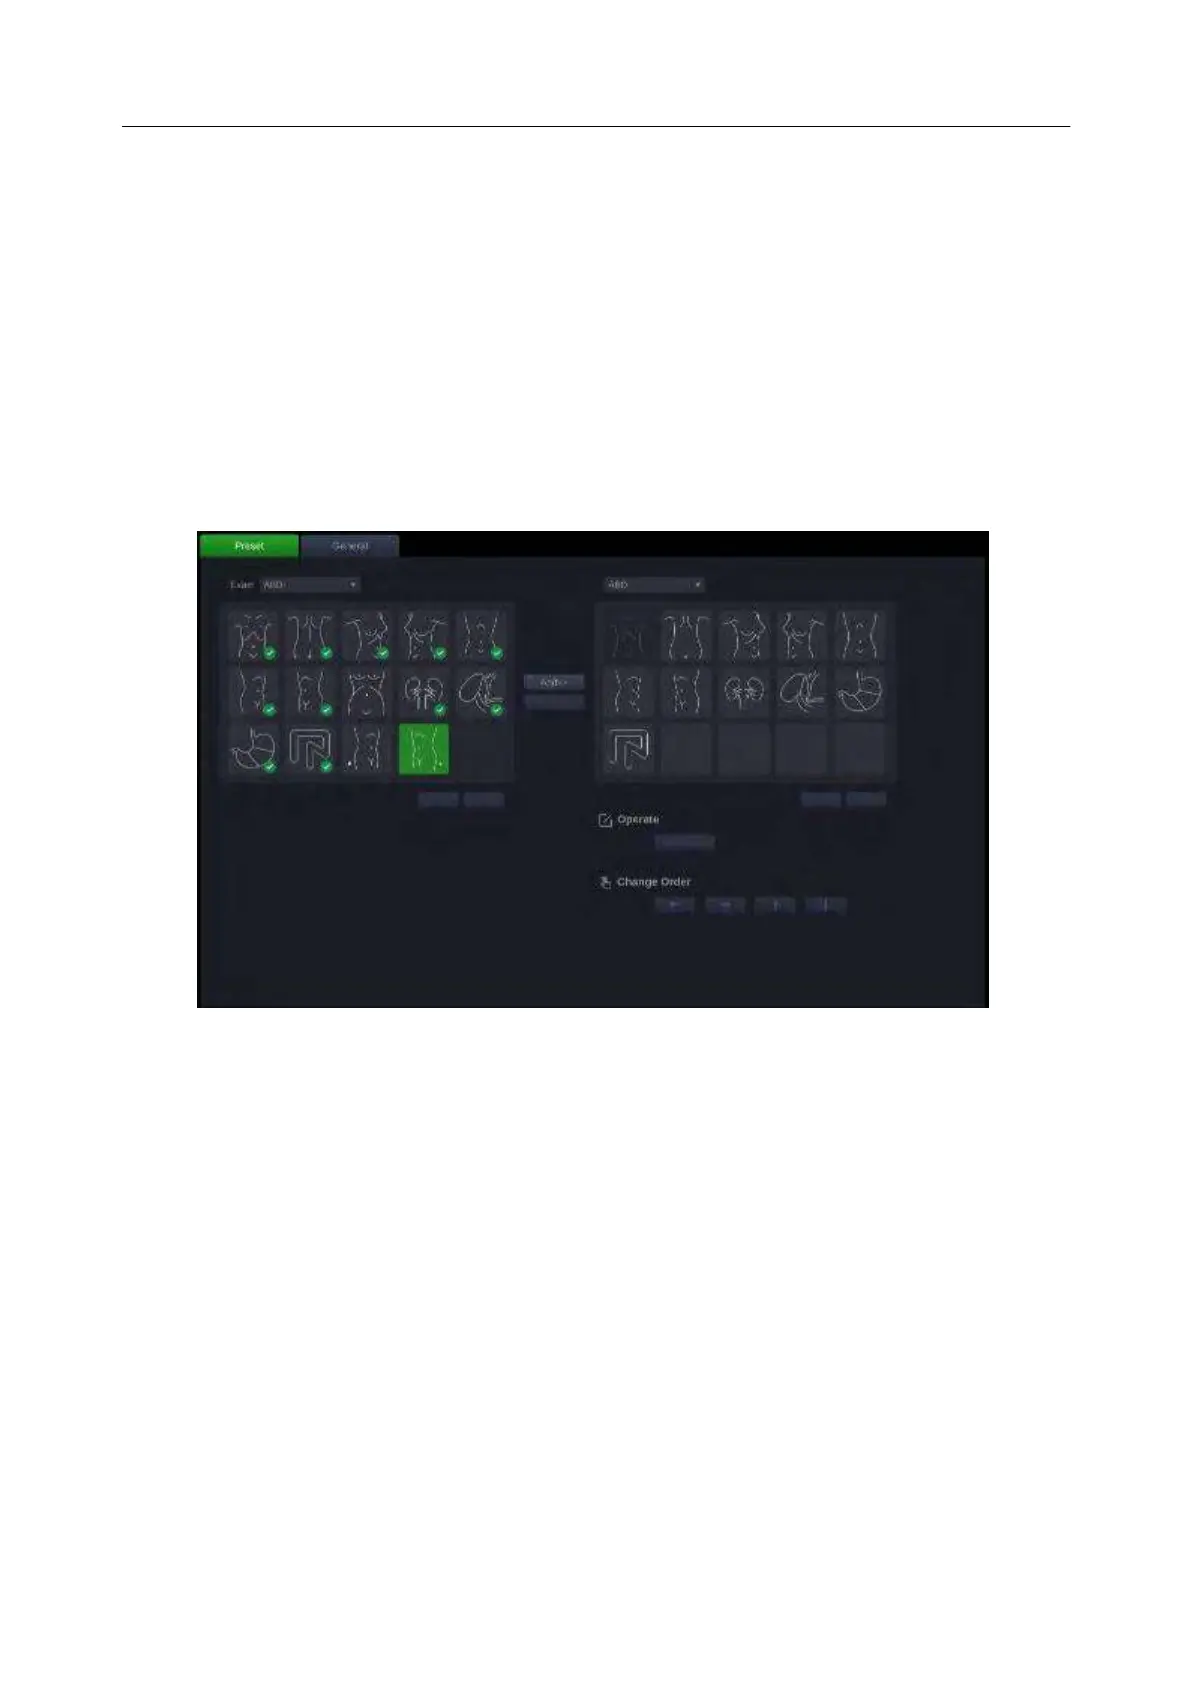
10.4 Body Mark Preset
Entering Body Mark screen:
Press Utilities-> Body Mark touch screen buttons to access Body Mark preset screen, as the
illustration figure shown below.
The left side of the Body Mark Preset page is the Body Mark Library, and the right side is the pre-
defined graphics area. On the Body Mark Preset page you can configure which body mark graphics
appear with each Body Mark preset.
Editing Body Mark Preset:
Select a Body Mark preset from the upper side of the pre-defined graphics area, and then you can do
the followings to edit the body mark preset for the selected preset.
Adding a Body Mark to a Preset:
The left side of the main screen provides the Body Mark Library. Select one category in the Exams
drop-down list, for example ABD, and all body marks of the Abdomen exam will be displayed on the
left screen. Press to select a body mark, and press the Add button to add the body mark to the pre-
defined graphics area.
If the pre-defined graphics of Body Mark is more than one page, the system will automatically create a
new page. Press "<" / ">" button in the lower right corner to turn the page.
Removing a Body Mark from a Preset:
Move the cursor to a Body Mark graphic in pre-defined graphics area and press <Set> key. Press
the Remove button to remove it.
 Loading...