F9, F9 Express Fetal & Maternal Monitor User Manual Fetal Monitoring Display
- 106 -
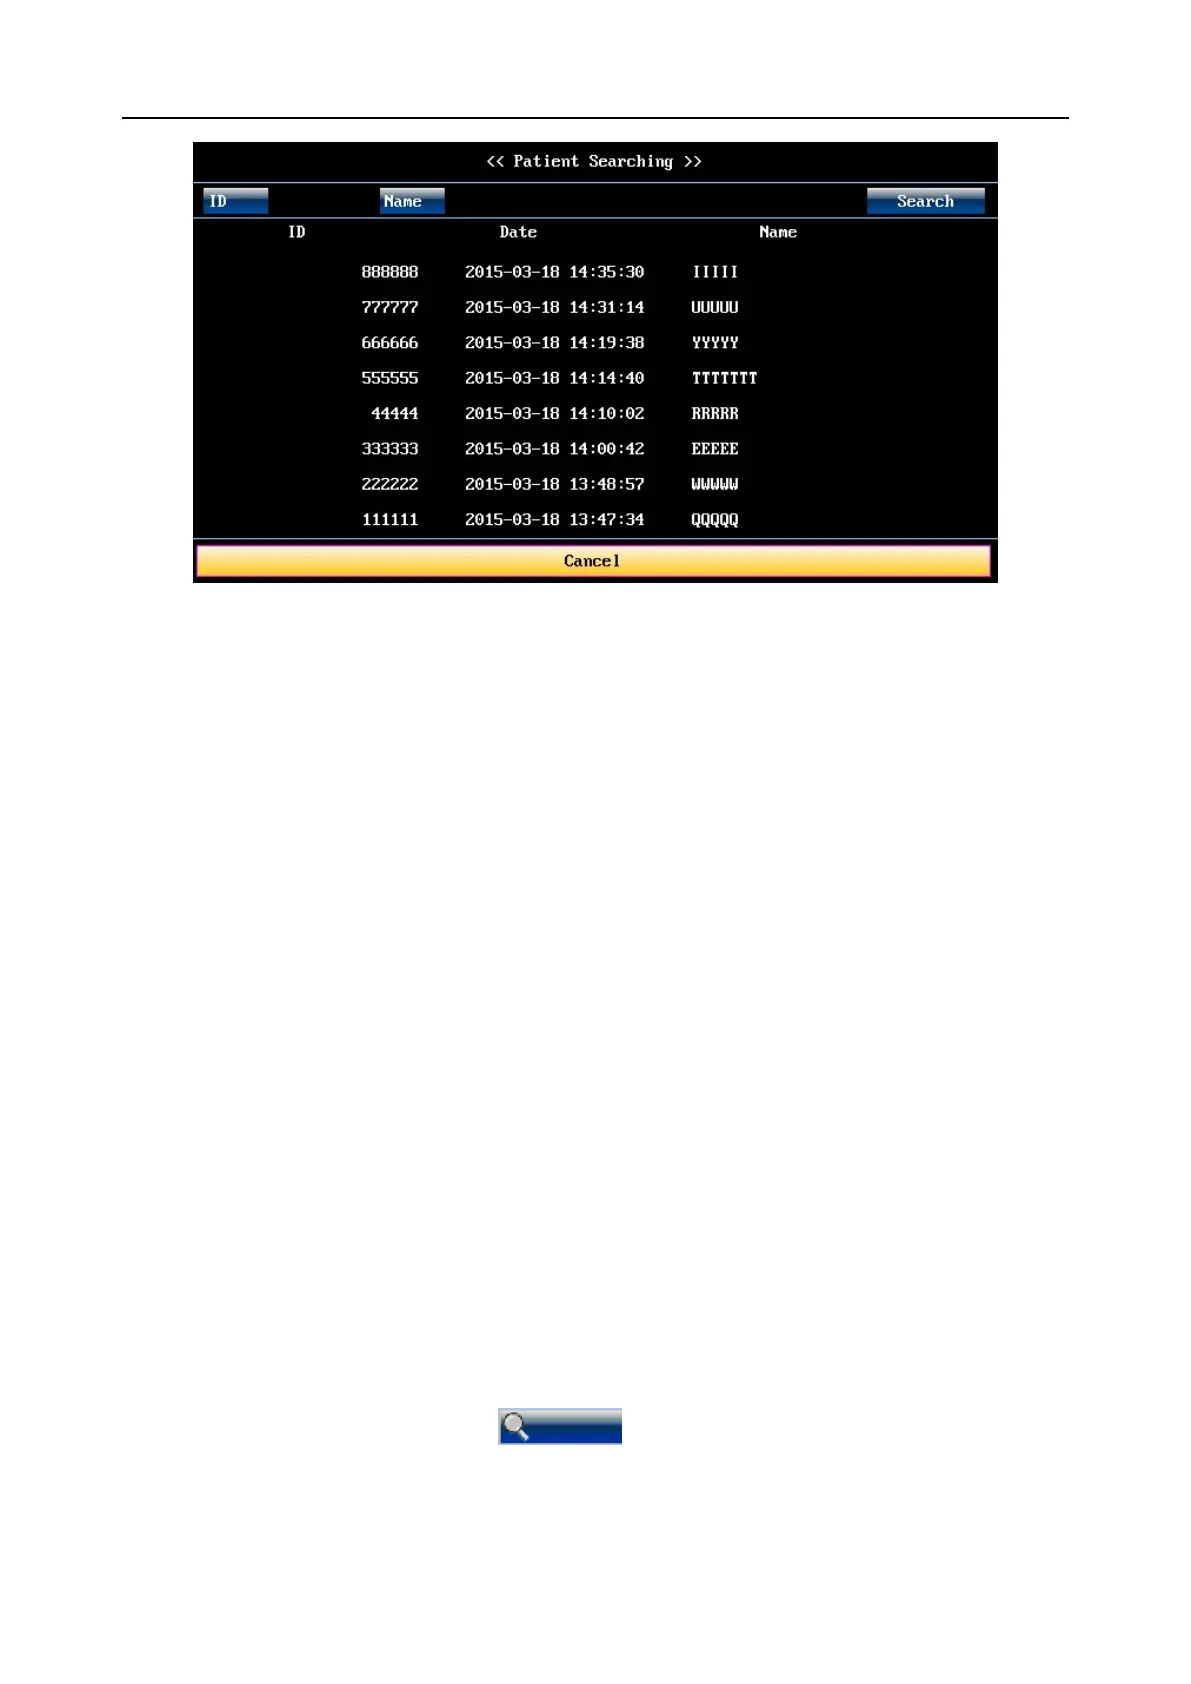
Figure 8-4 Patient Searching
3 Select ID, input the patient ID with the soft keyboard and select Enter.
4 Select Name, input the patient‟s name with the soft keyboard and select Enter.
NOTE:
You can input only a part of the patient ID or name. However, the more information you
input, the more accurate result you will get.
5 Select Search. The files with the matched information are listed in the window.
6 Select the required item, and this file is loaded to the main interface immediately. You can
review the traces backward or forward.
8.2.3 File Management (Optional)
The USB facility of the monitor allows you to export the auto-saved files into a USB disk, and
then you can save the files in a PC or open them in a data managing system.
Once the monitor is configured with the relevant hardware, the USB feature can be enabled or
disable by the service personnel of the manufacturer.
8.2.3.1 Exporting Files
1 Make sure the USB feature is enabled. Stop printing and disconnect the network.
2 Plug the USB disk into the USB socket on rear panel of the monitor (figure 2-4). A message
“Ready to use USB disk” in the message area indicates the proper insertion of the disk.
3 Select the file managing key on the main interface to open the File
Management interface, which records a list of up to 300 most recent monitoring records
(patients‟ ID, name and date) and a few operation items.