FloBoss 407 Instruction Manual
Rev 5/00 I-3
Figure 3-3. AI Loop Module Field Wiring for Voltage
Devices...................................................................3-9
Figure 3-4. AI Differential Module Field Wiring for
Low Voltage Devices...........................................3-10
Figure 3-5. AI Differential Module Field Wiring for
Higher Voltage Devices.......................................3-11
Figure 3-6. AI Differential Module Field Wiring for
Current Loop Devices..........................................3-11
Figure 3-7. AI Source Module Field Wiring for
Voltage Devices...................................................3-12
Figure 3-8. AI Source Module Field Wiring for
Current Loop Devices..........................................3-12
Figure 3-9. Analog Output Source Module Field
Wiring for Current Loop Devices ........................3-13
Figure 3-10. Analog Output Source Module Field
Wiring for Voltage Devices .................................3-13
Figure 3-11. Discrete Input Source Module Field
Wiring..................................................................3-14
Figure 3-12. Discrete Input Isolated Module Field
Wiring..................................................................3-15
Figure 3-13. Discrete Output Source Module Field
Wiring..................................................................3-16
Figure 3-14. Discrete Output Isolated Module Field
Wiring..................................................................3-17
Figure 3-15. Discrete Output Relay Module Field
Wiring..................................................................3-18
Figure 3-16. Pulse Input Source Module Field Wiring
.............................................................................3-19
Figure 3-17. Pulse Input Isolated Module Field Wiring
.............................................................................3-20
Figure 3-18. Slow Pulse Input Source Module Field
Wiring..................................................................3-21
Figure 3-19. Slow Pulse Input Isolated Module Field
Wiring..................................................................3-22
Figure 3-20. Low-Level Pulse Input Module Field
Wiring Schematic.................................................3-23
Figure 3-21. Calibration Setup ...............................3-24
Figure 3-22. RTD Input Module Field Wiring for
Two-Wire RTDs ..................................................3-26
Figure 3-23. RTD Input Module Field Wiring for
Three-Wire RTDs ................................................3-26
Figure 3-24. RTD Input Module Field Wiring for
4-Wire RTD With Compensation Loop...............3-27
Figure 3-25. Field Wiring for 4-Wire, Single Element
RTD .....................................................................3-27
Figure 3-26. Field Wiring for a HART Interface
Module.................................................................3-28
Figure 4-1. EIA-232 Serial Communications Card..4-3
Figure 4-2. EIA-422/485 Serial Communications Card
...............................................................................4-5
Figure 4-3. Radio Modem Communications Card...4-7
Figure 4-4. Leased-Line Modem Communications
Card........................................................................4-8
Figure 4-5. Dial-up Modem Communications Card .....
...............................................................................4-9
Figure 4-6. Communications Card Location..........4-11
Figure 4-7. EIA-232 Wiring Schematic.................4-14
Figure 4-8. EIA-422 Wiring Schematic.................4-15
Figure 4-9. EIA-485 Wiring Schematic.................4-15
Figure 4-10. Radio Modem Wiring Schematic......4-16
Figure 4-11. Leased-Line Modem Wiring Schematic ..
.............................................................................4-18
Figure 4-12. Dial-Up Modem Wiring Schematic ..4-19
Figure 5-1. FloBoss 407 Display and Keypad.........5-2
Figure 5-2. Keypad Layout......................................5-3
Figure 5-3. Operations Key.....................................5-4
Figure 5-4. General Display Format......................5-10
Figure 5-5. User List Display................................5-12
Figure 5-6. Alarm Summary Display.....................5-12
Figure 5-7. Min/Max History List Format.............5-13
Figure 5-8. Min/Max History List Example ..........5-13
Figure 5-9. Min/Max History Minimum Value
Example ...............................................................5-13
Figure 5-10. Min/Max History Maximum Value
Example ...............................................................5-13
Figure 5-11. Min/Max History Current Value Example
.............................................................................5-14
Figure 5-12. Minute History List Format ..............5-14
Figure 5-13. Minute History List Example............5-14
Figure 5-14. Minute History Value Example ........5-15
Figure 5-15. Hour History List Format..................5-15
Figure 5-16. Hour History List Example...............5-15
Figure 5-17. Hour History Value Example............5-15
Figure 5-18. Day History List Format...................5-16
Figure 5-19. Day History List Example.................5-16
Figure 5-20. Day History Value Example .............5-16
Figure A-1. Lightning Protection Module.............. A-1
Figure A-2. Typical Lighting Protection Module
Installation ............................................................ A-2
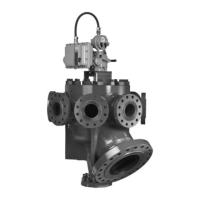
Figure B-1. MVS101R Multi-Variable Sensor....... B-2
Figure B-2. MVS205R Multi-Variable Sensor........ B-2
Figure B-3. FloBoss 407 and Integral MVS Outline
and Mounting Dimensions.................................... B-3
Figure B-4. Pipe Mounting of FloBoss 407 with
Integral MVS ........................................................ B-4
Figure B-5. MVS101R Mounting........................... B-5
Figure B-6. MVS205R Pipe Mounting................... B-6
Figure B-7. MVS205R Panel Mounting................. B-6
Figure B-8. Signal Hook-Up for a Integral MVS
Installation ............................................................ B-7
Figure B-9. Wiring the MVS101R......................... B-9
Figure B-10. Signal Hook-Up for a Integral MVS
Installation (MVS205 shown)............................. B-10
Figure B-11. Typical RTD Installation for MVS101
............................................................................ B-11
Figure B-12. RTD Assembly Details.................... B-12
Figure C-1. Current Loop — AO Source Module to AI
Loop Module ........................................................ C-1
Figure C-2. Current Loop — AO Source Module to AI
Differential Module .............................................. C-2
Figure C-3. Voltage Input — AO Source Module to
AI Differential Module ......................................... C-2

 Loading...