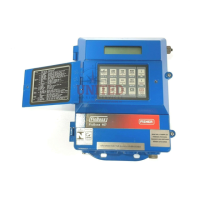
FloBoss 407 Instruction Manual
Rev 5/00 2-25
Table 2-4. Overload Protection Devices
ID RATING USE
F1 3A 100 VA power limiting fuse.
PTR1 1.25A Input power protection.
PTR2 0.30A Analog input 24 volts dc power (“+T” terminal).
2.5.7 RAM Backup and Real-Time Clock Battery
There is a battery on the processor board (installed in position B1 or B2) that provides power to the
real-time clock and backup power for the RAM. If this battery fails, the clock will stop running and
the FloBoss 407 will stop operating (the STATUS LED should be blinking). The battery is a 3.6-
volt lithium type and is secured with a hold-down clip. Under normal usage, this battery should last 5
to 10 years. However, if the FloBoss 407 is powered down for long periods of time, battery life will be
shortened.
To check the condition of the clock battery, install a new battery (see the following procedure) in the
unused battery socket location on the processor board, remove the existing battery, and use a multi-
meter to measure the voltage at the terminals of the removed battery. Leave the new battery installed if
the voltage of the old battery is less than 3.2 volts. If the old battery is still good, you can re-install it
into its socket and remove the new battery.
To install a clock battery into a functioning FloBoss 407 (if power is applied, it can remain applied):
NOTE
For Measurement Canada units, maintenance and resealing of the FloBoss
must be performed by authorized personnel only.
CAUTION
To avoid circuit damage when working with the unit, use appropriate
electrostatic discharge precautions, such as wearing a grounded wrist strap.
1.
Locate the unused battery socket (typically B2) on the processor board. Insert the new battery
in this position.
2.
Remove the old battery from the other battery socket (typically B1) by sliding the hold-down
clip to one side and lifting the battery from the board. If the clip does not readily rotate, you
may need to loosen the screw that secures it.
3.
Move the hold-down clip to the new battery (tighten the clip screw if you loosened it in Step 2).
 Loading...
