FloBoss 407 Instruction Manual
Rev 5/00 3-25
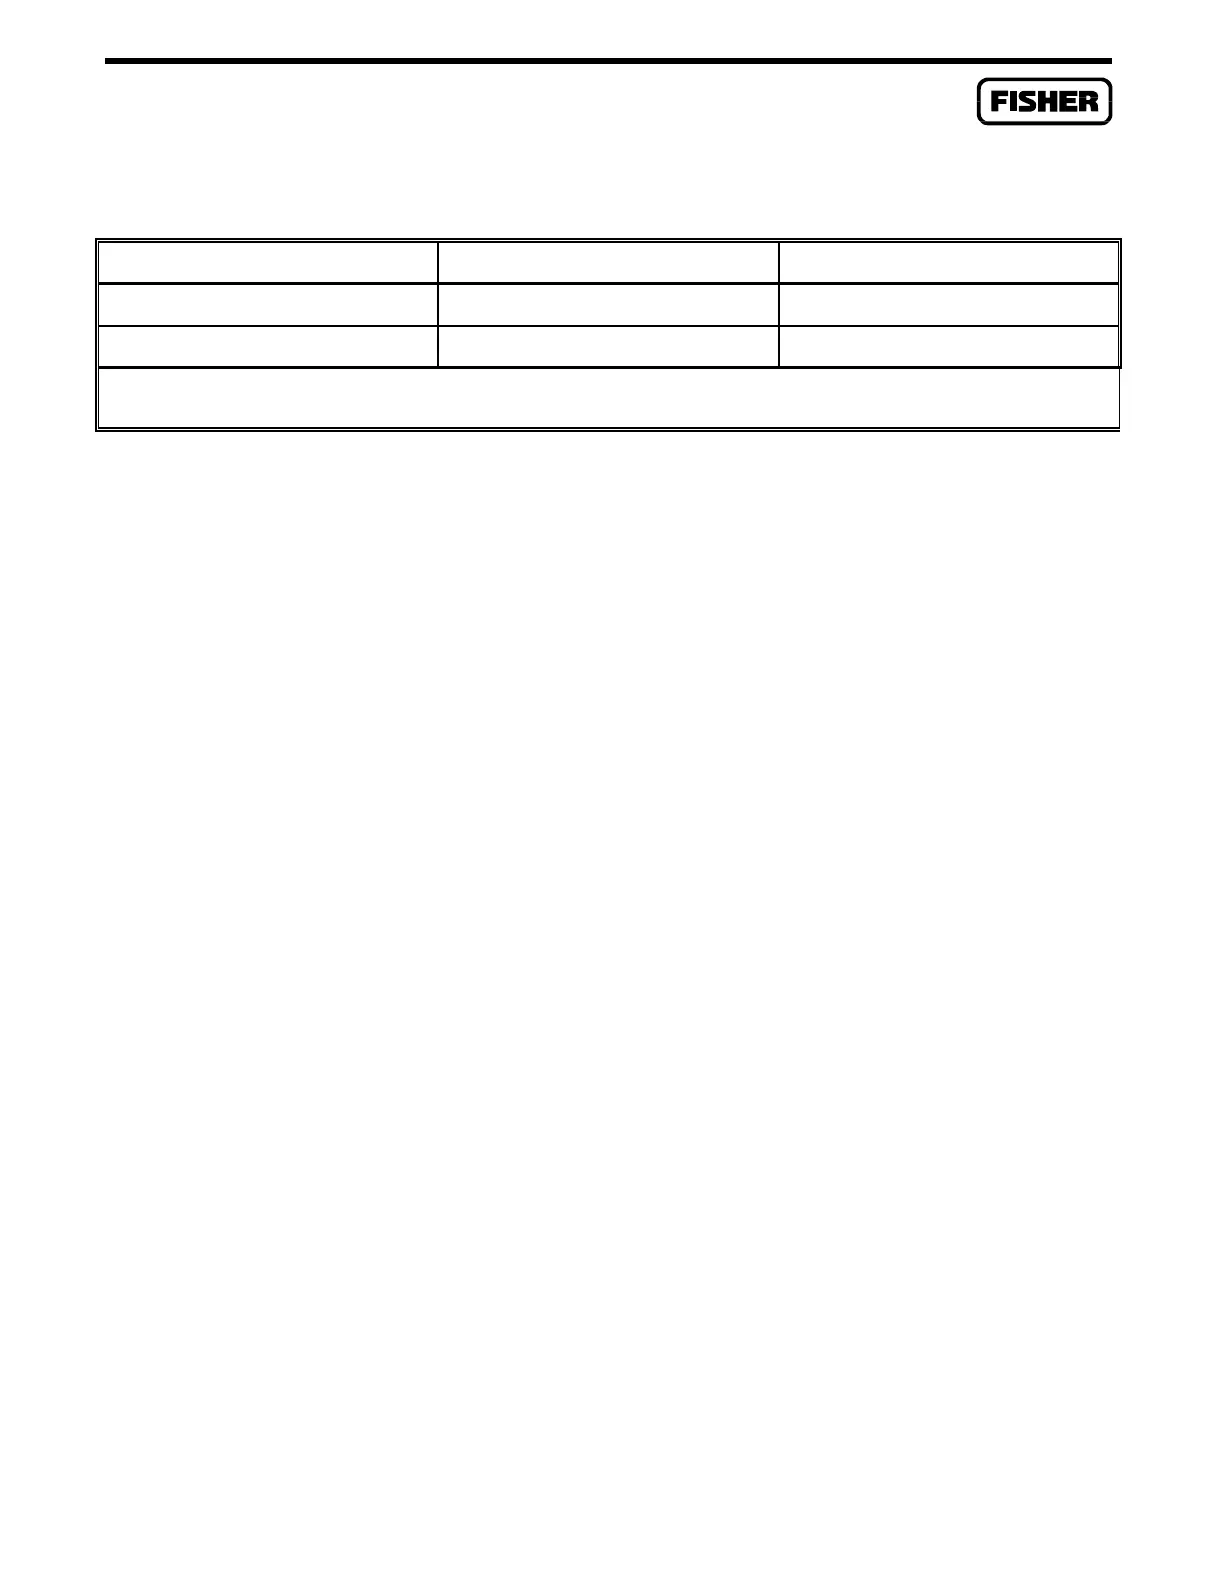
Table 3-1. Calibration Resistance Values
ALPHA -50º C 100º C
0.00385 80.31 OHMS 138.50 OHMS
0.00392 79.96 OHMS 139.16 OHMS
Note: Resistance values for RTD probes with other alpha values can be found in the temperature-to-resistance conversion
table for that probe.
1.
Connect the decade box as shown in Figure 3-21 on Page 3-24.
2.
Set the decade box to the -50° C resistance value corresponding to the RTD alpha value in
Table 3-1.
3.
Enter the value displayed for “Raw A/D Input” as the value for “Adj. A/D 0%” using the
Analog Inputs configuration screen for the RTD input (in ROCLINK, see the Advanced
Features for these parameters).
4.
Set the decade box to the 100° C resistance value given in Table 3-1.
5.
Enter the value displayed for “Raw A/D Input” as the value for “Adj. A/D 100%” using the
Analog Inputs configuration screen for the RTD input.
6.
Enter “-50” for “Low Reading EU”.
7.
Enter “100” for the “High Reading EU”.
8.
Press
F8
to save the changes.
3.4.15.2 Connecting RTD Module Field Wiring
The RTD sensor connects to the RTD module with ordinary copper wire. To avoid a loss in accuracy,
sensor wires should be equal in length, of the same material, and the same gauge. To avoid possible
damage to the RTD module from induced voltages, sensor wires should be kept as short as possible
(typically 100 feet or less). A schematic representation of the field wiring connections to the input
circuit of the RTD input module is shown in Figure 3-22, Figure 3-23, Figure 3-24, and Figure 3-25.
Two-wire RTDs are connected to module terminals A and B. Terminal B must be connected to
terminal C, as shown in Figure 3-22.

 Loading...