Configuring a protection profile Firewall Protection Profile
FortiGate Version 4.0 MR1 Administration Guide
486 01-410-89802-20090903
http://docs.fortinet.com/ • Feedback
Configuring a protection profile
If the default protection profiles do not provide the settings required, you can create
custom protection profiles.
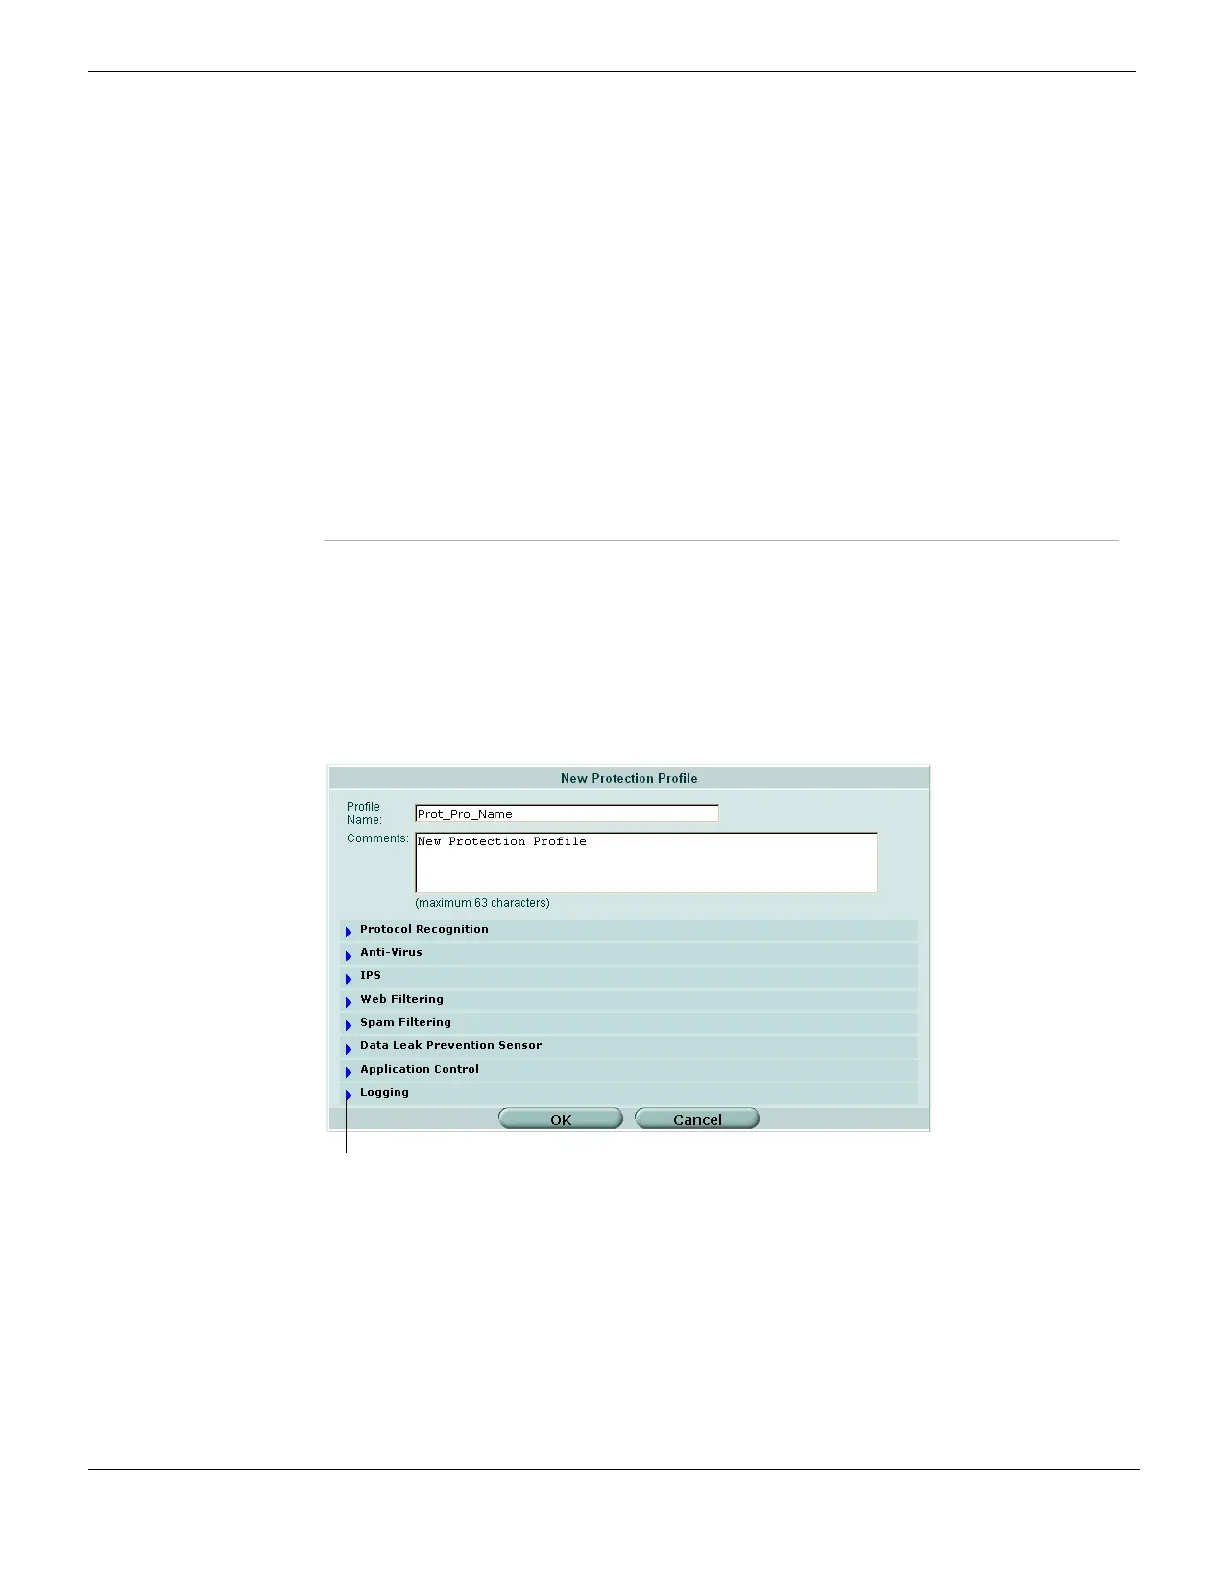
To add a protection profile, go to Firewall > Protection Profile and select Create New.
Figure 276: New Protection Profile
Displaying DLP meta-
information on the
system dashboard
DLP archive information on the Log and Archive Statistics widget on the
system dashboard for HTTPS, IMAPS, POP3S, and SMTPS.
Go to Firewall > Protection Profile. Add or edit a protection profile and
open Data Leak Prevention Sensor. For Displaying content meta-
information on the system dashboard select HTTPS, IMAPS, POP3S, and
SMTPS as required.
These options display meta-information on the Statistics dashboard
widget. For more information, see “Viewing DLP Archive information on
the Statistics widget” on page 130.
Archive SPAM email DLP archiving of email tagged as spam by FortiGate Email Filtering in
IMAPS, POP3S, and SMTPS sessions. Archive SPAMed emails to
FortiAnalyzer/FortiGuard is available only if you have configured logging to
a FortiAnalyzer unit or to the FortiGuard Analysis and Management
Service.
Go to Firewall > Protection Profile. Add or edit a protection profile and
select the Expand Arrow to view Data Leak Prevention Sensor. For
Archive SPAMed emails to FortiAnalyzer/FortiGuard, select IMAPS,
POP3S, and SMTPS as required. For more information, see “Data Leak
Prevention Sensor options” on page 501 and “DLP archiving” on
page 588.
 Loading...
