SIP support Configuring SIP
FortiGate Version 4.0 MR1 Administration Guide
01-410-89802-20090903 511
http://docs.fortinet.com/ • Feedback
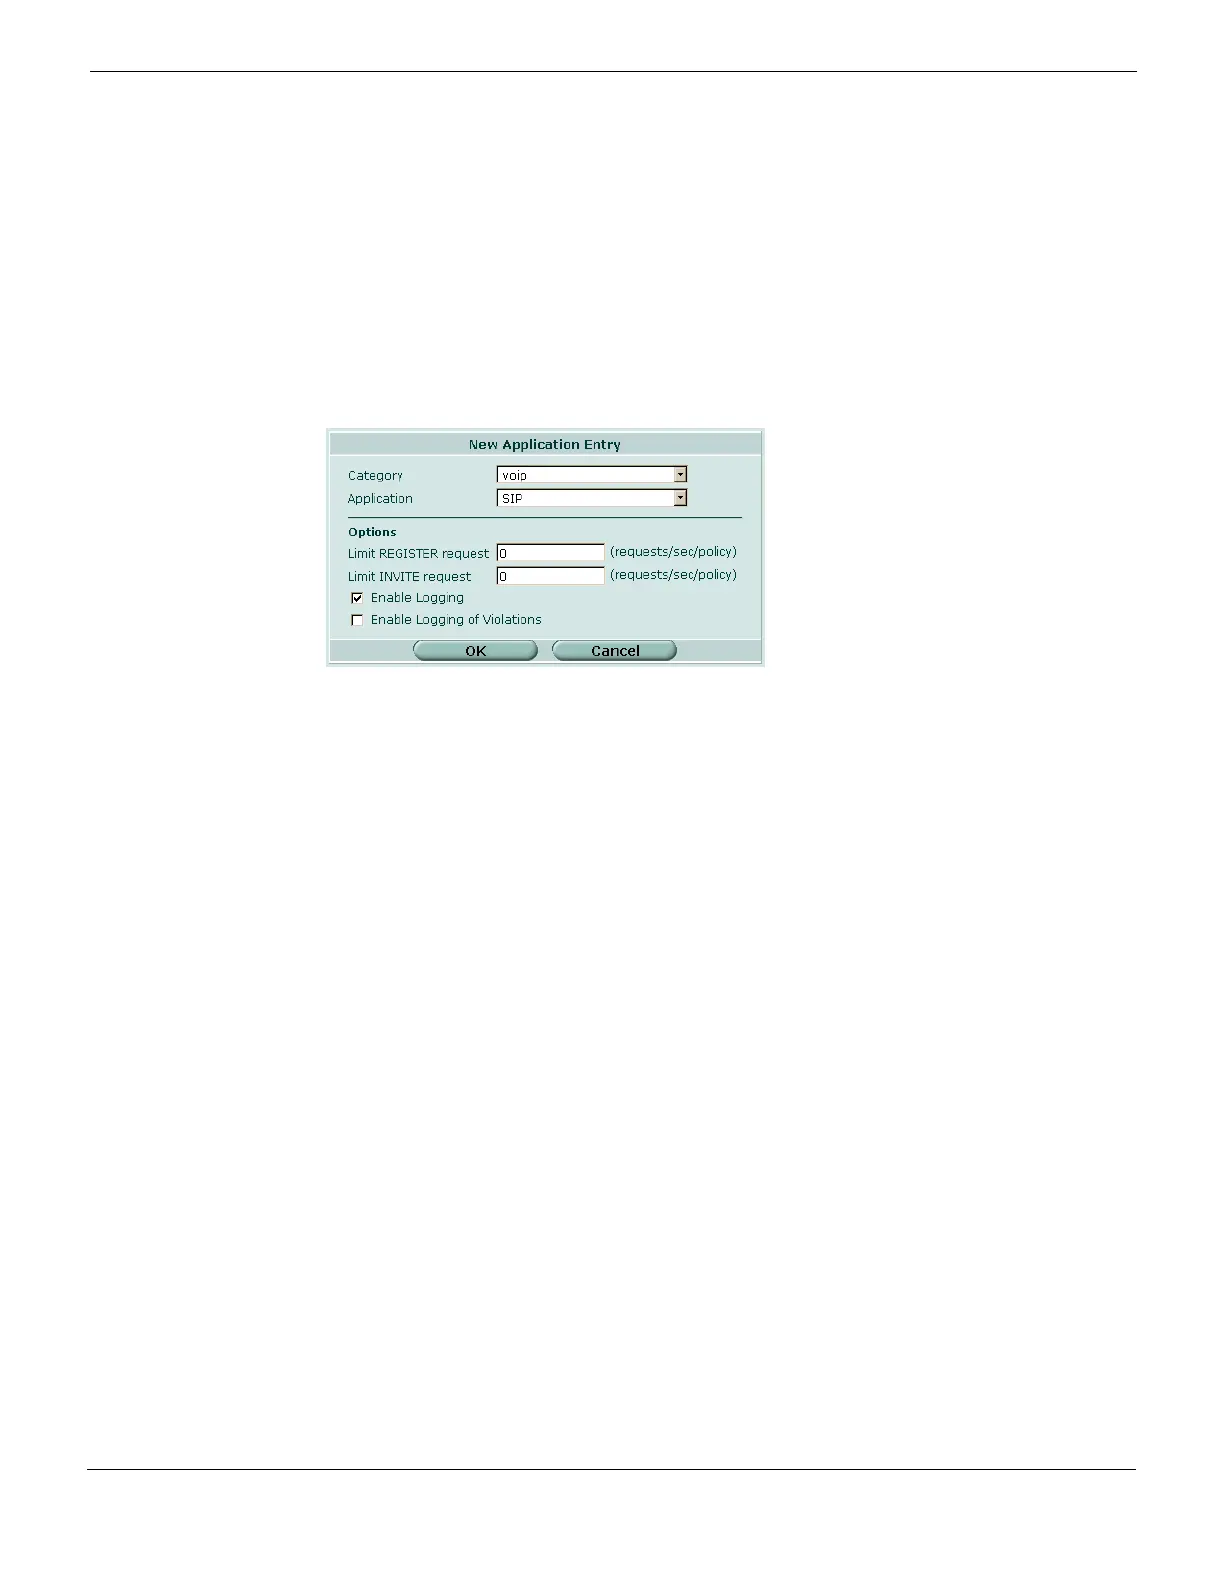
2 If you want to enable SIP for an existing application control list, select the Edit icon for
an application control list. Otherwise, select Create New to add a new application
control list.
3 Then, select Create New in the list to add a new application to the list.
4 Set Application to SIP.
You can optionally set Category to voip to make the SIP application easier to find.
5 Optionally limit REGISTER and INVITE requests.
6 Leave these set to 0 to disable rate limiting.
Figure 300: SIP Application control configuration
7 Select OK.
8 Go to Firewall > Profile and add the application control list to a protection profile.
9 Go to Firewall > Policy and add the protection profile to a firewall policy that accepts
SIP sessions.
For more information about application control, see “Application Control” on page 603.
Enabling SIP support from the CLI
From the FortiGate CLI, you can enable rate limiting for a more extensive range of SIP
requests, including ACK, INFO, NOTIFY, OPTIONS, PRACK, REFER, SUBSCRIBE, and
UPDATE. For more information, see the FortiGate CLI Reference.
From the CLI, you enable SIP support using the config application list command
to add SIP to an application control list. The config application list command
uses application list names or numbers to identify applications. SIP is application number
12.
Use the following command to enable SIP support in an application control list:
config application list
edit <list_name>
config entries
edit 1
set category voip
set application SIP
end
end
Entering this command enables SIP support with all SIP settings set to defaults. See the
FortiGate CLI Reference for information about all of the SIP settings and their defaults.

 Loading...