Firewall Virtual IP Viewing the IP pool list
FortiGate Version 4.0 MR1 Administration Guide
01-410-89802-20090903 465
http://docs.fortinet.com/ • Feedback
Scenario 3: The number of source addresses is fewer than that of IP pool addresses
In this case, some of the IP pool addresses will used and the rest of them will not be used.
Viewing the IP pool list
If virtual domains are enabled on the FortiGate unit, IP pools are created separately for
each virtual domain. To access IP pools, select a virtual domain from the list on the main
menu.
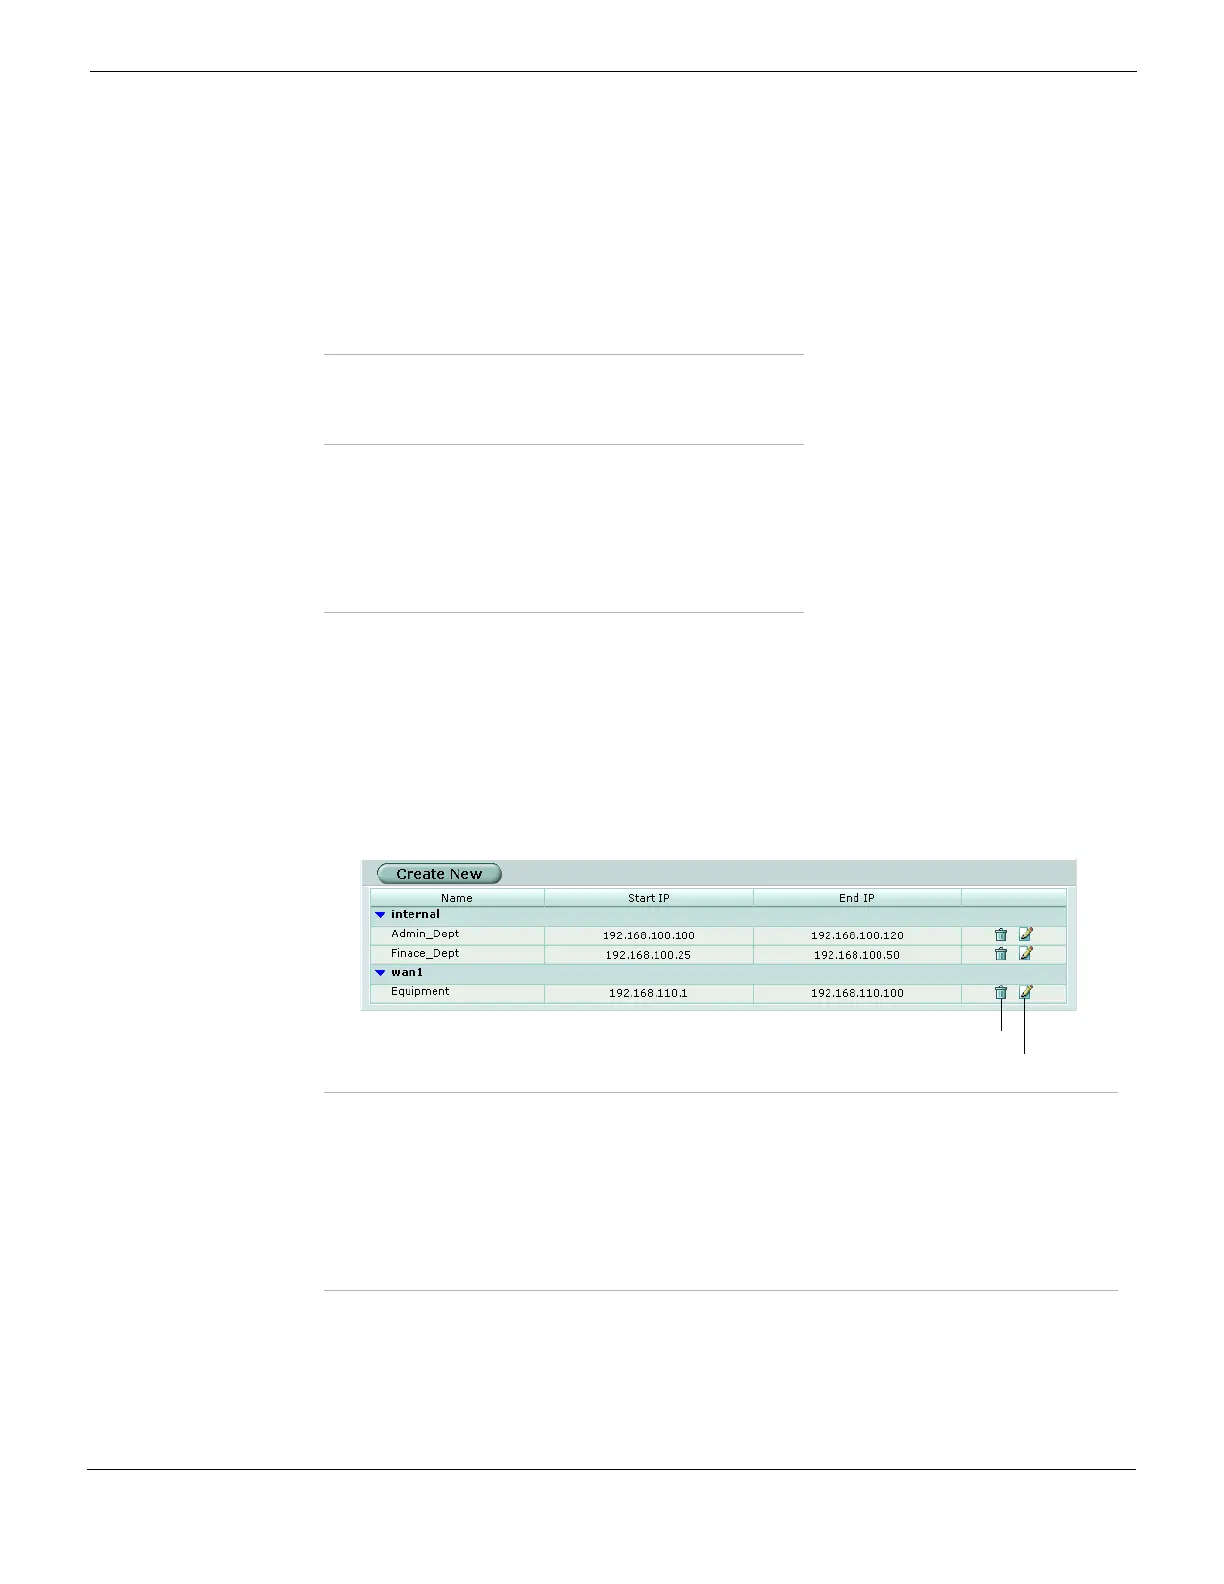
To view the IP pool list go to Firewall > Virtual IP > IP Pool.
Figure 261: IP pool list
Configuring IP Pools
To add an IP pool, go to Firewall > Virtual IP > IP Pool.
192.168.1.2 172.16.30.11
...... ......
192.168.1.10 172.16.30.19
192.168.1.11 172.16.30.10
192.168.1.12 172.16.30.11
192.168.1.13 172.16.30.12
...... ......
Original address Change to
192.168.1.1 172.16.30.10
192.168.1.2 172.16.30.11
192.168.1.3 172.16.30.12
No more source addresses 172.16.30.13 and other
addresses will not be used
Create New Select to add an IP pool.
Name Enter the name of the IP pool.
Start IP Enter the start IP defines the start of an address range.
End IP Enter the end IP defines the end of an address range.
Delete icon Select to remove the entry from the list. The Delete icon only appears if the IP
pool is not being used in a firewall policy.
Edit icon Select to edit the following information: Name, Interface, IP Range/Subnet.

 Loading...