Replacing bulbs
248
Practical hints
E Switch off the lighting.
E Undo screws 1 and remove the rear
lamp unit in the direction of the arrow.
E Remove the connector.
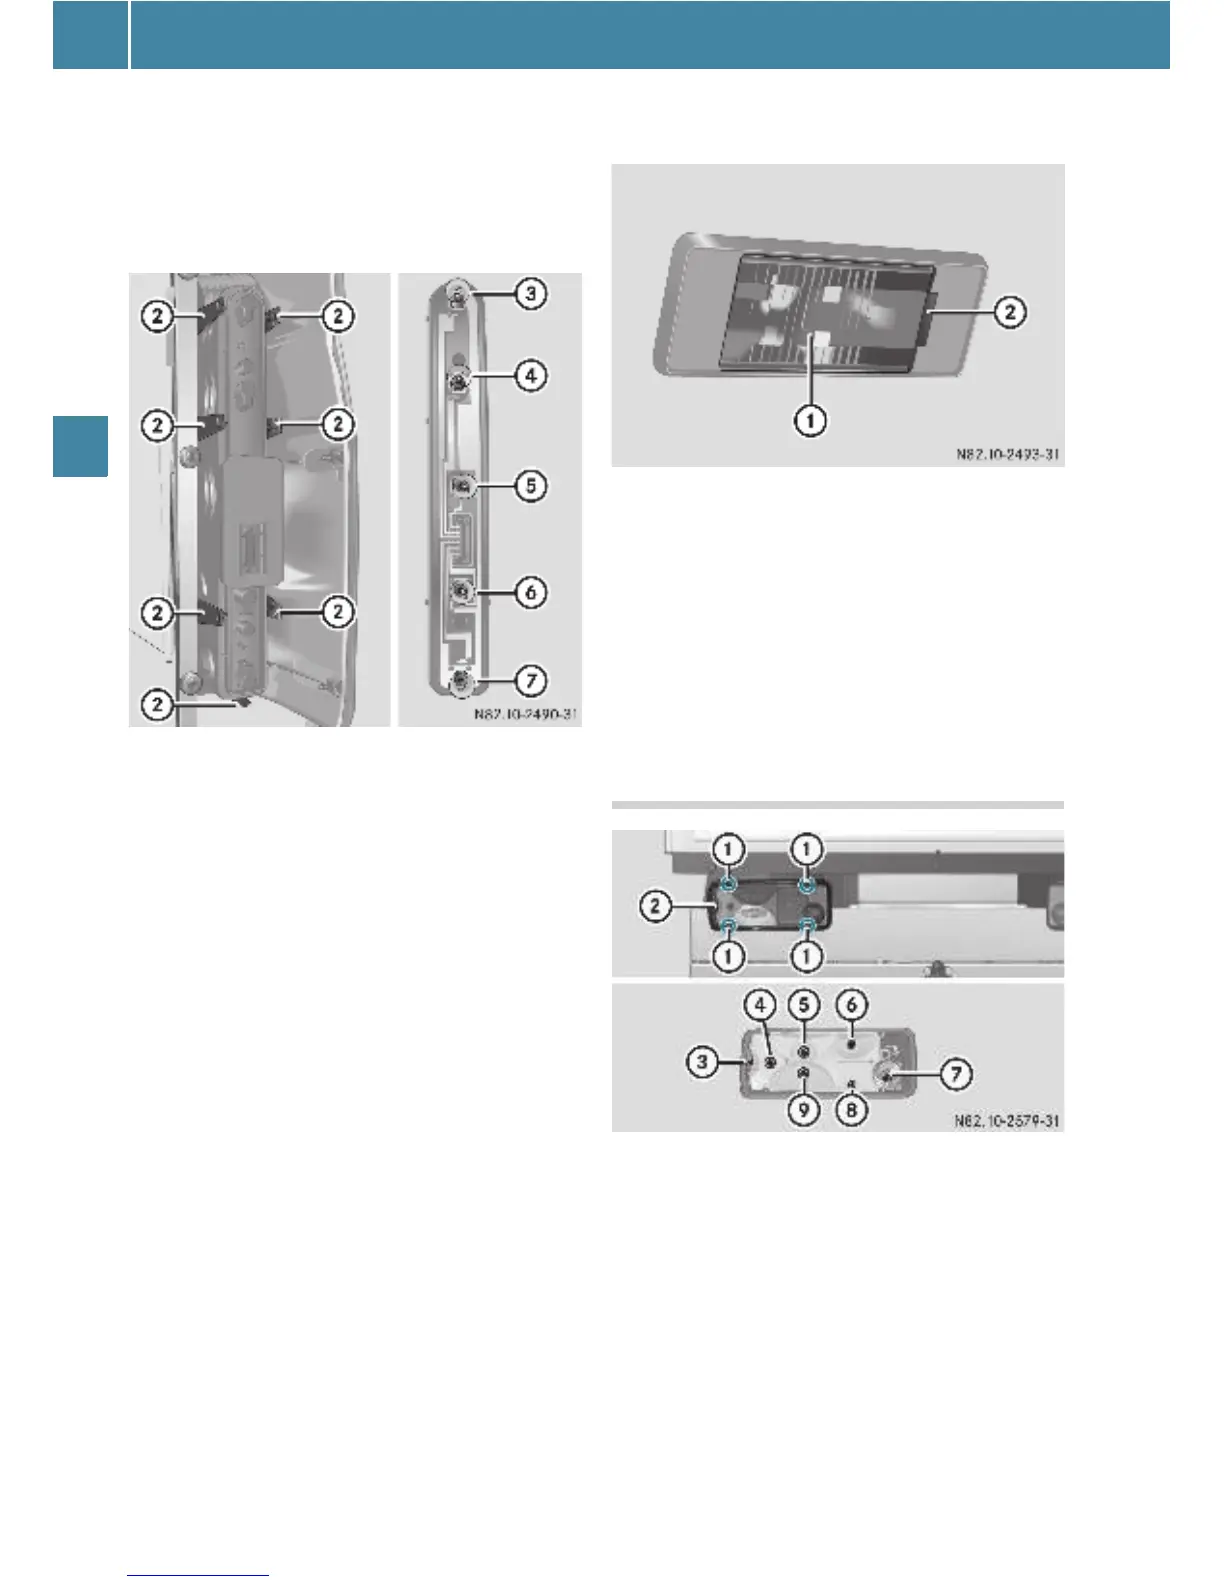
2 Retaining lugs
3 Brake lamp
4 Tail lamp/side marker
5 Reverse lamp
6 Turn signal lamp
7 Rear foglamp (driver's side)
E Release retaining lugs 2 and remove
the bulb holder from the rear lamp unit.
E Press down on the bulb, turn it counter-
clockwise and remove it from the
holder.
E Press the new bulb into the bulb holder
and screw it in clockwise.
E Plug the connectors into the bulb
holder.
E Fit the rear lamp unit.
To do this, clip the bulb holder into the
three holes provided on the side and
tighten screws 1.
License plate lamp W 5 W
E Switch off the lighting.
E Insert a screwdriver or similar imple-
ment into recess 2 and carefully pry
off lens 1.
E Pull the bulb out of the bulb holder.
E Insert the new bulb.
E Align lens 1 and clip it in, making sure
that it engages.
Changing the rear bulbs (chassis)
Example illustration of chassis
1 Securing screws
2 Lens
3 Perimeter lamp/side marker
4 Turn signal lamp
5 Brake lamp
6 Tail lamp
7 Rear foglamp (driver's side)
8 License plate lamp
9 Reverse lamp
E Switch off the lighting.
E Undo screws 1 and remove lens 2.