Replacing bulbs
250
Practical hints
E Switch off the lighting.
E Press in the latching springs of lamp
housing 1 using a suitable tool such
as a screwdriver.
E Pry off lamp housing 1.
E Remove bulb 2 from the bulb holder.
E Insert new bulb 2.
E Align lamp housing 1 on the right and
engage it.
! Have the interior lamps in the overhead con-
trol panel changed at an authorized Sprinter
Dealer which has the necessary specialist knowl-
edge and tools to carry out the work required.
You could damage the overhead control panel.
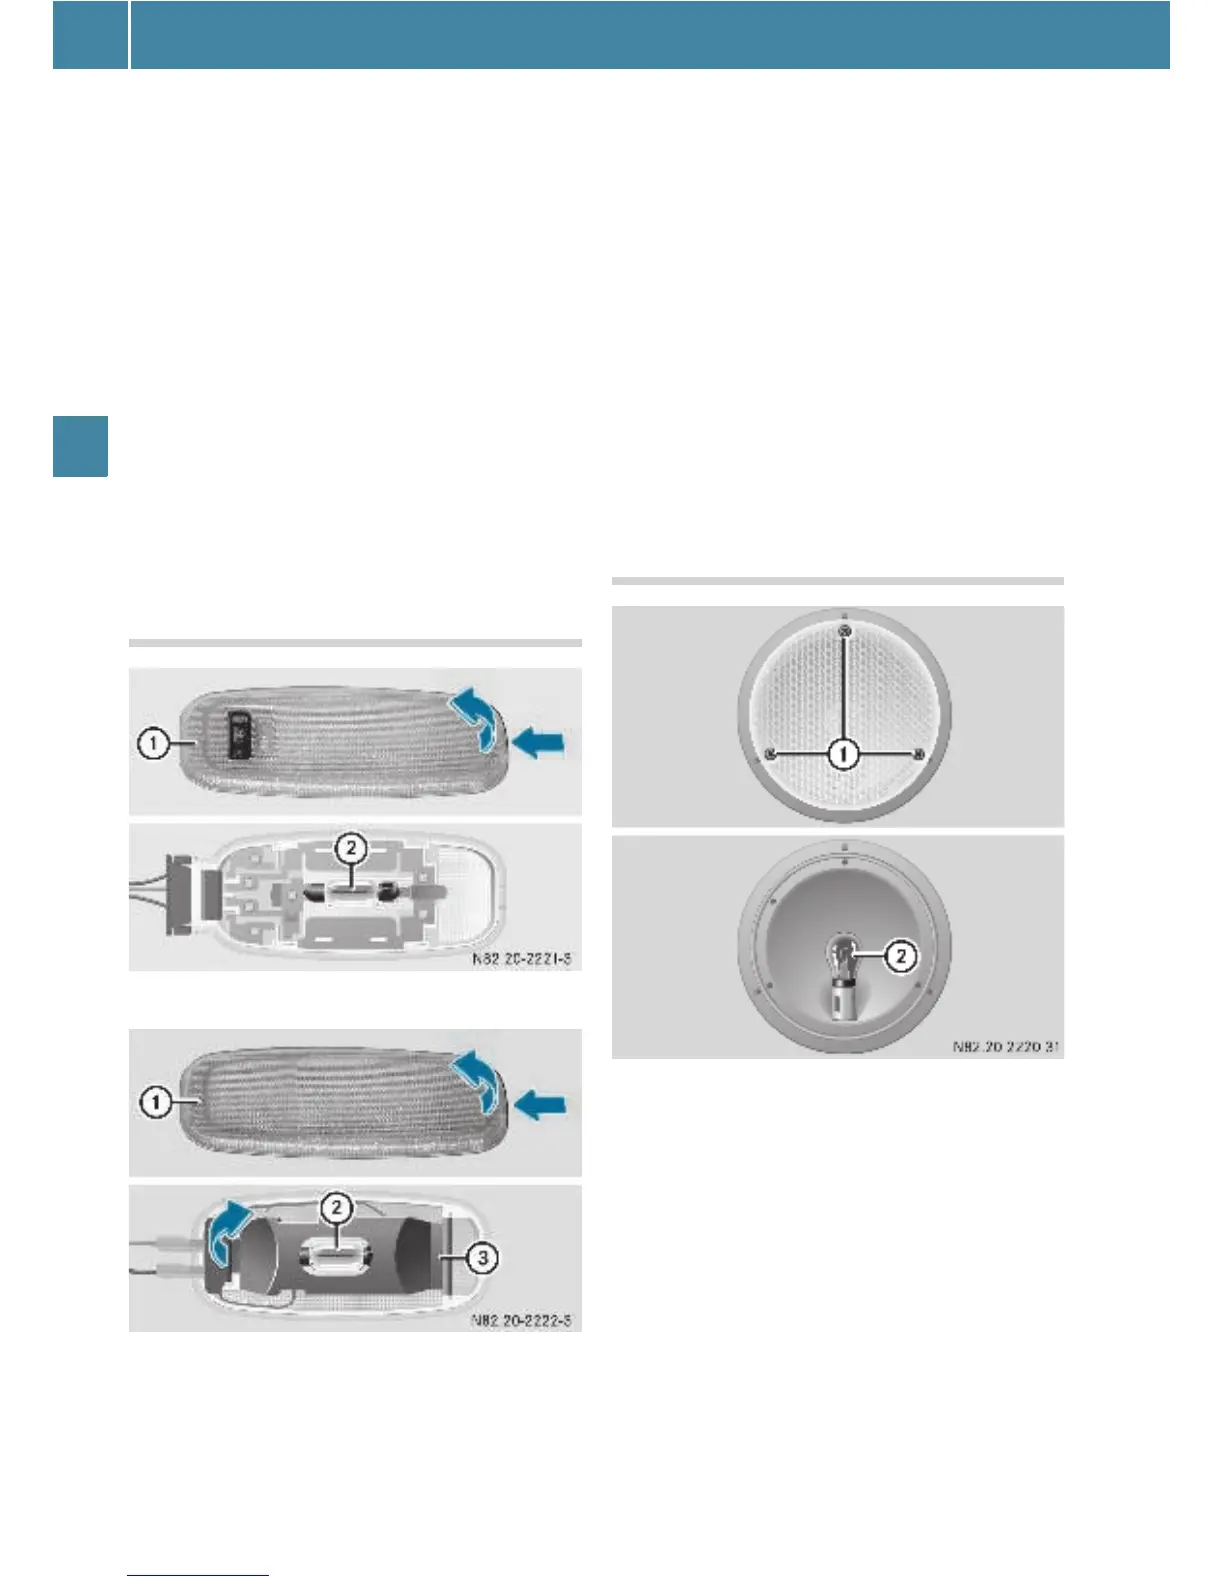
Rear interior lamps K 15 W
Interior lamp with switch
Interior lamp without switch
E Switch off the lighting.
E Insert a screwdriver or similar imple-
ment into the recess and carefully pry
off lamp housing 1.
E Interior lamp without switch: fold
shield 3 up.
E Remove bulb 2 from the bulb holder.
E Insert new bulb 2.
E Interior lamp without switch: fold
shield 3 back.
E Align lamp housing 1 on the left and
engage it.
Rear interior lamps W 5 W
E Switch off the lighting.
E Undo screws 1 and remove lens.
E Turn bulb holder 2 and remove it to-
gether with the bulb.
E Press bulb 2 into the socket, turn it
counterclockwise and remove it from
the holder.
E Press new bulb 2 into the bulb holder
and screw it clockwise.
E Carefully reattach the lens and retight-
en screws 1.