Flat tire
253
Practical hints
E Remove the spare wheel from the
spare wheel bracket (
e page 206).
E For wheels with wheel bolts, remove
the wheel cover.
E From the jack's three-part pump lever,
assemble the medium rod and the rod
with the largest diameter as a wheel
wrench extension.
E Slide the wheel wrench extension with
the medium rod along the wheel
wrench to the stop.
! Only use the medium rod and the rod with
the largest diameter from the jack's pump lever
as the wheel wrench extension. Only insert this
and the medium rod to the stop on the wheel
wrench. Otherwise, the rods can bend and be-
come so deformed that they can no longer be
used as the jack's pump lever.
E Using the extended wheel wrench,
loosen the wheel nuts or wheel bolts on
the wheel to be changed 1 by about
one turn, but do not unscrew them.
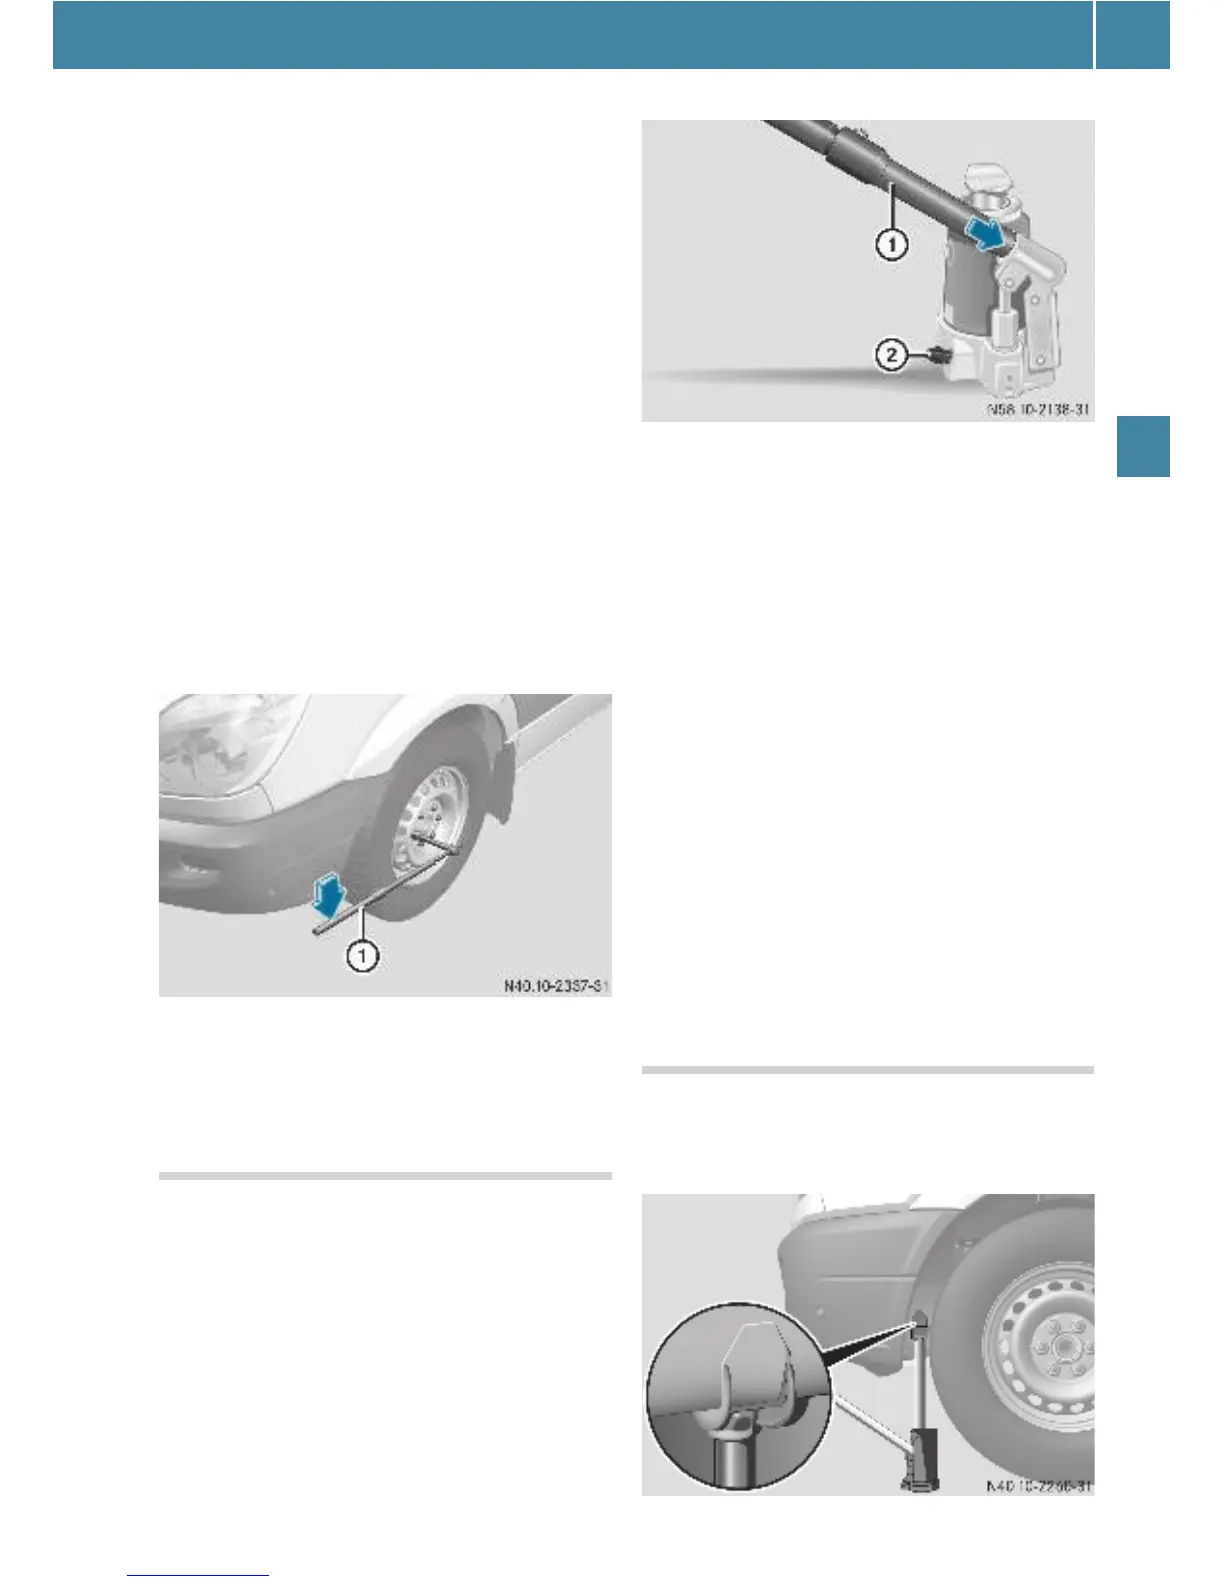
Hydraulic jack
E Insert the third pump lever rod for the
jack into the wheel wrench extension.
The pump lever is now assembled as
the jack.
E Close pressure release screw 2.
E To do this, turn the flattened section on
the pump lever clockwise to the stop.
i Never turn pressure release screw 2 more
than 1 or 2 full turns. Hydraulic fluid could other-
wise escape.
E Insert pump lever 1 into the recess on
the jack and secure it by turning it
clockwise.
E Make sure that the jack is positioned
vertically under the jacking points de-
scribed below.
E Raise the vehicle by pumping the lever
until the wheel is raised clear of the
ground.
Make sure that the distance between
the underside of the tires and the
ground does not exceed 1.2 in (3 cm).
Jacking point at the front axle
The vehicle jacking point is located under
the longitudinal member in front of the
front axle.