Home
Fujitsu
Server
PRIMERGY TX100 S3 Core Edition
Upgrade And Maintenance Manual
Page 43 (6 Starting Up and Operation)
Fujitsu PRIMERGY TX100 S3 Core Edition - 6 Starting Up and Operation; Opening the Server Chassis
252 pages
Manual
Save Page as PDF
To Next Page
To Next Page
To Previous Page
To Previous Page
Loading...
TX100 S3 Core Edition
Upgrade and Maintenance Manual
43
Basic hardware procedures
4.3.1
Removing t
he side co
ver
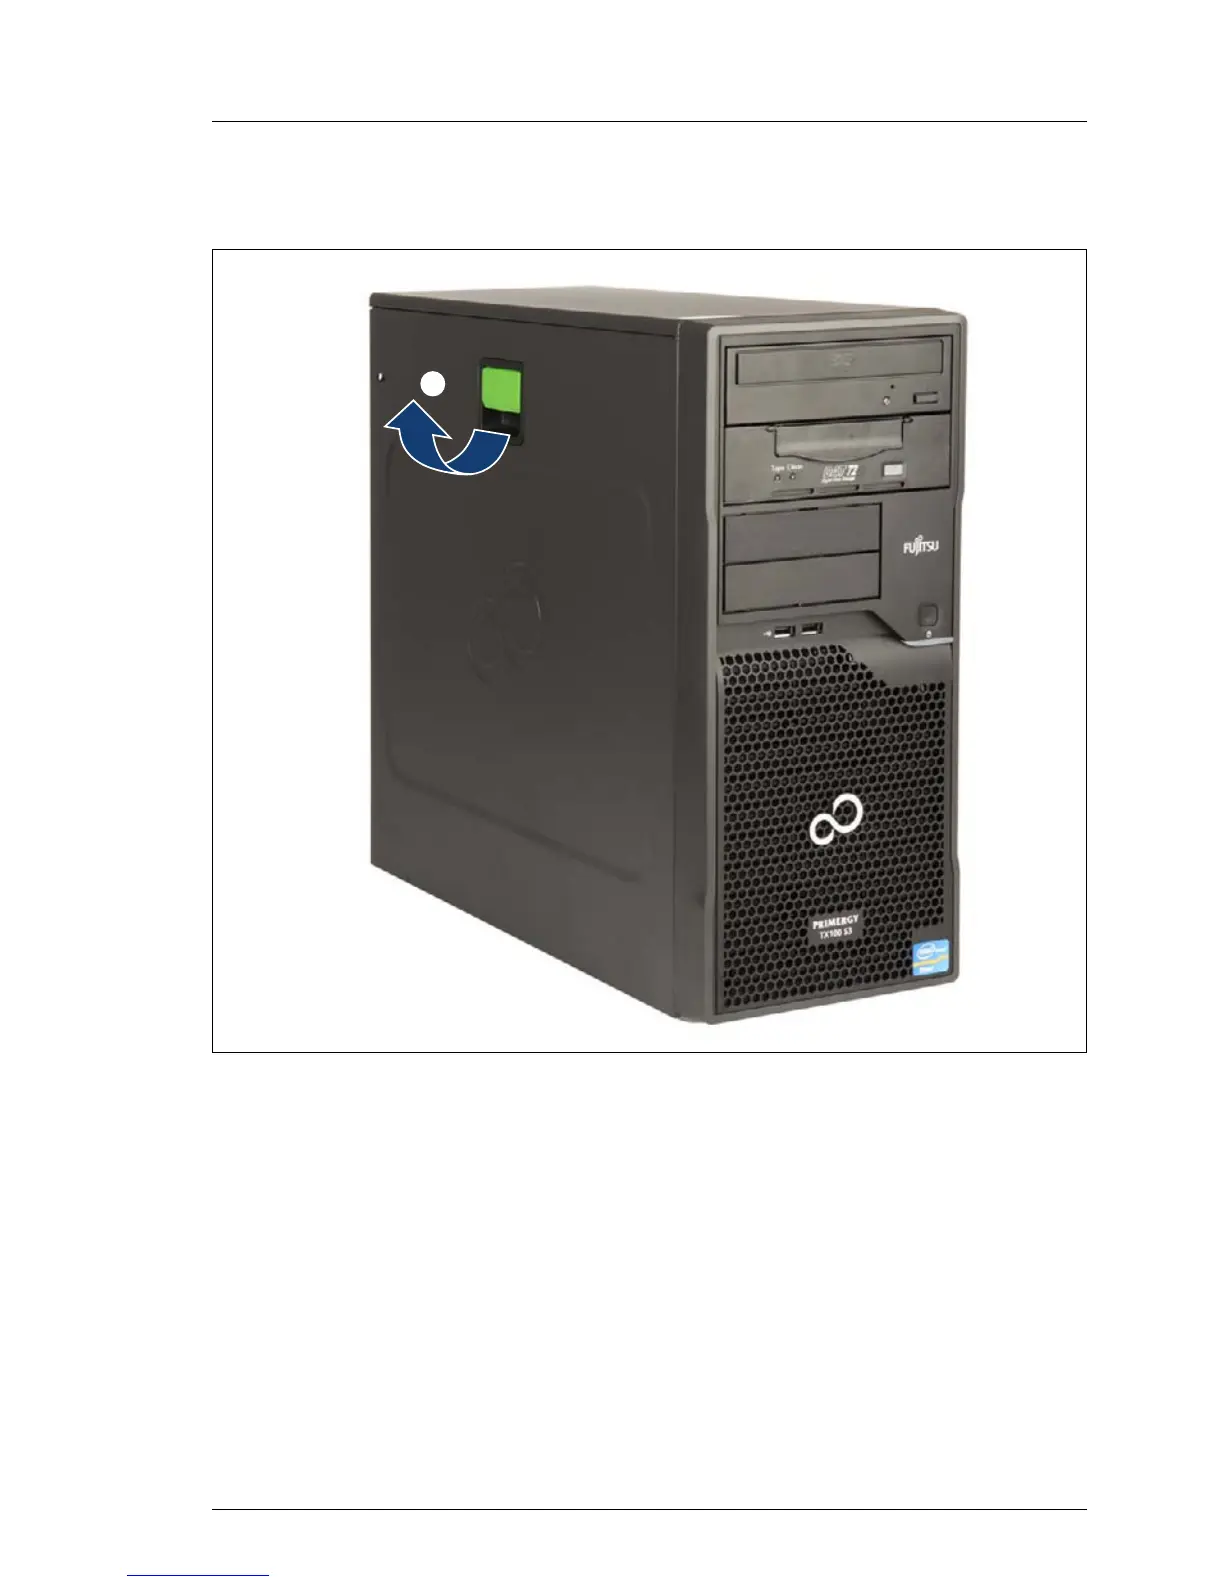
Figure 4: Removing the side cover
Ê
Pull up on the locking lever (1).
This will dis
engage the locking mech
anism.
/
42
44
Table of Contents
Main Page
Default Chapter
2
Copyright and Trademarks
2
Table of Contents
5
Version History
13
1 Introduction
15
Where to Find Which Information
16
Notational Conventions
17
2 Before You Start
19
Classification of Procedures
20
Customer Replaceable Units (CRU)
20
Upgrade and Repair Units (URU)
21
Field Replaceable Units (FRU)
22
Average Task Duration
23
Tools You Need at Hand
24
Documents You Need at Hand
25
3 Important Information
27
Safety Instructions
27
Energy Star
34
CE Conformity
34
FCC Class a Compliance Statement
35
Environmental Protection
36
4 Basic Hardware Procedures
39
Using Diagnostics Information
39
Shutting down the Server
40
Opening the Server
42
Removing the Side Cover
43
Removing Accessible Drives
45
Removing Optical Disk Drives (Odds)
45
Removing the Backup Drive
47
Removing the Front Cover
49
Closing the Server
50
Installing the Front Cover
51
Installing the Optical Disk Drive (ODD)
52
Installing the Backup Drive
54
Installing the Side Cover
56
Connecting the Server to the Mains
57
Switching on the Server
58
Removing the HDD Cage
60
Preliminary Steps
60
Installing the HDD Cage
62
Concluding Steps
64
5 Basic Software Procedures
65
Starting the Maintenance Task
65
Removing Backup and Optical Disk Media
65
Verifying and Configuring the Backup Software Solution
66
Completing the Maintenance Task
67
Updating the System Board BIOS Via USB Stick
67
Note on Boot Sequence Settings
68
Verifying and Configuring the Backup Software Solution
69
Viewing the System Event Log (SEL)
70
Performing a RAID Array Rebuild
71
6 Power Supply
73
Replacing the Power Supply Unit
74
Required Tools
74
Preliminary Steps
74
Disconnecting Power Cables
75
Removing the Power Supply Unit
77
Installing the Power Supply Unit
79
Reconnecting Power Cables
81
Concluding Steps
82
7 Hard Disk Drives
83
Mounting Order for 3.5-Inch Hdds
84
Installing 3.5-Inch Hdds
85
Required Tools
85
Preliminary Steps
85
Installing a 3.5-Inch HDD
86
Connecting Cables
90
Concluding Steps
92
Removing 3.5-Inch Hdds
93
Required Tools
93
Preliminary Steps
93
Removing a 3.5-Inch HDD
94
Concluding Steps
96
Replacing a 3.5-Inch HDD
97
Required Tools
97
Preliminary Steps
97
Removing a 3.5-Inch HDD
98
Installing a 3.5-Inch HDD
98
Concluding Steps
98
8 System Fan Modules
99
Replacing the System Fan Module 1
101
Required Tools
101
Preliminary Steps
101
Removing the System Fan Module 1
102
Installing the System Fan Module 1
105
Concluding Steps
108
Replacing the System Fan Module 2
109
Required Tools
109
Preliminary Steps
109
Removing the System Fan Module 2
110
Installing the System Fan Module 2
114
Concluding Steps
116
9 Expansion Cards and Battery Backup Units
117
10 Main Memory
119
Basic Information
120
Memory Sequence
120
Operation Modes
121
Installing Memory Modules
122
Required Tools
122
Preliminary Steps
122
Installing a Memory Module
123
Concluding Steps
124
Removing Memory Modules
125
Required Tools
125
Preliminary Steps
125
Removing a Memory Module
126
Concluding Steps
126
Replacing Memory Modules
127
Required Tools
127
Preliminary Steps
127
Removing a Memory Module
127
Installing a Memory Module
128
Concluding Steps
128
11 Processor
129
Basic Information
130
Upgrading or Replacing the Processor
130
Required Tools
130
Preliminary Steps
131
Removing the Processor Heat Sink
131
Removing the Processor
133
Installing the Processor
136
Applying Thermal Paste
140
Installing the Processor Heat Sink
142
Concluding Steps
145
Replacing the Processor Heat Sink
145
Required Tools
145
Preliminary Steps
146
Removing the Processor Heat Sink
146
Applying Thermal Paste
146
Installing the Processor Heat Sink
146
Concluding Steps
146
12 Accessible Drives
147
Basic Information
148
Installing Accessible Drives
149
Required Tools
149
Preliminary Steps
149
Removing the Accessible Drive Dummy Cover from Drive Bay
150
Installing an Optical Disk Drive (ODD)
152
Preparing the Optical Disk Drive
152
Installing the Optical Disk Drive
154
Installing a Backup Drive
157
Preparing the Backup Drive
157
Installing the Backup Drive
159
Concluding Steps
162
Removing Accessible Drives
163
Required Tools
163
Preliminary Steps
163
Removing an Optical Disk Drive (ODD)
164
Removing a Backup Drive
166
Installing an Accessible Drive Dummy Cover
168
Installing the Filler Cover into Drive Bay 2
168
Installing the Dummy Cover into Drive Bay 2
169
Concluding Steps
170
Replacing Accessible Drives
171
Required Tools
171
Preliminary Steps
171
Replacing an Optical Disk Drive (ODD)
172
Replacing a Backup Drive
174
Concluding Steps
175
13 Front Panel and External Connectors
177
Replacing the Front Panel Module
177
Required Tools
177
Preliminary Steps
178
Removing the On/Off Button
178
Removing the HDD Activity LED
179
Removing the Front Panel Cable
180
Installing the Front Panel Cable
181
Installing the On/Off Button and HDD Activity LED
182
Concluding Steps
183
Replacing the Front USB Module
184
Required Tools
184
Preliminary Steps
184
Disconnecting the Front USB Cable
185
Removing the Defective Front USB Module
186
Removing the Defective Front USB Board
187
Installing the New Front USB Board
188
Installing the New Front USB Module
190
Installing the Front USB Cable
191
Concluding Steps
191
14 System Board and Components
193
Replacing the CMOS Battery
193
Required Tools
194
Preliminary Steps
194
Replacing the Defective CMOS Battery
195
Concluding Steps
196
Replacing the System Board
197
Removing / Installing the System Board
197
Required Tools
197
Preliminary Steps
198
Removing the System Board
198
Installing the System Board
202
Concluding Steps
210
Converting the System Board to the Core Edition Version and Storing the System's Serial Number
211
Updating the BIOS
214
Checking Operation
215
15 Cabling
217
Cabling Overview
218
Cable Plans
219
Fan Cabling
223
Replacing the Power Cable
224
Required Tools
224
Preliminary Steps
224
Disconnecting / Connecting the Power Cable
225
Concluding Steps
229
Replacing the Front USB Cable
230
Required Tools
230
Preliminary Steps
230
Disconnecting/Connecting the Front USB Cable
231
Concluding Steps
232
Storing Not Used SATA Data Cables
232
16 Appendix
233
Mechanical Overview
233
Server Front
233
Server Rear
234
Server Interior
235
Configuration Tables
236
Hard Disk Drives Mounting Order
236
Memory Board Configuration Table
236
Expansion Card Configuration Table
236
Connectors and Indicators
237
Connectors on the System Board
237
Onboard Connectors
237
Onboard Settings
239
I/O Panel Connectors
240
I/O Panel Indicators
241
Connectors and Indicators on the Front Panel
242
Front Panel Connectors and Indicators
242
Minimum Startup Configuration
244
Troubleshooting and Error Analysis
246
The Server Cannot be Powered on at All
246
The Power-On Indicator Reports an Error by Flashing Continuously
247
Remote Access to the Server Fails
248
Remote Desktop Connection Fails
249
VNC Connection Fails
249
Primecollect Log Files Available for Error Diagnostics
251
Other manuals for Fujitsu PRIMERGY TX100 S3 Core Edition
Operating Manual
90 pages
Related product manuals
Fujitsu PRIMERGY TX100 S3
72 pages
Fujitsu PRIMERGY TX100 S1
46 pages
Fujitsu PRIMERGY TX100 S2
66 pages
Fujitsu PRIMERGY TX150 S3
95 pages
Fujitsu PRIMERGY TX120 S3
82 pages
Fujitsu Primergy RX300 S3
313 pages
Fujitsu Primergy RX100 S3
287 pages
Fujitsu PRIMERGY RX200 S3
100 pages
Fujitsu PRIMERGY TX150 S7
120 pages
Fujitsu PRIMERGY TX140 S1
86 pages
Fujitsu PRIMERGY TX1330 M2
86 pages
Fujitsu PRIMERGY TX1320 M1
86 pages