190-01115-01 G3X™/G3X Touch™ Avionics Installation Manual
Rev. AV Page H-26
If removal and replacement of a GMU magnetometer is required after post-installation calibration has been
completed, the GMU mounting rack must not be moved. If the mounting screws that secure the GMU 11
or GMU 22 mounting rack are loosened for any reason, post-installation calibration procedures GMU 11
Unit Orientation (Appendix H.4.3.1
, if applicable), Magnetometer Interference Test (Appendix H.4.4.2),
and Magnetometer Calibration (Appendix H.4.4.3
) must be repeated before the aircraft can be returned to
service.
Any GMU magnetometer removal or replacement requires repeating the Magnetometer Calibration
(Appendix H.4.4.3
).
A repeat of the Pitch/Roll Offset Compensation (Appendix H.4.3.2
) requires a repeat of the Magnetometer
Calibration (Appendix H.4.4.3
).
The addition, removal, or modification of components that are ferrous, or otherwise magnetic, within 10.0
feet of the GMU magnetometer location after the Magnetometer Interference Test (Appendix H.4.4.2
) or
Magnetometer Calibration Procedure (Appendix H.4.4.3)
were completed requires a repeat of both
procedures.
Furthermore, electrical changes to the installation that affect components within 10.0 feet of the GMU
magnetometer after the Magnetometer Calibration (Appendix H.4.4.3
) and Magnetometer Interference
Test (Appendix H.4.4.2
) were completed will require a repeat of the Magnetometer Interference Test
(Appendix H.4.4.2
). If new magnetic interference is detected, it must be resolved, then the Magnetometer
Calibration (Appendix H.4.4.3
) must be repeated. Wiring or grounding changes associated with a device
located in the vicinity of the GMU magnetometer is a good example of such a change.
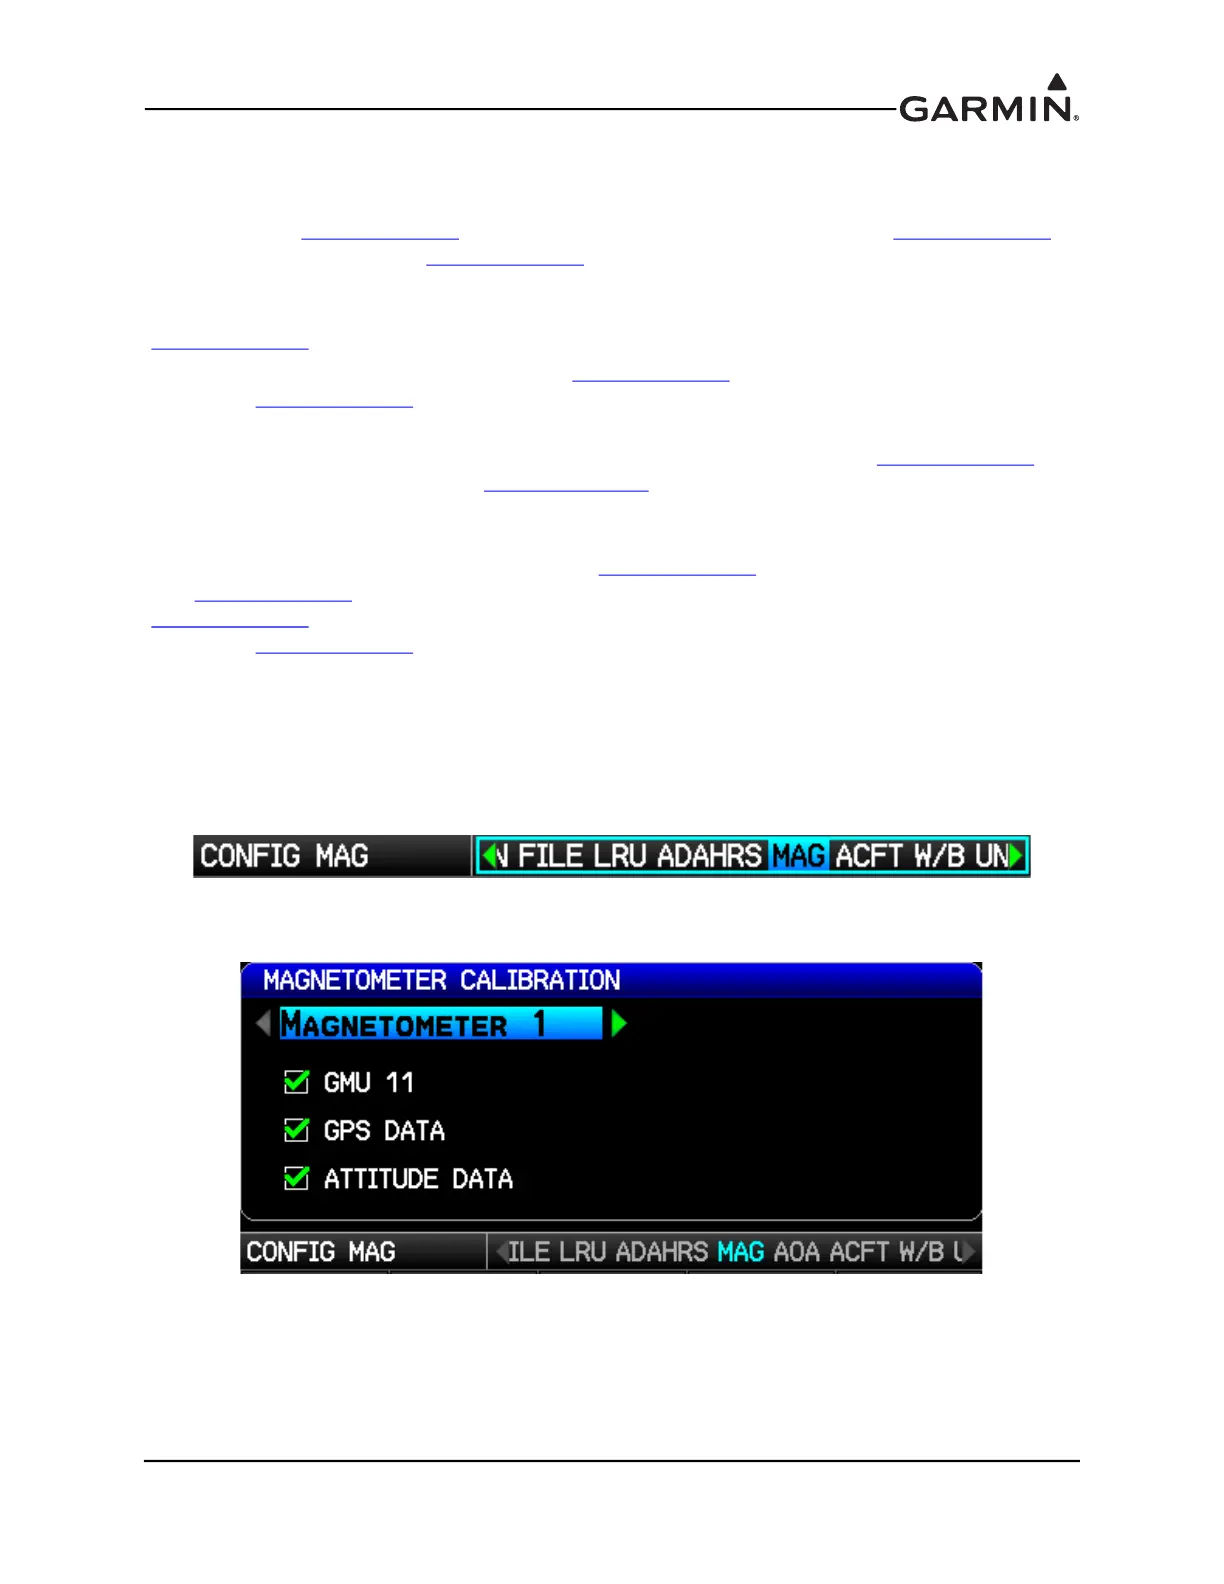
H.4.4.1 Unit Orientation (GMU 11 Only)
1. Enter configuration mode by holding down the left-hand softkey while powering on the PFD 1
display (if needed).
2. Use the FMS Joystick to select the MAG Page (if needed).
3. Use the FMS Joystick to select the Magnetometer designated for the GMU 11 and press the ENT
key.