GE Healthcare Senographe DS
Revision 1 Service Information and Procedures Class A 2385072-16-8EN
Job Card D/R A189 - Interface Board
Page no. 1127 Chapter 9
JC-DR-A-189.fm
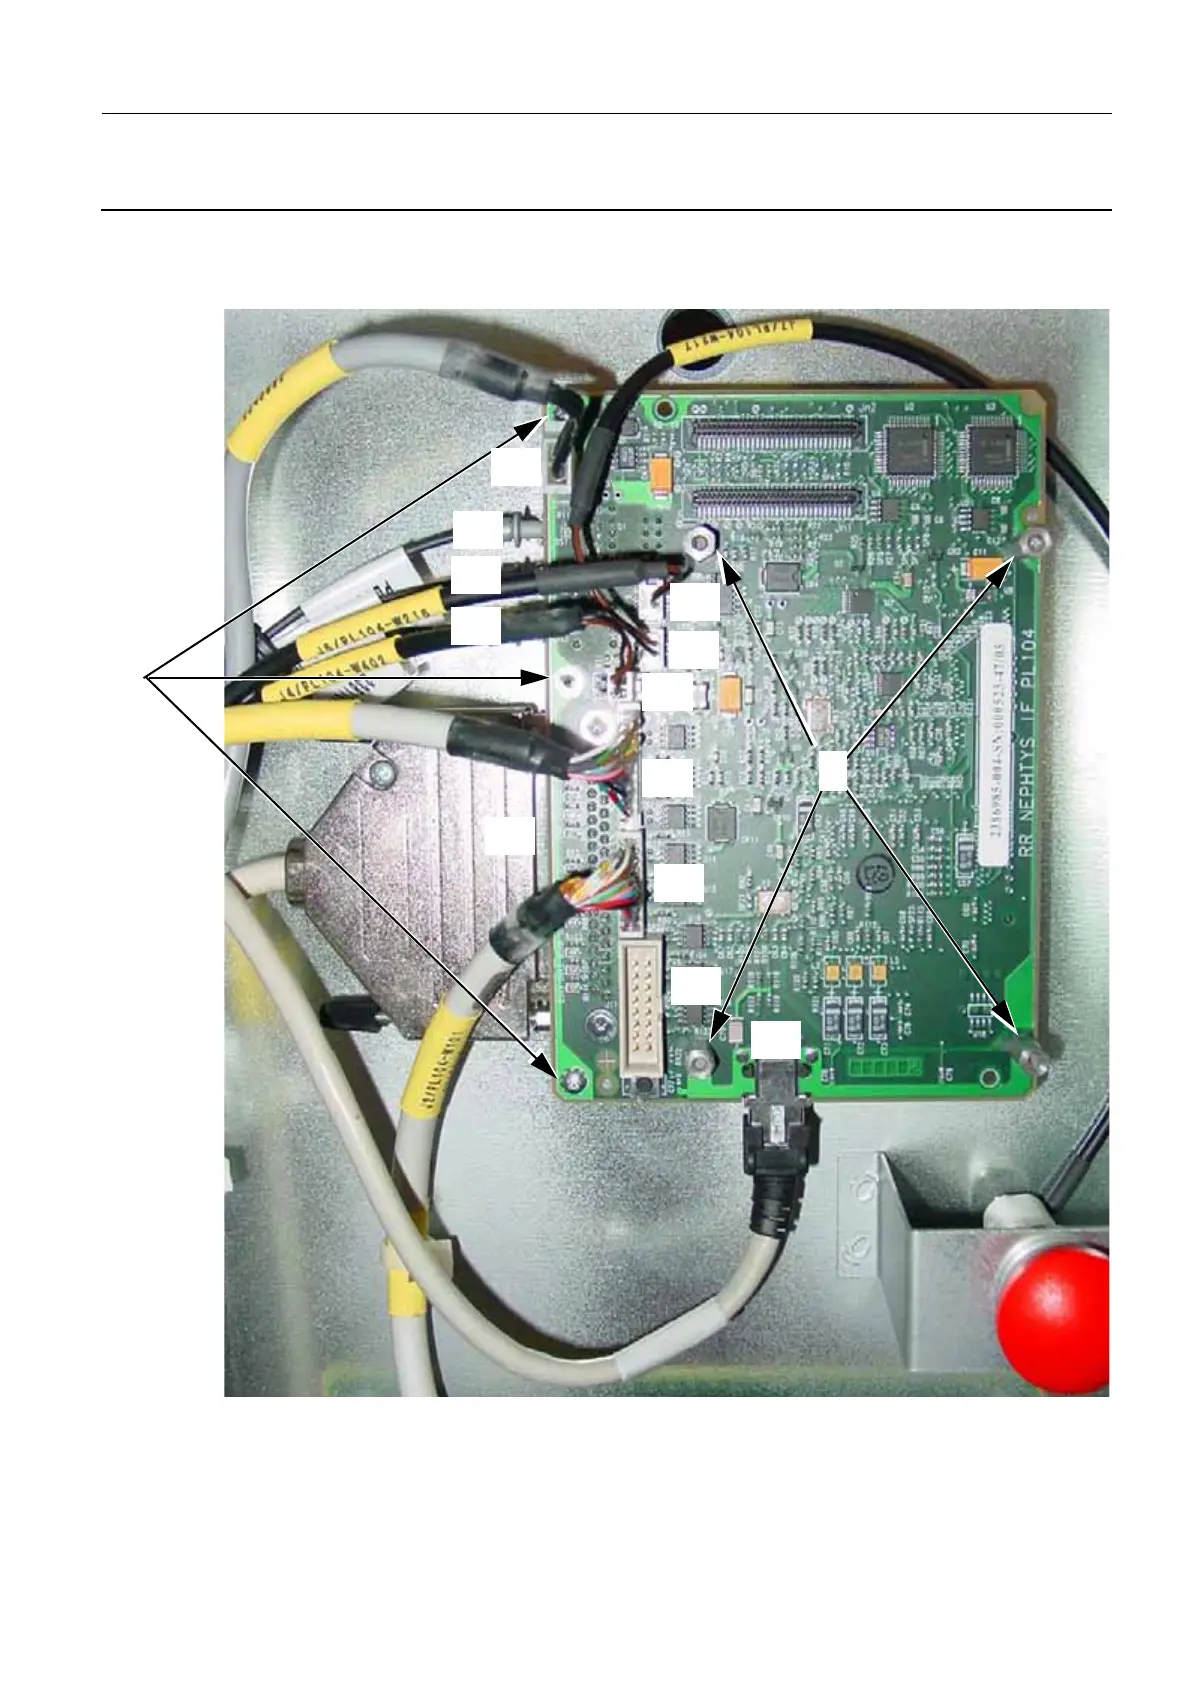
6-2 Replacing the Interface Board
1. Install the replacement Interface board and secure it using the four threaded nuts (1) and three
screws (2) (cross-head screwdriver).
2. Connect all the cables to the new Interface board as summarized in the diagram above and table
below. Ensure that the Ethernet cable is fully visible and does NOT go behind the PDU board.
Ensure that all the other cables are routed away from the Interface board, and that the stop button
cable which connects to J7 is routed around the Interface board and NOT behind the Interface board.
1
2
J1
J6
J7
J4
J3
J2
J11
Eth
J5
J8
J9
J10

 Loading...


