EasyManuals Logo

GE Senographe DS User Manual

GE Senographe DS
1810 pages
To Next Page IconTo Next Page
To Previous Page IconTo Previous Page
Page #1139 background imageLoading...
Page #1139 background image
GE Healthcare Senographe DS
Revision 1 Service Information and Procedures Class A 2385072-16-8EN
Job Card D/R A191 - PDU Board
Page no. 1139 Chapter 9
JC-DR-A-191.fm
6. Put the defective PDU board into an anti-static bag.
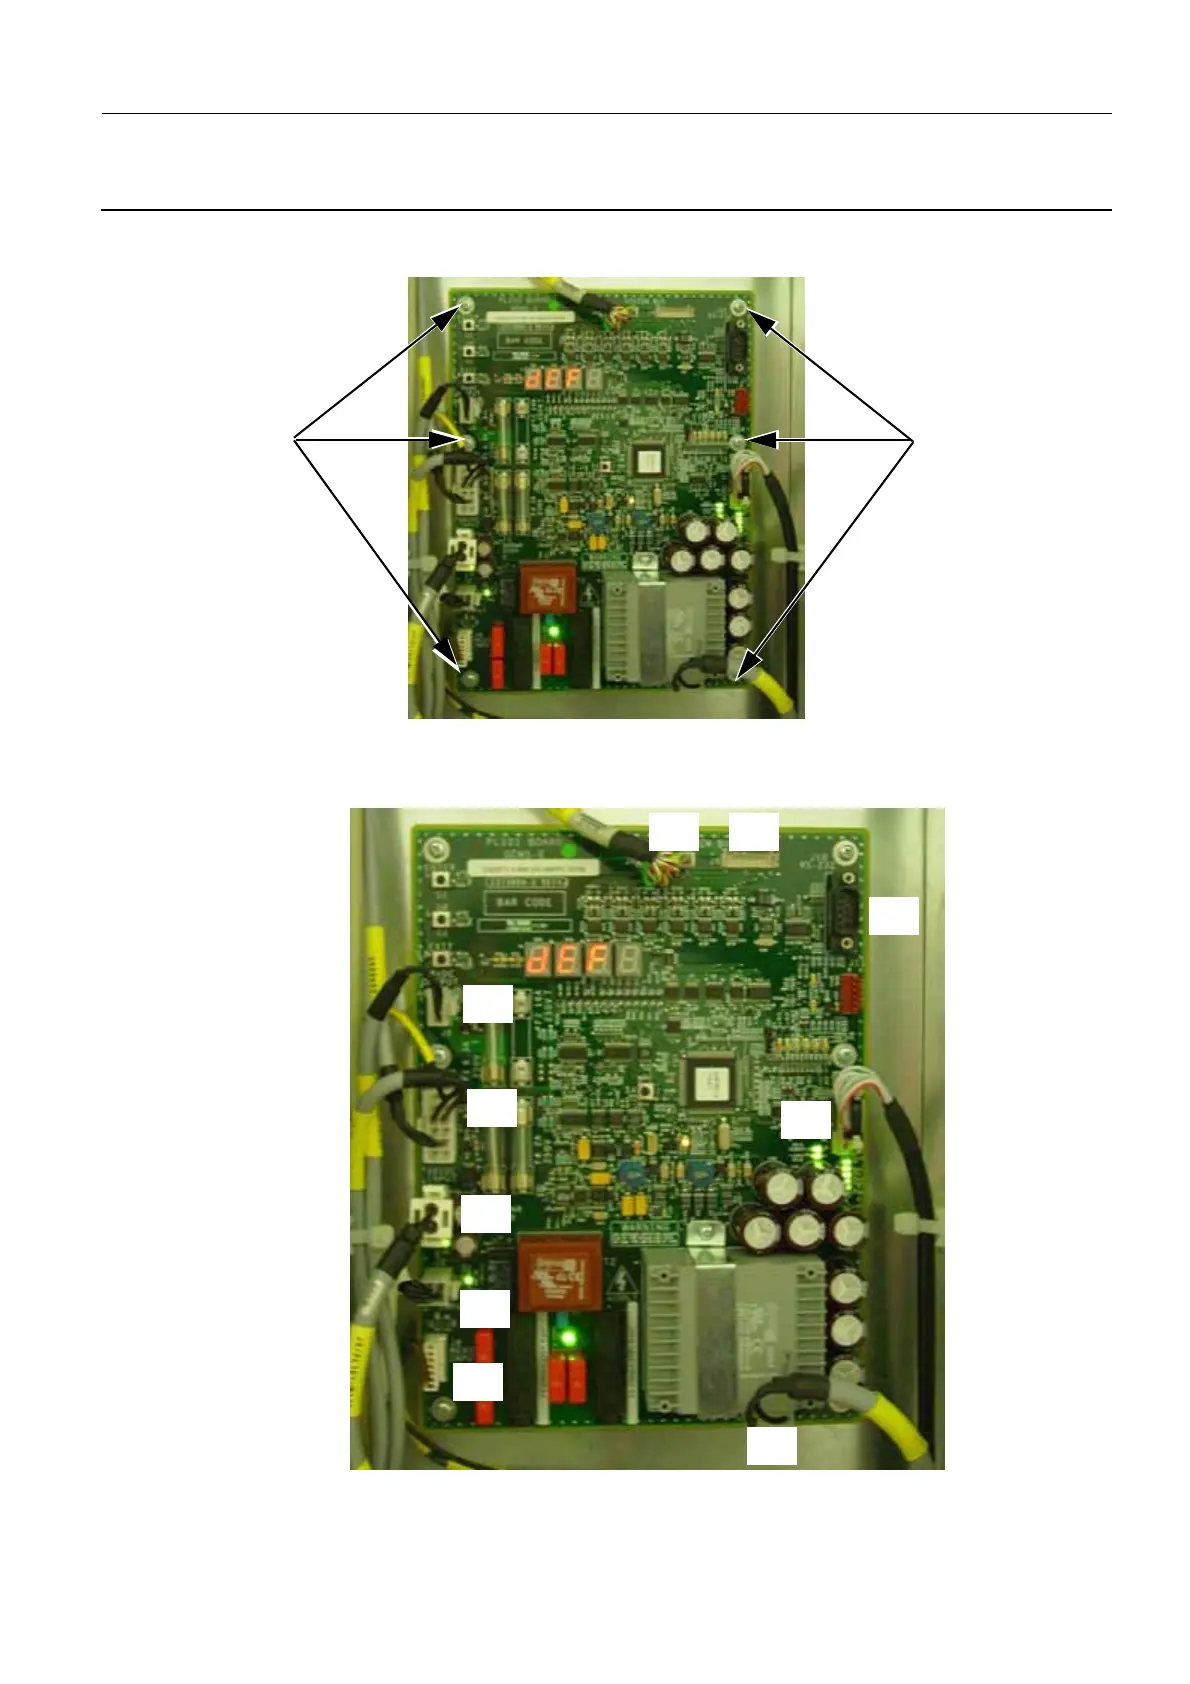
7. Install the replacement PDU board and secure it with the six screws (4) (cross-head screwdriver).
8. Connect all the cables to the new PDU board as summarized in the diagram and table below. To
avoid potential EMC interference ensure that all the cables are routed around (away from) the PDU
board.
4
4
J1
J4
J2
J5
J7
J6
J9J8
J10
J3

Table of Contents

Other manuals for GE Senographe DS

Questions and Answers:

Question and Answer IconNeed help?

Do you have a question about the GE Senographe DS and is the answer not in the manual?

GE Senographe DS Specifications

General IconGeneral
BrandGE
ModelSenographe DS
CategoryMedical Equipment
LanguageEnglish

Related product manuals