Chapter 9 Page no. 1412
JC-DR-A-311.fm
GE Healthcare Senographe DS
Revision 1 Service Information and Procedures Class A 2385072-16-8EN
Job Card D/R A311 - AWS Unit
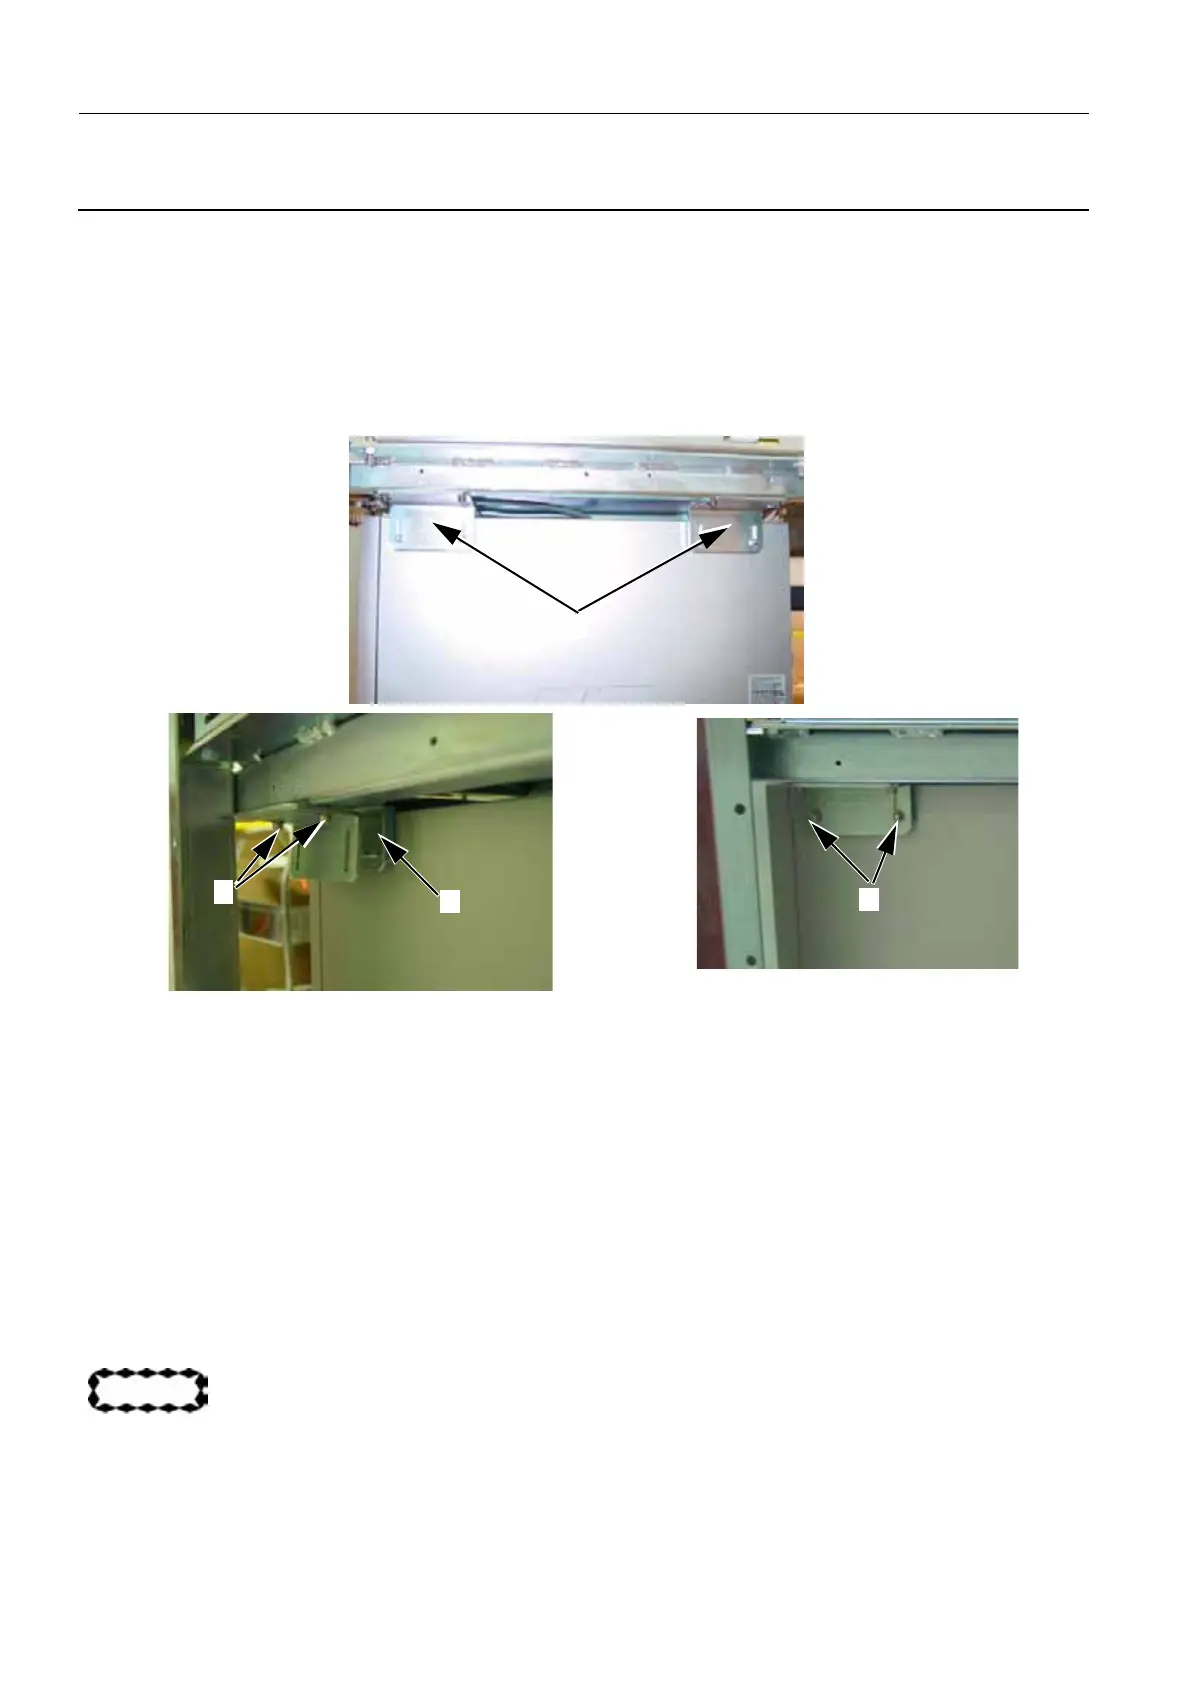
4. Secure the top of the AWS unit to each of the side L-brackets (4) as follows:
a. Gently place the C-bracket (5) on the top of the AWS unit, so that its threads line up with the holes
on the L-bracket.
b. Push the L-bracket away onto threads of the C-Bracket.
c. Attach the two nuts (6) to secure the L-bracket to the C-bracket (7 mm open ended wrench).
d. Tighten the two allen screws (7) to secure the L-bracket to the Control Station framework (4 mm
allen wrench).
5. Reconnect the ground cable (screwdriver).
6. Reconnect all the cables to the AWS unit rear panel. Refer to ADS Rear Panel Connectors (HP Z400
Workstation) on page 1416 for a guide to cable connections.
6-5 Reassembly of Top and Front Covers
1. Reinstall the Control Station omega cover. See Job Card PHY A040 - Remove/Reinstall Control Sta-
tion Covers on page 503.
2. Reinstall the Control Station top cover. See Job Card PHY A040 - Remove/Reinstall Control Station
Covers on page 503.
3. Reinstall the X-ray Console.
6-6 Software Installation
Install the AWS Application from the AWS Application Software CD-ROM supplied with the system.
CAUTION
It is important to load the same software version as that installed in the old AWS.
• Follow the instructions given in the CD-ROM booklet to install the software.
4
6
7
5

 Loading...


