GE Healthcare Senographe DS
Revision 1 Service Information and Procedures Class A 2385072-16-8EN
Job Card D/R A335 - AWS (U20) Motherboard Battery (V3 Control Stations only)
Page no. 1539 Chapter 9
JC-DR-A-335.fm
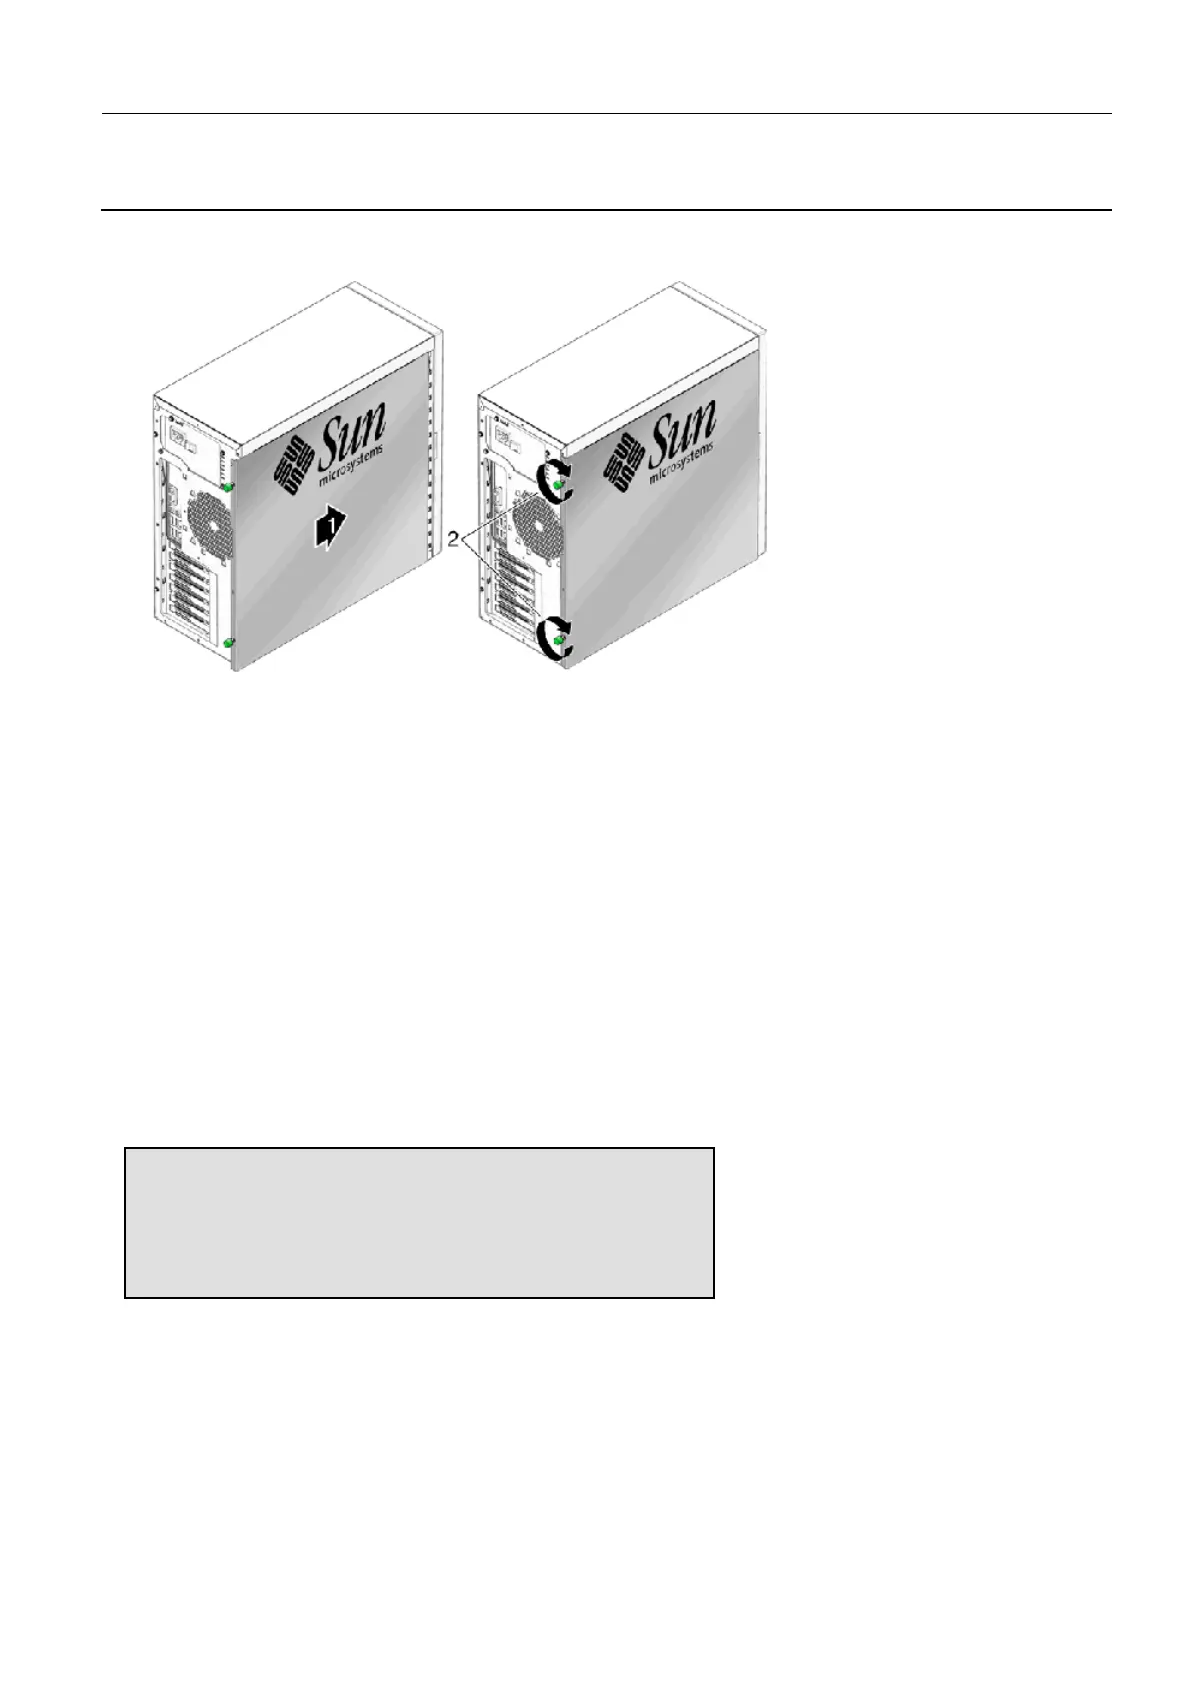
15. Pressing gently against the top of the access panel, slide the panel toward the front of the chassis.
The access panel lies flat against the chassis, with no gaps between the two.
16. Tighten the two captive thumbscrews located on the rear lip of the panel. The access panel is
installed flat against the chassis with the thumbscrews tightened.
17. Put the U20 Workstation back into the Control Station (refer to section 6-3-2 in Job Card D/R A311 -
AWS Unit), and re-connect it to all the cables (refer to section 6-3-2 in Job Card D/R A311 - AWS
Unit). Turn the power switch on the back of the U20 chassis to the ON position ( I ).
18. Reinstall the Control Station omega cover. See Job Card PHY A040 - Remove/Reinstall Control Sta-
tion Covers on page 503.
19. Reinstall the Control Station top cover. See Job Card PHY A040 - Remove/Reinstall Control Station
Covers on page 503.
20. Reinstall the X-ray Console.
21. Power on the Senographe system from the X-ray Console.
22. If necessary, power on the U20 from button O located in front panel under the DVD-ROM drive.
23. Immediately press repeatedly the F2 key until you enter the Bios setup.
24. Use the cursor keys to select the Boot item.
25. Use the vertical cursor keys and + - keys to have the boot order as follows:
26. Press the right cursor key to go into the Power item.
Boot priority order:
1: IDE CD : DVD_model_name
2: PCI SATA1 : Hard_drive_model_name
...

 Loading...


