GE Healthcare Senographe DS
Revision 1 Service Information and Procedures Class A 2385072-16-8EN
Job Card ELE A013 - AWS Configuration
Page no. 575 Chapter 7
JC-ELE-A-013.fm
b. The QAP Time-out field sets the time (in days) at which a warning that QAP must be carried out,
is displayed.
c. The Screen Blank Timeout field sets the delay time (in minutes) that the screen will go blank if
there has been no mouse or keyboard activity. This Screen Blank Timout value must not be con-
fused with the Auto-Logoff Timout, which is described in Changing the Auto-Logoff Timeout on
page 576.
d. If the Auto Delete feature is activated (see Enabling The Auto Delete Feature on page 575), then
the Auto Delete parameters are applied. When the disk usage exceeds the configured Upper
Threshold value, images are automatically deleted. They are deleted in chronological order, old-
est first, until the disk space reaches the Lower Threshold. Images which have been on the disk
for less than the Minimum Image’s Storage Time are not deleted. If neccessary, change the
default Auto Delete parameters according to the customer requirements.
!
Notice:
Do not activate Auto Delete or change Auto Delete settings without agreement from the customer.
e. The Language check boxes allow you to set the required application language for the Browser,
Worklist and Viewer. Changing the language impacts the only the Browser, Worklist and Viewer.
The Service Desktop remains in English.
f. The Edit Patient radio buttons allow you to determine whether the Edit Patient function is acti-
vated when the Edit Patient command is selected from the Tools menu. If On is selected, patient
details can be edited. If Off is selected, patient details cannot be edited, and a dialog box appears
suggesting that the Edit Patient function is discativated.
!
Notice:
If you change the application language, you must perform a shutdown and restart before the
change takes effect.
3. When you are happy with the changes, confirm them by clicking the Submit button.
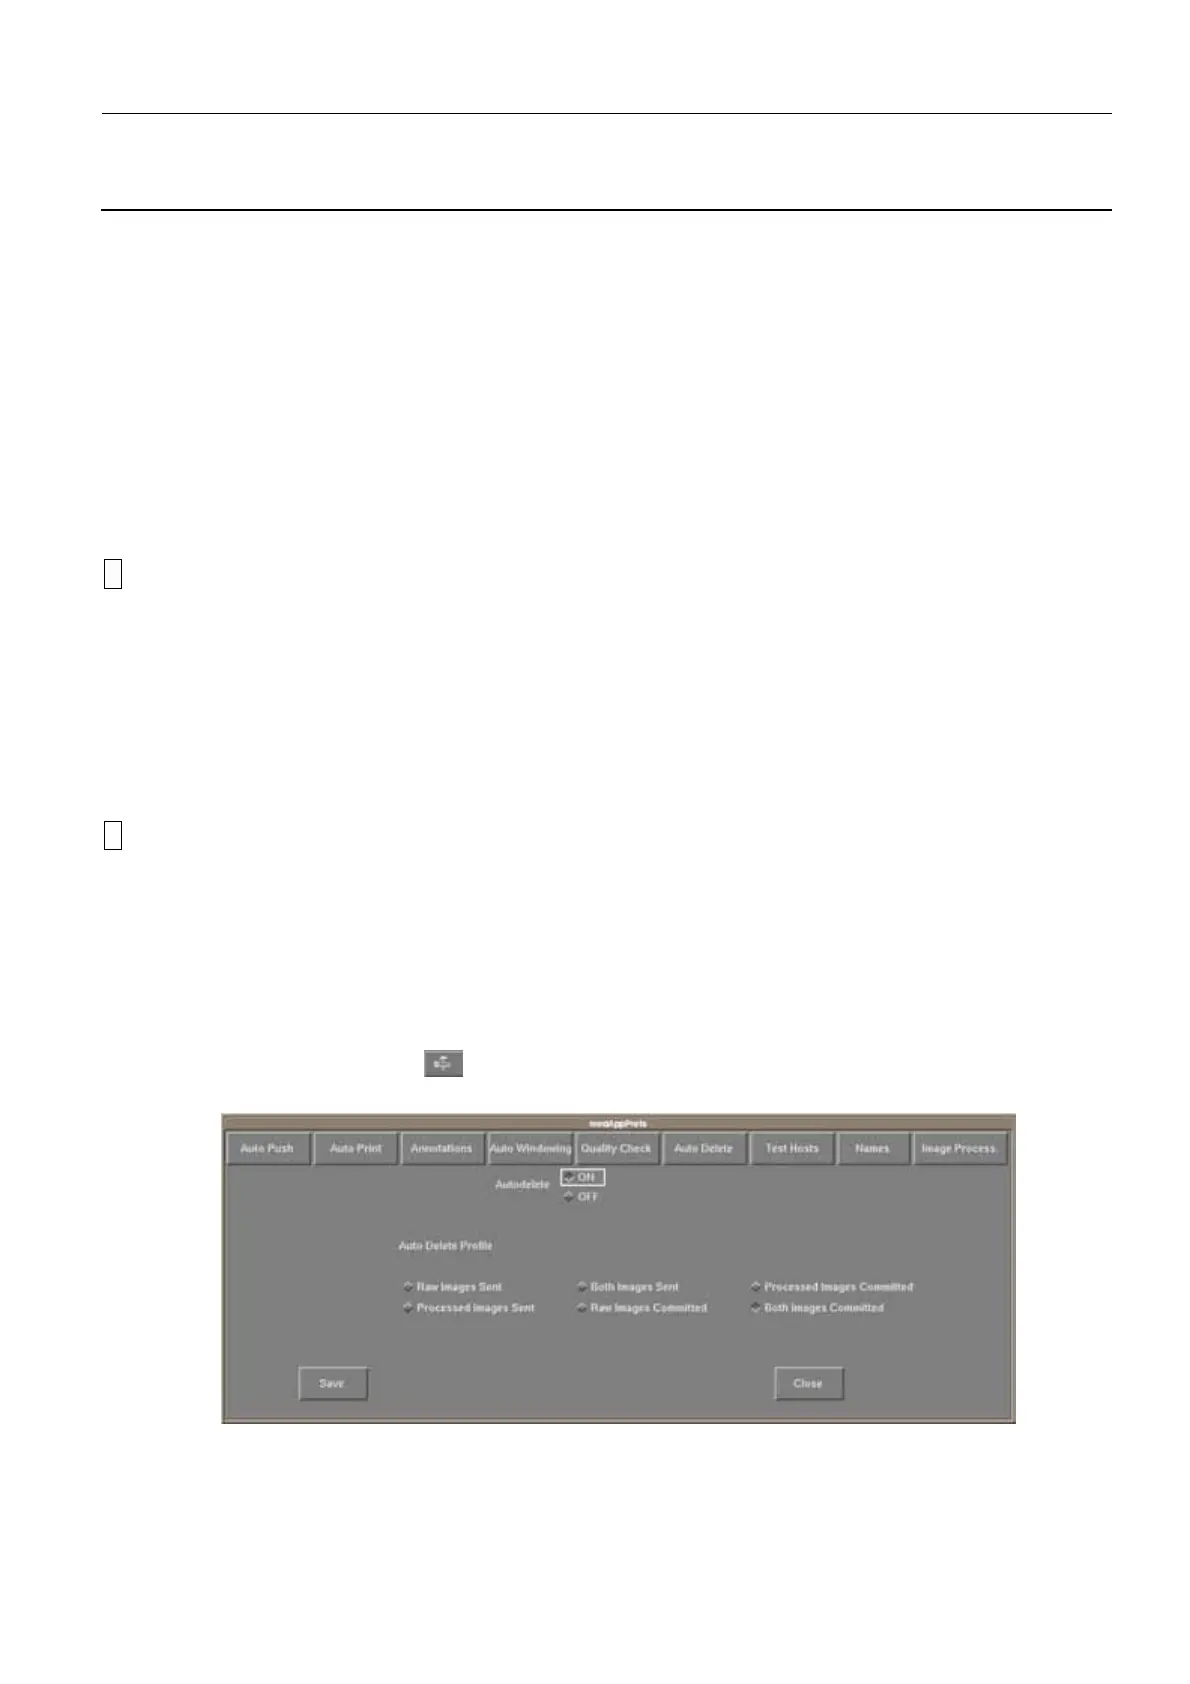
6-4 Enabling The Auto Delete Feature
By default, the auto-delete feature is not active. If the customer wants to activate the auto-delete feature,
perform the following steps:
1. Click the Tools menu button , then click Medical application preferences
2. From the medAppPrefs window that appears, click the Auto delete button.
3. Click the Auto delete ON radio button, and click the appropriate radio buttons to define your auto
delete profile.
4. Click the Save button.