GE HEALTHCAREDRAFT VOLUSON E8 / VOLUSON E6
D
IRECTION KTD102576, REVISION 7 DRAFT (AUGUST 23, 2012) SERVICE MANUAL
Chapter 10 - Care & Maintenance 10-9
10-5-3 Physical Inspection
10-5-4 Cleaning
10-5-4-1 General Cleaning
Frequent and diligent cleaning of the Voluson E8 / Voluson E6 ultrasound system reduces the risk of
spreading infection from person to person, and also helps to maintain a clean work environment.
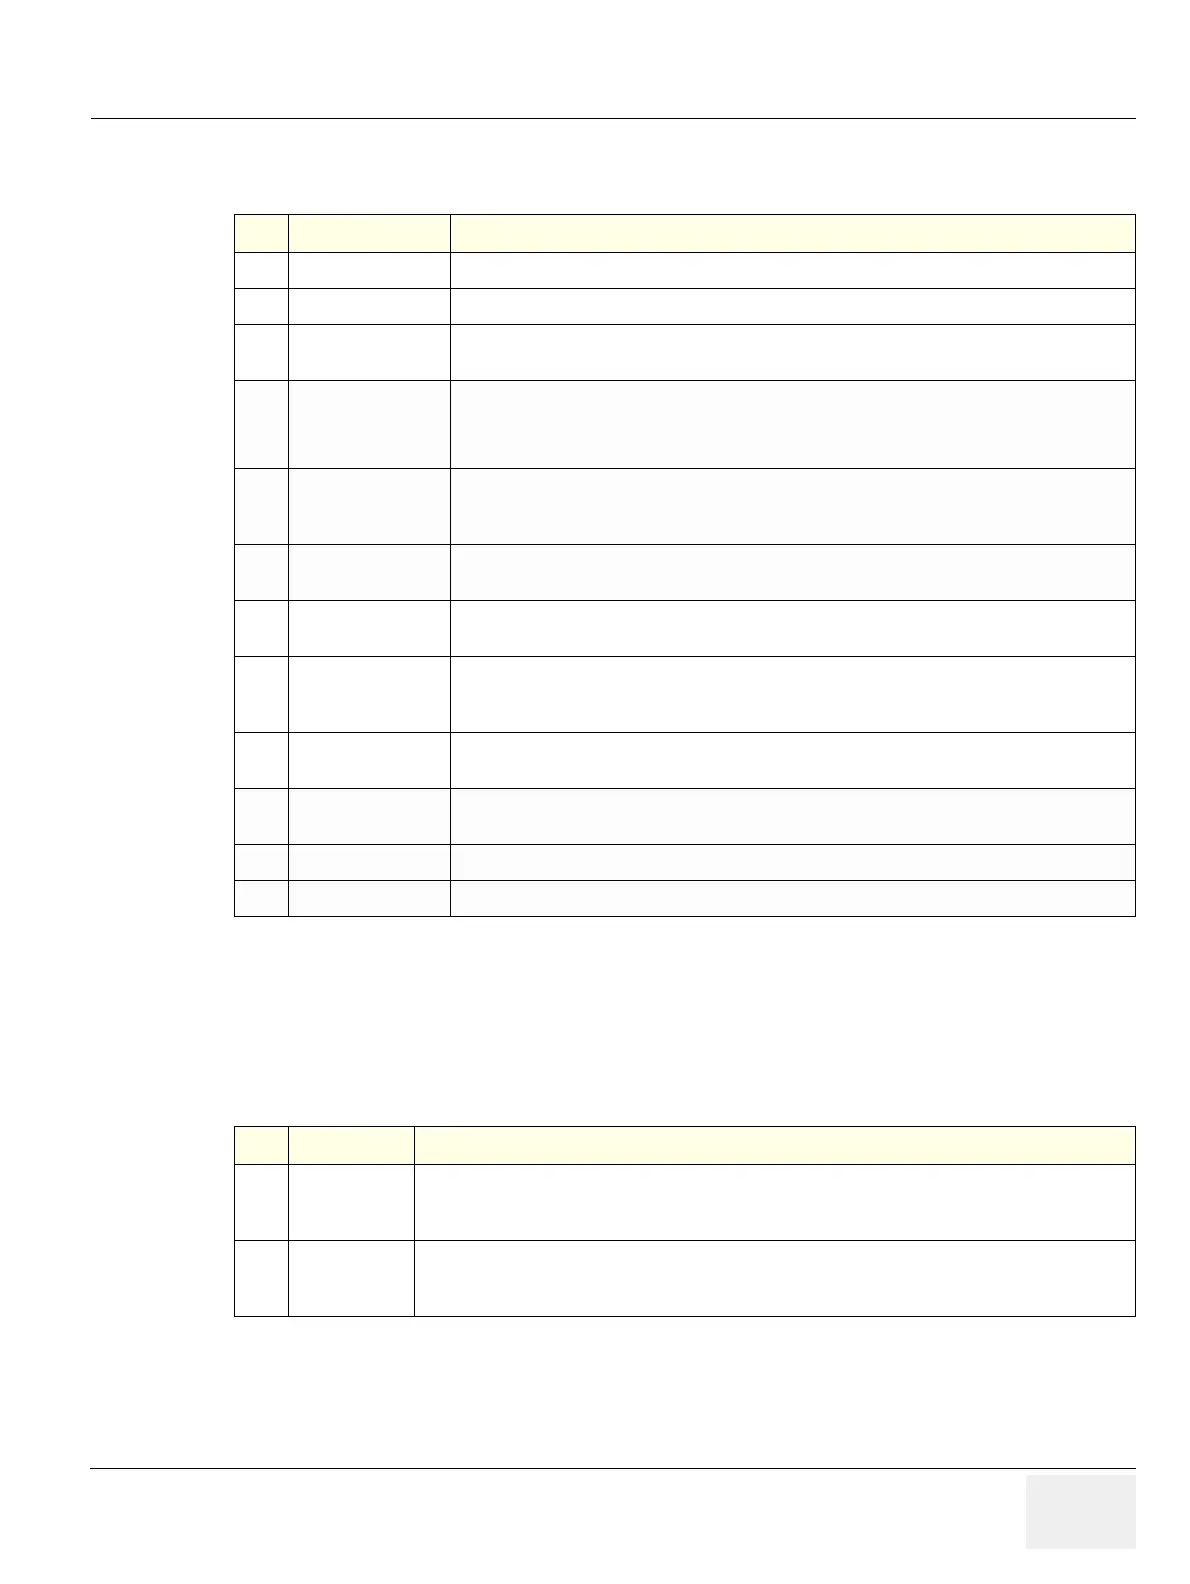
Table 10-7 Physical Checks
Step Item Description
1
Labeling Verify that all system labeling is present and in readable condition.
2
Scratches & Dents Inspect the console for dents, scratches or cracks.
3
LCD Monitor Display
Inspect the LCD Monitor Display for scratches and raster burns.
Verify proper operation of Contrast and Brightness controls.
4
Control Panel and
Keyboard
Inspect the Control Panel and Keyboard. Note any damaged or missing items.
(Replace faulty components, as required).
Verify proper operation of Control Panel backlighting and TGC sliders.
5
DVD+R/RW Drive
Clean the drive head and media with the vendor-supplied cleaning kit.Advise the user to repeat
this often, to prevent future problems. DVDs/CDs must be stored away from dust and cigarette
smoke. Do not use alcohol or benzene to clean the drive
6
Wheels & Brakes
Check all wheels and casters for wear and verify operation of foot brake, to stop the system from
moving, and release mechanism. Check all wheel locks and swivel locks for proper operation.
7
Cables & Connectors
Check all internal cable harnesses and connectors for wear and secure connector seating.
Pay special attention to footswitch assembly and probe strain or bend reliefs.
8
Power Cord
Check the power cord for cuts, loose hardware, tire marks, exposed insulation or other
deterioration, and verify continuity. Tighten the clamps that secure the power cord to the system
and the outlet plug to the cord.
9
Shielding & Covers
Check to ensure that all EMI shielding, internal covers, air flow panels and screws are in place.
Missing covers and hardware could cause EMI/RFI problems during scanning.
10
Peripherals
Check and clean the peripherals according to the manufacturer’s directions.
To prevent EMI or system overheating, dress the peripheral cables inside the peripheral cover.
11
External I/O Check all connectors for damage and verify that the labeling is good.
12
Control Panel Lights Check proper operation of all control panel key illuminations (flash once during system start-up).
Table 10-8 General Cleaning
Step Item Description
1 Console
Use a fluid detergent in warm water on a soft, damp cloth to carefully wipe the entire system.
Be careful not to get the cloth too wet so that moisture does not enter the console.
Caution: DO NOT allow any liquid to drip or seep into the system.
2
LCD Monitor +
Touch Panel
Clean LCD Monitor surface and Touch Panel with a fluid detergent in warm water on a soft, damp cloth.
Caution: DO NOT spray any liquid directly onto the Voluson E8 / Voluson E6 covers, LCD Monitor,
keyboard, etc.