47
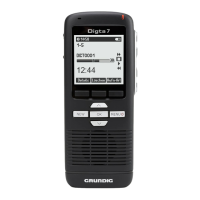
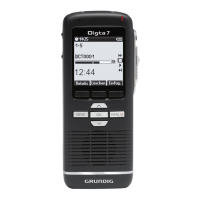
Menu functions
Select one of the following settings: x
»No entry«: no dictation ID is entered for new dictations•
»On request«: • for each new dictation, the user is prompted to
scan a dictation ID. “Scan dictation ID!” appears on the display.
Activate the selected option by pressing “ x OK”.
The marker bullet moves to the highlighted bar.
Confirm the change using “ x Save”.
If you do not wish to save the change, press the “ x Escape” button.
Programming
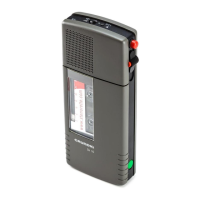
The barcode scanner* must be connected to the dictation machine
(see section “Barcode scanner*/Connect scanner”).
To program the scanner, you need a table of programming codes. Fur-
ther details can be found in the section “Barcode scanner*/Configure
barcode scanner”.
Press “ x MENU”.
Use the up/down buttons to navigate to the “ x Scanner” menu item
and confirm using “OK”.
Select the “ x Programming” subitem using the up/down buttons.
Confirm your selection using “OK”.
Scan in the desired programming code. x
An acoustic signal confirms that the barcode has been successful-
ly scanned.
You can scan in as many successive programming codes as you like. x
If the device cannot read the barcode, “Scan error” appears on the
display.
Confirm the error message using “ x OK” and repeat the scan.
Complete the programming using the “ x Save” button.
If you do not wish to save the change, press “ x Escape”.
5.5 Folder
In the “Folder” menu, you can set the folder in which you want to save
your dictation.
Six folders are available. The folders are labeled A-F by default. You can
use the folders to organize dictations (e.g. to separate business and pri-
vate dictations).
Details regarding folders can be found in the section “Possible configu-
rations with PC software/Folder functions”.
Scanner
Programming codes