75
Communication with the PC
Move to the “ x USB mode” menu item using the up/down buttons.
Confirm by pressing “ x OK” to set up the USB connection.
Details can be found in the section “Menu Functions/Device settings/
USB connecting”.
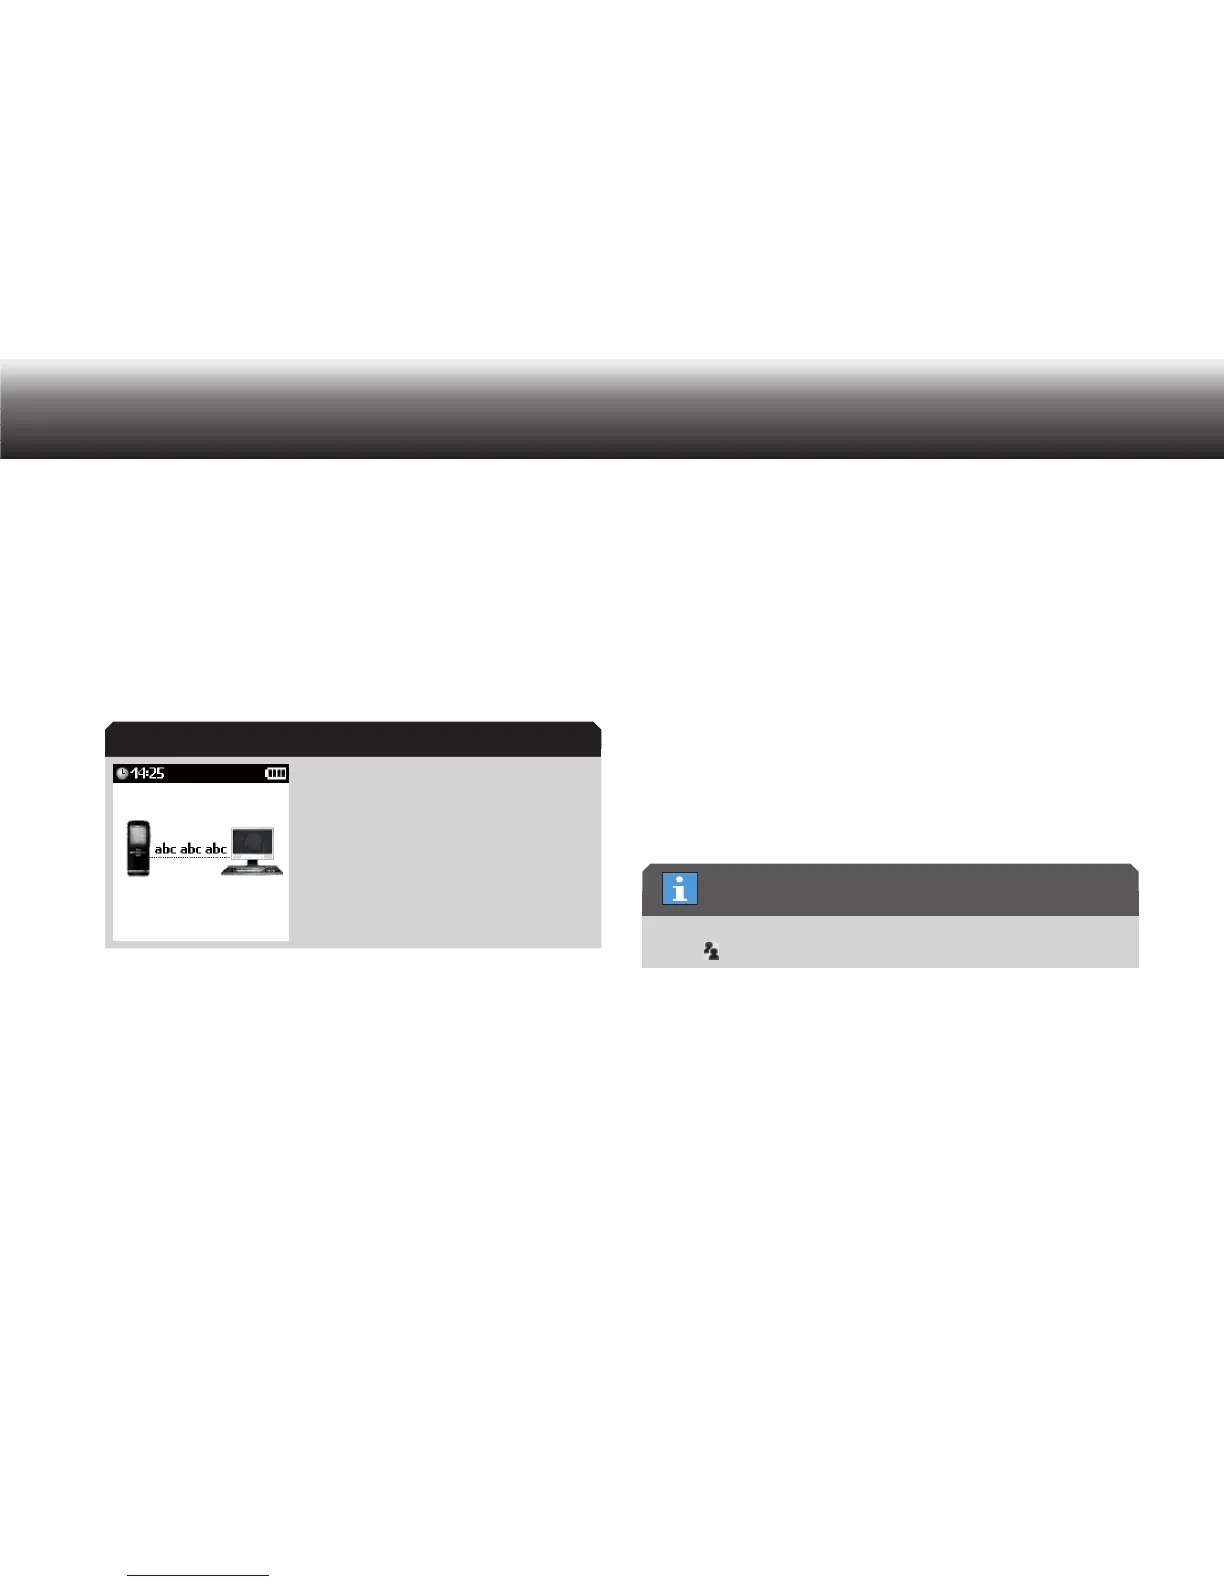
The USB data transfer is indicated by an animation on the display. When
data is being transferred, the group of letters “abc” runs repeatedly in
the direction of transfer until the transfer is complete. The “abc” disap-
pears when no file transfer is taking place.
USB data transfer
PC microphone operation (USB-Audio, USB-HID)
When the dictation machine is connected to a PC with a USB cable,
the device is also registered for USB Audio and USB HID. The dictation
machine can thus be used as the PC microphone, e.g. for direct dicta-
tion into the Grundig PC software or into a speech recognition system.
Switch the dictation machine on by pressing the “ x MENU” button until
the first display appears.
Connect the dictation machine to the PC via the USB interface. x
Press “ x MENU” a second time.
Use the up/down buttons to navigate to the “ x Microphone sensitivi-
ty” menu item and confirm using “OK”.
Select one of the following settings: x
Dictation•
Conference•
Confirm the selection using the “ x Save” button.
The microphone sensitivity for USB Audio is saved.
If you do not wish to save the change, press the “ x Escape” button.
If the microphone sensitivity is set to “Conference”, the conference
symbol is shown in the display during recording.
If a sound program or speech recognition system (e.g. AudioRecorder or
DigtaSoft) is running on your PC in record or play-back mode, the sym-
bols for recording, recording paused and play-back appear on the dis-
play in the PC symbol. The recording LED lights up green and you can
hear the recording from the speaker of the dictation machine.
Data transfer
Conference