Creating the Digital Image 103
The Zoom Control
You can zoom in or out in any one of the settings (except Battery Saver) by depressing the
or buttons. The area you zoom in is shown on the preview image. You can zoom into
any desired area of the image by moving the zoom area to the desired spot with the navigat-
ing control. At the end of the Zoom Out mode, you can view several of the last images taken.
Move the or buttons to the standard setting before moving to the next image. With the
Preview turned on, you can press the Menu button at any time to see or change sensor unit
settings.
The zoom control also allows you to operate like the browse control. Starting with the
single image view, depressing the zoom out control () repeatedly brings you from the single
image view to the four thumbnail view, then the nine thumbnail view, then to the batch list,
and fi nally to the Media list. Move the up/down navigating control to see images from differ-
ent media.
Thumbnails
To see thumbnails, start with the standard preview display. Press the Zoom Out () button
once to see four images (Figure 5-17), twice to see nine (Figure 5-16). The selected image has
a blue border and you can zoom in on this image and use the Storage setting to work with the
image. Use the navigating control to put the blue border on other images. You can get back to
single image view by depressing the button, repeatedly if necessary.
Browse Control
The Browse control on the main menu tells the sensor unit which images you would like to
view. The options are All, Green, Red, Yellow, and Green and Yellow. The thumbnail view then
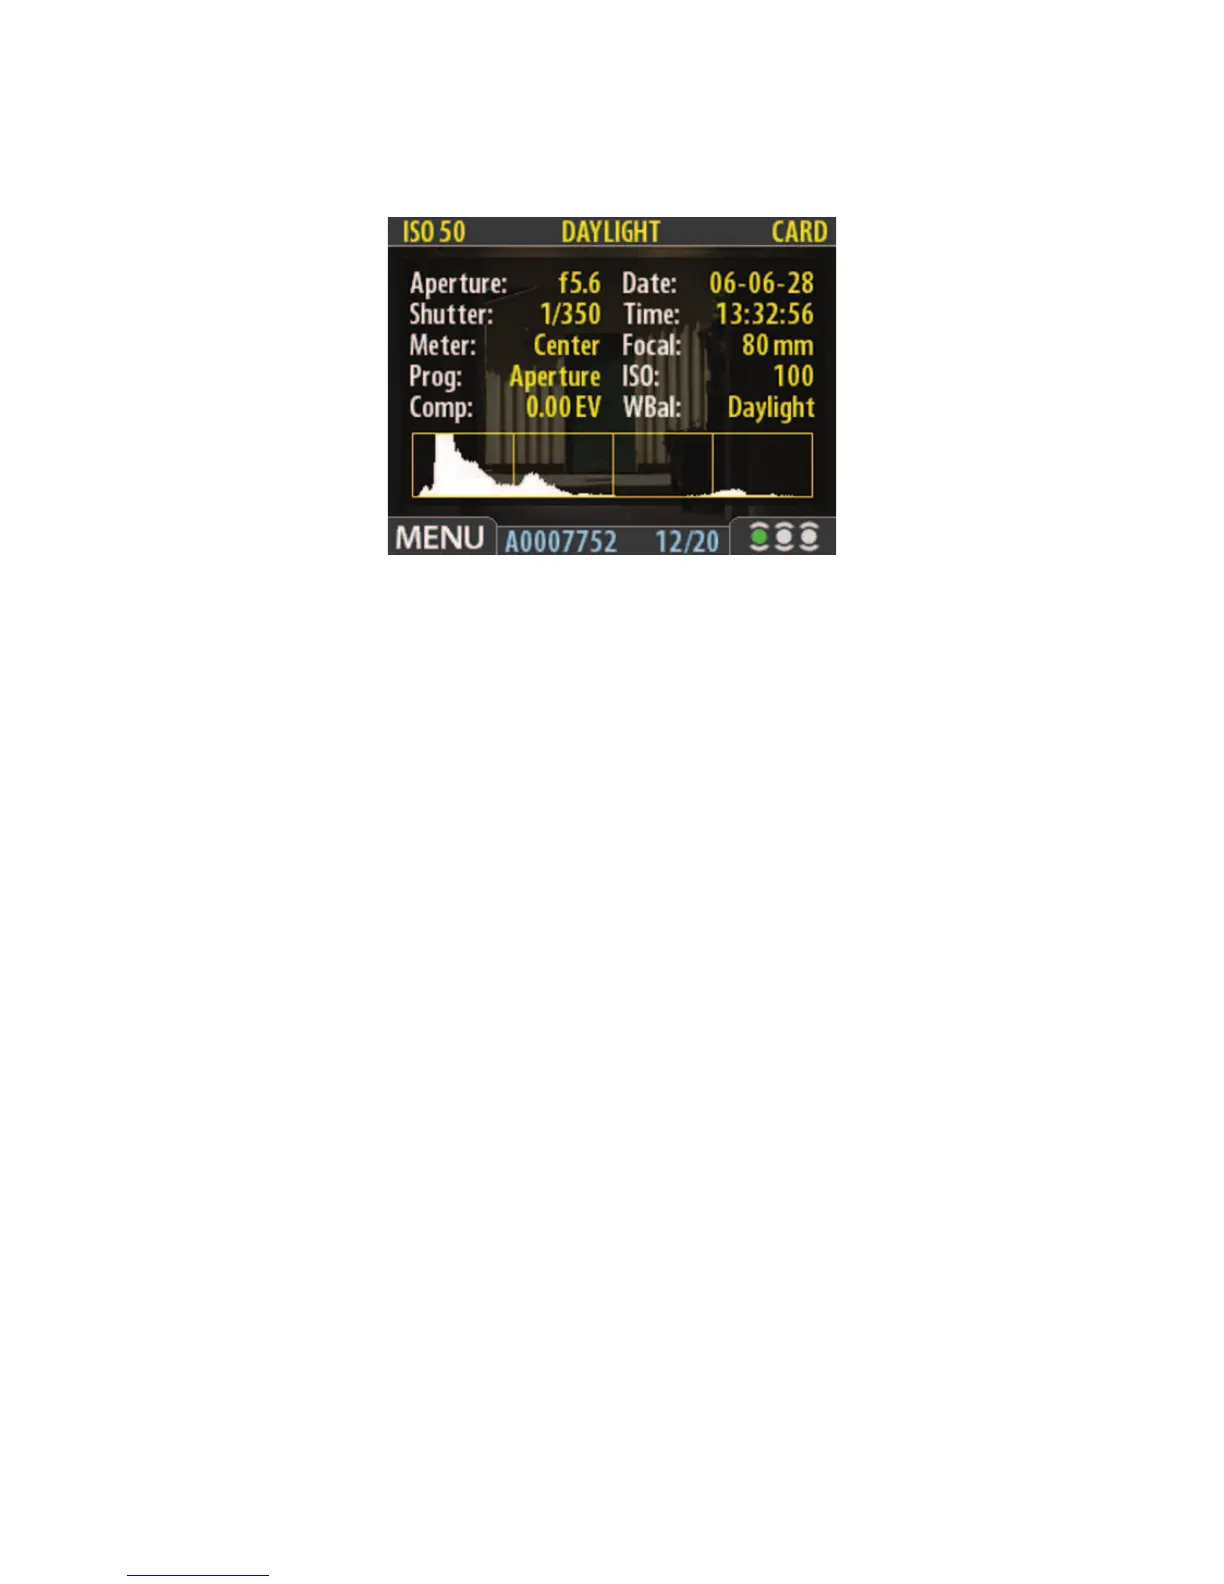
Figure 5-15 Full Details Preview mode. In the Full Details Preview mode the screen image
shows the Histogram, the camera settings, and a darkened preview of the image. The camera
setting details are stored with the image.