54 THE HASSELBLAD MANUAL
When the camera is turned on, the fi lm winds automatically to frame 1, and the cam-
era’s motor drive automatically winds it to subsequent frames. It also automatically winds up
the paper trailer at the end of the roll. If you do not want the fi lm to wind automatically to
frame 1, but when the release is pressed the fi rst time, you can do so with a custom option
described later in this chapter.
To change fi lm, simply remove the fi lm holder from a detached or mounted magazine and
replace the exposed fi lm with a new roll (Figure 4-8). If the fi lm is not wound to frame 1 or
for some reason an ERROR warning appears on the display and in the viewfi nder, the camera
cannot be released. To ensure proper fi lm operation, I can make four suggestions:
1
2
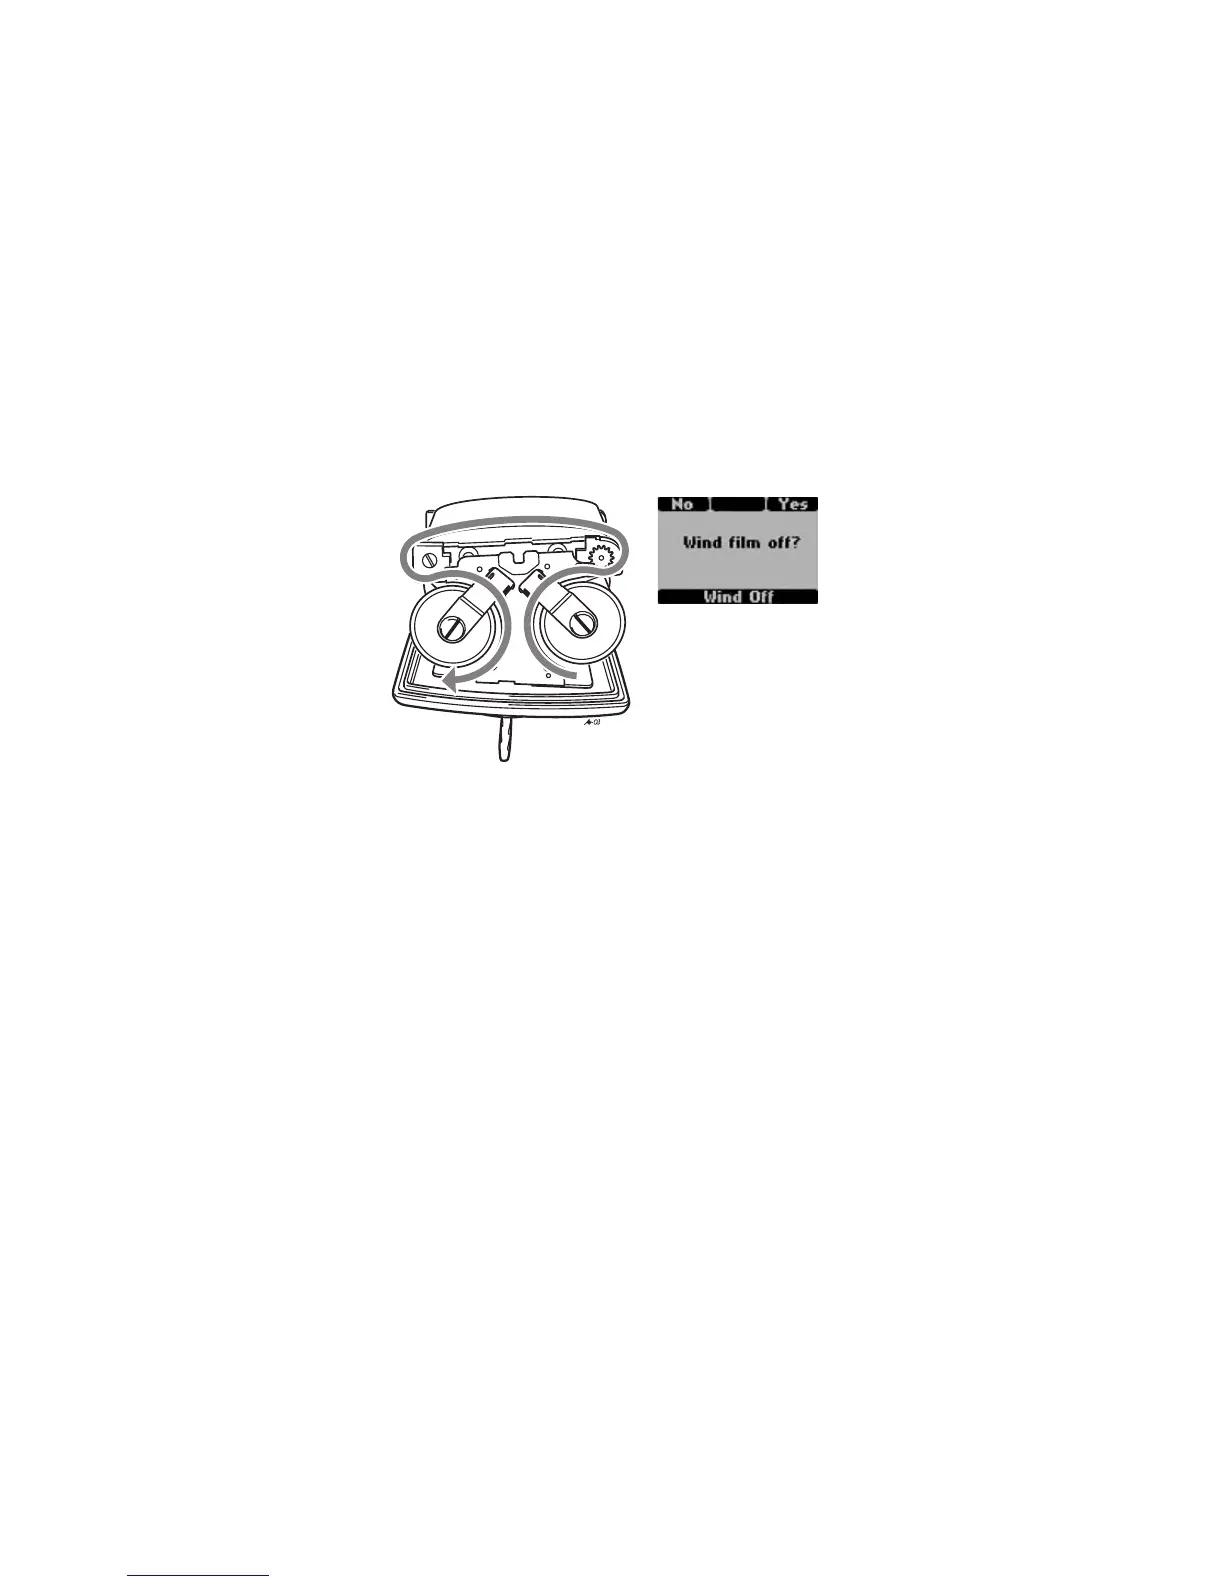
Figure 4-8 (1) Proper fi lm path from feed reel on the right to the take-up reel on the left.
(2) A partially exposed roll of fi lm can be rewound and removed only after you confi rm the
message on the grip LCD panel.
1. Always insert the fi lm holder by pressing it in the center toward the magazine shell (not on the
left or right side) to assure that it is locked on both sides.
2. After you insert the loaded fi lm holder and the camera is turned on, make certain that you hear
the sound of the fi lm wind for about two seconds.
3. Always check that the display on the camera, in the viewfi nder, or on the magazine shows the
number 1 (or the last frame number when set to REMAIN).
4. You can program the camera so that it operates only with fi lm properly loaded. You do this with
the magazine exposure lock as described under the custom options in Figure 4-24.
Imprinting the Film
The H camera allows you to imprint the dark area along each image with data such as the
date and time when the image was made, the aperture and shutter speed, the metering mode,
the photographer’s name and copyright symbol, and other helpful data. To make certain that
the imprint appears on the fi lm, you must program the fi lm magazine accordingly:
1. Unlock the setting lock lever (item 9, Figure 4-1).
2. Press the function selector repeatedly until DATA appears (see FIgure 4-7).
3. Press either the Up or the Down control until ON or OFF appears, and set to ON if you want to
imprint data.
4. Place the locking lever into the locked position.